Hot Water Heater Leaking? Do This Now to Stop the Flood.
Your water heater just burst or is spraying water. You need to move fast to save your house from major damage.
This article gives you the direct steps to take control. We will cover finding and using the emergency shut-off valve, cutting all power sources, safely draining the tank, and what to check before you call for help.
I’ve been on hundreds of these emergency calls and handled my own heater swap. Shut off the water and power first-everything else can wait.
First 60 Seconds: Your Immediate Action Plan for a Leak
Don’t panic. Your first job is to stop the water and power. Everything else can wait.
Follow this three step sequence exactly to take control of the situation. Speed matters, but acting in the right order prevents a bad problem from becoming dangerous. Here is what to do the moment you see water.
- Shut off the water. This is your absolute priority. Water is the source of the damage and the immediate threat.
- Cut the power or gas. A leaking heater near electricity or an open gas flame is a serious safety hazard. You must disable it.
- Contain the mess. Only after steps one and two are complete do you grab towels or a wet/dry vac to limit water damage.
This directly answers the common question, “What are the immediate steps to take when you discover a leaking or burst hot water heater?” The goal is to make the situation safe and stable before you even think about diagnosing the cause.
How Do You Turn Off the Water Supply to Stop the Leak?
Knowing how do you stop a hot water tank from leaking starts at the dedicated shut-off valve. This is the fastest way to isolate the problem.
Look for a valve on the large cold water pipe connected to the top of your heater. It’s usually a 3/4-inch pipe. There are two common valve types.
- A lever handle valve is simple. When the handle is in line with the pipe, water flows. Turn it a quarter turn (90 degrees) so the handle is perpendicular to the pipe. This is “off.”
- A wheel handle (or gate valve) turns clockwise to close. Turn it firmly until it stops. Do not force it if it’s very stiff.
This valve location answers “Where is the emergency shut-off valve for the water heater located?” It’s your first stop. For code-compliant placement, the shut-off must be easily reachable and clearly labeled. The next steps will reference the relevant water heater shut-off valve codes.
If you cannot find this valve, it’s missing, or it won’t turn, you must use the backup plan. Find your home’s main water shut-off valve. This is often in the basement, crawlspace, or garage where the main water line enters the house. Turn it off. This stops all water to the house, which answers “How do you turn off the water supply to the leaking water heater?” when the dedicated valve fails.
In my own basement, I have a lever valve on my heater. I also keep the path to my main house valve completely clear. You don’t want to be moving boxes while water is spraying.
Cutting Power: How to Safely Disable Electric and Gas Heaters

Water and electricity or gas do not mix. Your first job is to kill the heat source. This stops the unit from trying to work while it’s failing and removes a major safety hazard. Do this before you even think about touching the water supply valves.
For Electric Water Heaters
An electric water heater runs on 240-volt power. You need to shut it off at the source.
- Go directly to your home’s main electrical service panel (the breaker box).
- Find the specific double-pole breaker for the water heater. It’s usually a single switch that’s twice the width of a standard breaker, labeled “Water Heater” or “HWT.” If it’s not labeled, it’s often a 30-amp or 40-amp breaker positioned by itself.
- Firmly flip this breaker to the full OFF position.
If the floor, the panel, or your hands are wet, do not touch the breaker box. Call an electrician immediately. I keep a dry pair of work gloves and shoes near my basement panel for exactly this kind of emergency. It’s a simple prep step that can prevent a disaster.
This directly answers the common question: How do you turn off the power or gas supply to the water heater for safety? For electric models, you locate and shut off its dedicated double-pole circuit breaker at the main panel. If you’re leaving on vacation, turning off the water heater can save energy and prevent leaks. The next steps will include a quick vacation shutdown checklist with an implicit link to the full procedure.
For Gas Water Heater
A gas heater has two points of control: the gas supply and the unit’s own valve. You need to handle both.
- First, find the flexible yellow corrugated copper gas supply line connected to the heater. On it, you’ll see a simple shut-off valve with a handle.
- Turn this handle so it is perpendicular (forming a 90-degree angle) to the gas pipe. This is the universal “off” position for gas valves.
- Next, locate the gas control valve on the unit itself, near the bottom. It will have settings like “On,” “Pilot,” and “Off.” Turn the knob to the “Pilot” position first to extinguish the main burner, then continue turning it to “Off.”
Turning the gas supply valve off at the unit is your primary, non-negotiable safety step. Turning the control knob to “Off” is a good secondary measure to ensure the system is fully deactivated. If you smell gas strongly at any point, evacuate the area and call your gas company from outside.
Draining the Tank and Relieving Pressure Safely
With the power and water off, your next job is to empty the tank. A full 50-gallon water heater weighs over 400 pounds. Draining it makes the unit far lighter and safer to move for inspection, repair, or replacement.
This process also relieves internal pressure and stops any active leak from having a water supply. You’ll need a standard garden hose. The drain valve is a standard hose thread, typically found near the bottom of the tank.
Step-by-Step Draining Procedure
- Connect one end of a garden hose to the tank’s drain valve. Hand-tighten it firmly.
- Run the other end of the hose to a safe discharge point. This can be a floor drain, a large bucket (which you’ll need to empty repeatedly), or outside, well away from your home’s foundation.
- Go to a sink or tub in your home and open the hot water faucet all the way. This breaks the vacuum in the pipes and allows the tank to drain completely.
- Return to the water heater. Slowly open the drain valve (usually a standard spigot handle or a slot for a screwdriver).
Warning: The water that comes out first will be extremely hot, around 120°F or more. Wear work gloves and avoid letting the hose kick around. Let it flow until the tank is empty and the hose stops dripping.
Using the Temperature & Pressure (T&P) Relief Valve
On the side or top of your tank is a valve with a small lever. This is the T&P safety valve. If you need to relieve pressure quickly before or during draining, you can lift this lever carefully. Water and steam may blast out, so have a bucket ready. Operating the T&P valve can help vent pressure, but the main drain valve is what empties the tank.
What should you do to drain the water heater and relieve pressure after shutting it off?
You follow the draining procedure above. Connect a hose from the drain valve to a floor drain or outside. Open a hot water faucet inside the house to break the vacuum. Then, open the drain valve completely. The act of draining relieves the water pressure. For an extra pressure release, you can carefully lift the lever on the T&P valve on the tank’s side.
The DIY vs. Pro Verdict: Can You Fix This Yourself?
This is the moment of truth. You’ve shut off the water and power. Now you need to figure out what you’re dealing with and if you can handle it.
Difficulty Rating
Let’s break this down into two separate tasks:
- Shutting Off the Water and Power: 2/10. This is basic homeowner emergency action. If you can locate two valves and a breaker, you can do this.
- Diagnosing and Repairing the Leak Source: 8/10. This requires plumbing knowledge, proper tools (pipe wrenches, thread sealant, voltage tester), and comfort working with water and electrical/gas systems. A small mistake can cause a new leak or create a safety hazard.
The “Red Flag” Troubleshooting Guide
Look for these signs. If you see any of them, your repair job is over. It’s time for a new water heater.
- Water Actively Leaking from the Tank Itself. This is the most critical red flag. If you see water seeping or streaming from the middle of the steel tank, the internal liner has failed. The tank is corroded through.
- A Large, Flaky Rust Hole on the Tank Body. Surface rust on a pipe is one thing. A hole you can see into, often surrounded by wet, crumbly metal, means the structural integrity of the tank is gone.
- Water Pouring or Spraying Continuously from the T&P Valve Drain Pipe. A small, occasional drip from this pipe is normal. If it’s a constant stream even after you’ve cooled the tank down, the temperature and pressure relief valve has likely failed and the tank itself may be unsafe.
- A Leak from the Bottom of the Tank That Soaks the Entire Base. If the leak source is completely hidden under the unit and a large area is soaked, it’s almost certainly a tank failure at the bottom. Don’t bother moving it to check.
When NOT to Try This
If the leak is coming from the main tank body, stop. This is a replacement job, not a repair. No epoxy, no sealant, no wrap will fix this for more than a few hours. You are dealing with a pressurized vessel that holds scalding hot water; a failed patch can lead to a sudden and catastrophic rupture. I’ve been to service calls where a homeowner tried to “fix” a tank leak with plumbing putty. It always ends with a flooded basement and a full-price emergency install.
A Note on Leak Detectors
Some people search for “how to disable leak detector on water heater.” Here’s the straight answer: don’t. That sensor is there for a reason. It’s a safety device designed to shut off the water or power if it detects moisture, preventing a minor leak from becoming a major flood. Disabling it is dangerous, voids your unit’s warranty, and is against plumbing code. The fix isn’t to silence the alarm; the fix is to find and solve the actual leak that triggered it. If your leak detector is going off, follow the steps above to find the source. If it’s a false alarm from a wet floor, dry the area and the sensor will reset.
What Causes a Water Heater to Leak or Burst? (The Water Science)
Think of your water heater tank like a steel kettle you’re constantly boiling water in. Now, imagine your water is full of dissolved minerals like calcium and magnesium. Every time you heat that water, some of those minerals solidify and fall out of suspension, just like limescale in a kettle.
This is sediment. In areas with hard water or high Total Dissolved Solids (TDS), this happens fast. This gritty sludge settles to the very bottom of the tank, right on top of the burner flames or heating elements. That layer of sediment acts like an insulating blanket, forcing the steel underneath it to overheat, weaken, and eventually corrode straight through. The leak almost always starts at the bottom of the tank for this exact reason.
The Pressure Problem
Your home’s water pressure is the other silent killer. The standard maximum safe pressure for your entire plumbing system, including the water heater, is 80 pounds per square inch (PSI).
Many homes, especially those without a pressure reducing valve (PRV), run much higher. I’ve seen homes with steady pressure at 100 PSI or more. Constant high pressure puts immense stress on every weld, fitting, and the tank shell itself, dramatically speeding up the failure of any weak point created by corrosion. It’s like constantly over-inflating a tire; it might hold for a while, but it will fail sooner and more catastrophically.
The Simple List of Common Culprits
While sediment and pressure are the main villains, they team up with a few usual suspects. Here’s what you’re likely dealing with:
- Sediment Corrosion: As explained above. This is the number one cause of tank failure. An annual drain and flush can prevent it.
- Failed Anode Rod: This is the “sacrificial” rod inside your tank designed to corrode instead of your steel tank. Once it’s completely eaten away, the tank lining is next. If you’ve never changed it, it’s probably gone.
- Loose Inlet/Outlet Connections: The cold water inlet and hot water outlet pipes at the top of the heater can slowly loosen from thermal expansion and contraction. A leak here is often a simple fix.
- A Stuck Temperature & Pressure (T&P) Relief Valve: This safety valve is supposed to open if temperature or pressure gets dangerously high. If it’s old or clogged with sediment, it can stick open and leak, or worse, fail to open when needed.
- Simple Old Age: Most standard tank heaters have a life expectancy of 8-12 years. The internal glass lining eventually cracks, and corrosion takes over. If yours is in this range and leaking from the tank, it’s simply done.
Tools & Materials You Might Need for Assessment and Repair

Tools & Material Checklist
Before you get started, gather these items. You might not need them all, but they cover most checks and minor fixes.
- A Garden Hose: This is for draining the tank. It needs to be long enough to reach from your heater’s drain valve to a floor drain, a sump pit, or outside.
- Adjustable Wrenches (Two): You need two-one to hold the water line nut steady, the other to turn the fitting. Using one wrench alone can twist and damage your pipes.
- Screwdrivers (Flathead and Phillips): For removing access panels on electric heaters or the outer jacket on gas units to inspect components.
- A 5-Gallon Bucket: For catching water from pressure relief valve lines or small drips while you work.
- Teflon Tape or Pipe Thread Sealant: For resealing threaded connections on drain valves, relief valves, or inlet/outlet nipples if you disassemble them.
- A Non-Contact Voltage Tester or Multimeter (for Electric Heaters): Always confirm power is off at the breaker before touching any electrical components. A tester adds a crucial safety check.
- A Flashlight or Work Light: Water heater closets and basements are often poorly lit. You need to see exactly where the water is coming from.
- Old Towels or Rags: For mopping up water to prevent slips and to keep your work area dry.
Here’s the reality. If the leak is coming from a seam on the steel tank itself or from a massive rust hole, you are not fixing it. The internal tank is under constant pressure and corrodes from the inside out. A tank leak means the heater has failed. In that case, the only “material” on your shopping list is a new water heater.
Understanding Your Pipe Connections
Your water heater connects to your home’s plumbing. Knowing what you’re looking at helps you assess the leak source and understand what you might need to disconnect. You’ll typically see one of three materials.
Copper pipes use soldered fittings. They’re durable but require a torch and skill to work with. The connections at the heater are often made with flexible copper connectors or dielectric unions (a special fitting that prevents corrosion where copper meets the steel tank nipple).
CPVC (cream-colored plastic pipe) uses solvent-welded (glued) fittings. It’s brittle. Don’t force it. Connections at the heater are usually made with threaded male adapters screwed into the tank nipples, sealed with Teflon tape.
PEX (flexible plastic tubing, often red for hot, blue for cold) is common in newer homes. It uses crimp or push-to-connect fittings. Look for a shut-off valve installed on the PEX lines close to the heater; it makes your emergency shutdown much faster.
In almost all cases, the water heater has 3/4″ threaded nipples for the hot and cold connections. Your house piping connects to these using fittings specific to your pipe material. If you need to fully disconnect the heater, you’ll be working on these two connections and the drain valve.
Your Maintenance Roadmap to Prevent the Next Leak
Once you’ve handled the emergency, your job is to stop it from happening again. A water heater is a simple appliance, but it demands basic care. Ignore it, and it will fail. Follow this simple schedule, and you’ll get every possible year out of it.
System Maintenance Roadmap
Treat your water heater like your car. It needs regular service. I do this for my own unit every year, and it takes less than an hour. Vacation homes can sit idle for long periods, so vacation homes water heater maintenance is crucial. It helps ensure hot water is ready when you return.
Here is your annual maintenance checklist to prevent leaks and extend your heater’s life.
- Flush the Tank (Every 12 Months): Sediment is your heater’s worst enemy. Minerals in your water settle at the bottom of the tank. This sludge makes the heater work harder, reduces efficiency, and can corrode the tank from the inside. To flush it, hook a garden hose to the drain valve at the base, run it to a floor drain or outside, and open the valve for a few minutes until the water runs clear.
- Check the T&P Valve (Every 12 Months): The Temperature and Pressure Relief valve is your last line of defense against an explosion. Lift the valve’s test lever for a few seconds. You should hear a rush of air or see water discharge from the overflow pipe. If nothing happens, the valve is bad and must be replaced immediately.
- Inspect the Anode Rod (Every 3-5 Years): This is the most important part you never see. The sacrificial anode rod attracts corrosive elements in the water to protect the steel tank. Once it’s eaten up, the tank starts to rust. Use a 1-1/16″ socket and a long breaker bar to unscrew it from the top of the heater. If it’s less than 1/2″ thick or coated in calcium, replace it. A new rod can buy you many more years.
Code & Compliance Check
If your heater is beyond repair and needs replacement, you must follow the rules. A proper installation isn’t just about hooking up pipes; it’s a permitted job that must meet local plumbing code (IPC or UPC). Doing it wrong can void warranties, fail inspections, and create new safety hazards.
Any new installation will require two key safety components by code. First, a metal or PVC drain pan under the heater, piped to a drain. This catches slow leaks. Second, the T&P valve discharge line must be made of approved material (like CPVC), be the same size as the valve outlet, and terminate within 6-18 inches of the floor. It cannot be threaded or have a cap on the end.
Always check with your local building department for a permit. This ensures the work is inspected and safe.
Recommended Products
When shopping for a replacement, focus on the right category, not just a brand name. For most homes, a standard 40 or 50-gallon tall electric water heater is the direct swap. If you have a gas unit, match the BTU rating and vent type.
Your shopping list should include the heater, a standard drain pan sized for the unit, and a thermal expansion tank if your home has a check valve or pressure reducing valve on the main water line. The expansion tank is often required by code in closed systems to handle the increased pressure from heating water.
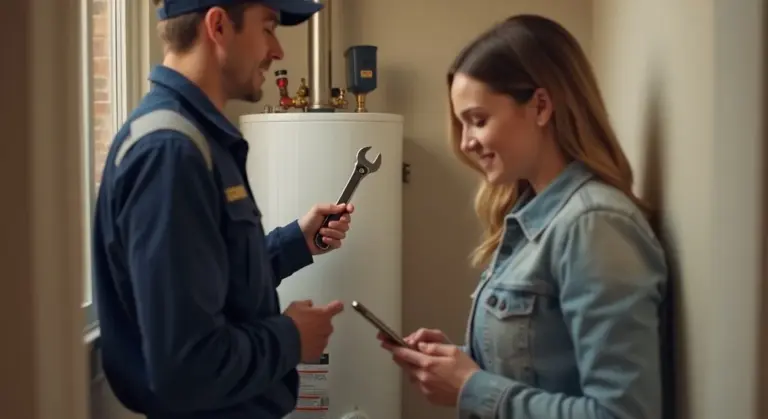
Who should you contact for professional repair or replacement?
Replacing a water heater involves plumbing, electrical or gas work, and code compliance. This is not a casual DIY project. You need to hire a licensed, insured plumber for the job. They will pull the permit, ensure the installation meets all safety codes, and handle any surprises like corroded fittings or undersized wiring. A professional install protects your home and is your final, best step in preventing the next leak.
What Helped Me: A Pro Tip from a Flooded Basement
I came home from a service call years ago to a sound no one wants to hear. A hissing, sputtering spray was coming from my own basement. My old water heater had finally given up, and a small split in a fitting was sending water across the floor. My heart sank. But my hand knew exactly what to do.
I sprinted to the main shut-off valve and cranked it closed. The whole house went silent. That moment, from panic to solution, took 12 seconds. Knowing precisely where your main water shut-off is located is the single most important piece of preparedness for any plumbing emergency. Don’t wait for the crisis to go looking for it with a flashlight.
Your One-Minute Prep Task
Right now, go find your water heater. On its side, you’ll see a metal tag or sticker. That’s the data plate. Use your phone and take a clear picture of it. Then, compare it with the parts on your water heater to identify the components.
Having a photo of your water heater’s data plate gives you the model and serial number instantly, which any plumber or parts desk needs to get you the correct replacement parts or give accurate advice. When you’re stressed, wet, and on the phone, you won’t want to be squinting at faded print in a dark corner.
You’ve stopped the emergency. Now take a breath and make a plan. The water is off. The immediate danger is over. Your next steps are diagnosis and repair, which you can tackle clearly now that the panic has passed.
Quick Answers
1. I’ve shut off the water and power. What’s the very next thing I should do?
Your next priority is to drain the tank to make it safe and light. Connect a garden hose to the drain valve and run it to a floor drain or outside. Then, open the drain valve completely.
2. What if I can’t find or turn the dedicated shut-off valve on the heater?
Don’t waste time. Immediately go to your home’s main water shut-off valve and turn it off. This stops all water flow to the house and is your reliable backup plan in any plumbing emergency.
3. How can I be absolutely sure the power to an electric heater is off?
Go to your main breaker panel and locate the double-pole breaker for the heater. Confirm it’s switched fully to OFF. For ultimate safety, use a non-contact voltage tester on the wires at the heater’s access panel before touching anything.
4. What safety precautions are most critical to avoid shock or more damage?
Never stand in water when operating an electrical panel. For gas heaters, if you smell gas, evacuate and call the utility company from outside. Always wear dry, rubber-soled shoes and gloves when working in the wet area.
5. When is it time to stop assessing and just call a professional?
Call a licensed plumber immediately if the leak is from the tank itself (a rust hole or seam) or if you see any of the “red flag” failures for water heaters. This is a job for a pro who can safely handle replacement, permits, and code-compliant installation.
Take Control in an Emergency
Shut off the water and power to your heater the moment you notice a leak. This simple action prevents massive water damage and keeps your family safe from electrical risks. Follow these water heater safety guidelines for more precautions.
Bob is a an HVAC and plumbing industry veteran. He has professionally helped homeowners resolve issues around water softeners, heaters and all things related to water systems and plumbing around their homes. His trusted advice has helped countless of his clients save time, money and effort in home water systems maintenance and he now here to help you and give you first hand actionable advice. In his spare time, Bob also reviews home water systems such as tankless heaters, water softeners etc and helps home owners make the best choice for their dwelling. He lives around the Detroit area and occasionally consults on residential and commercial projects. Feel free to reach out to him via the contact us form.