How to Replace a Gas Water Heater: A No-Nonsense DIY Guide
Your gas water heater just failed, and now you have no hot water. This guide gets you from a cold panic to a working heater with clear, safe steps.
We will cover shutting off the gas and water, draining and removing the old tank, installing the new unit, checking for dangerous leaks, and keeping it running smoothly.
I’ve handled hundreds of these replacements on job sites and in my own home. Here is your first takeaway: if you smell gas at any point, stop immediately and call the utility company-this is not a DIY moment.
Is This a DIY Job or a Pro Call?
This job gets a 7.5 out of 10 on the difficulty scale. You are mixing pressurized water lines with combustible gas. A mistake with either one can ruin your day. A mistake with both can ruin your house.
The clear line is at the gas connection, the vent pipe, and the paperwork. If your new heater needs a different vent size or route, that’s a pro. Disconnecting the old gas line and making the final connection to the new heater is a pro job in most areas. Pulling the required permit is your responsibility, and the inspector will scrutinize the gas and vent work.
To consider this a DIY task, you need three specific skills:
- Basic plumbing competence with either sweat-soldering copper or crimping PEX.
- The patience to follow the manufacturer’s instructions and local code to the letter, not to “what looks about right.”
- The strength and a helper to safely move a unit that can weigh over 300 pounds when full.
Here’s the plumber’s secret you should know. Most companies charge a flat rate to replace a standard gas water heater. The price covers their labor, liability, and knowing it’s done right. The cost of a single mistake-a small gas leak, a faulty vent, a flooded basement-can easily exceed that flat rate fee. That’s why safety and efficiency matter as much as price when choosing and installing a gas water heater. A properly installed unit with correct venting reduces risk and energy waste, protecting your home and wallet.
What You Need Before You Touch a Wrench
Gather everything first. A trip to the hardware store with the water off and the heater disconnected is a bad way to spend an afternoon.
Tool Checklist
- Two 14-inch or larger pipe wrenches (one to hold, one to turn)
- Tubing cutter for copper or PEX cutter
- Gas leak detector solution (soapy water in a spray bottle works)
- 4-foot level
- Garden hose long enough to reach a drain or outside
- Adjustable wrenches
- Pipe thread sealant rated for gas (yellow tape or paste)
- Hacksaw (for cutting old pipe if needed)
- Wire brush (for cleaning pipe threads)
- Voltage tester (to confirm power is off if it has an electric igniter)
- Work gloves and safety glasses
Part Checklist
- New flexible water connectors (braided stainless steel is reliable)
- Dielectric unions (if not included with heater) to prevent corrosion
- New flexible gas connector (often a corrugated yellow brass line)
- T&P valve discharge pipe extension (if needed to direct hot water safely to within 6 inches of the floor)
- Sediment trap (drip leg) for the gas line, if your old one isn’t reusable
- Vent pipe adapters or sections, if the new heater’s flue outlet is a different size
The Permit and Code Reality
You likely need a permit. Call your local building department. The inspector isn’t there to hassle you; they are checking for silent killers: improper venting and gas leaks. They will ensure the vent pipe has the correct rise, proper clearance to combustibles, and is securely connected. They will pressure-test the gas line. Failing inspection means redoing work, so doing it right the first time is the only real path.
How It Works: The 30-Second Version
Knowing the basics shows you why each step is critical. Cold water enters the tank. A gas burner underneath heats it. The hot water rises to the top where it exits to your faucets. The dangerous exhaust from the burner gets carried safely outside through the center flue pipe. The T&P valve is a critical safety release if temperature or pressure gets too high. Every part you connect-water, gas, or vent-serves one of these simple, vital functions.
The Safe Shutdown: Prepping the Old Heater

Step-by-Step Guide to Turning Off the Gas Supply
Find the gas supply line. It’s a black or yellow flexible pipe running to the control valve at the bottom of the heater. Right where it connects, you’ll see a valve. A standard gas valve has a handle that you turn a quarter of the way (90 degrees) to shut off. When the handle is parallel to the pipe, gas is on. Turn it so it’s perpendicular to the pipe, and the gas is off.
If you see a valve without a handle, or only a pipe with no valve at all, stop immediately and call your utility company. This is not a DIY situation. They will need to cap the line properly. Never try to work on a gas line that isn’t fitted with a proper shutoff valve.
How to Drain the Old Water Heater Completely
First, turn off the cold water supply valve at the top of the heater. Now, go to a faucet in your house, like the kitchen sink, and turn the hot water side on. This relieves pressure and prevents a vacuum from forming inside the tank, which can slow or stop the draining process completely.
Next, connect a standard garden hose to the drain valve at the bottom of the heater. Run the other end to a floor drain, a sump pit, or outside. Open the drain valve slowly. Be ready, the first water coming out will be very hot. Let it drain until the tank is empty. If the flow slows to a trickle, briefly open the cold water supply valve to flush out sediment and restart the flow, then shut it off again.
How to Disconnect the Old Water Heater from Gas and Water Lines
With the gas off and tank drained, you can disconnect. Start with the water lines. Use two wrenches, one to hold the fitting on the heater, the other to turn the coupling nut on the flexible line. Do this for both the hot and cold connections. Have a bucket handy for the last bit of water that will drip out.
For the gas line, use a wrench to loosen the flare nut connecting the flexible pipe to the control valve. A small amount of gas may hiss out from the short section of pipe between the shutoff and the heater. This is normal. Before you move the old heater, give it a firm shove or brace it with a piece of wood so it cannot tip over when the gas line is disconnected. A full tank is stable, but an empty one is top-heavy and can fall easily.
How to Remove the Old Water Heater from Its Location
Your tank is disconnected but still holds about a gallon of water in the very bottom. Tilt the tank slowly toward the drain valve side to pour this last bit into your bucket. Most 50-gallon tanks weigh about 120 pounds empty. You need a helper and an appliance dolly. Strap the tank to the dolly securely. Tilt it back and roll it carefully to your exit path. Protect your floors and doorways with moving blankets or cardboard.
Clear the area where the new heater will go. Sweep up any sediment or debris. This is a good time to check the floor for level and make sure the new heater will have the required clearances listed in its manual.
Setting the Stage for the New Heater
With the old unit out of the way, it’s time to get your new gas water heater ready for its long service life. This is where a little prep work goes a long way toward preventing leaks and maximizing efficiency.
How to prepare the new water heater: Installing the new T&P valve, checking the anode rod, attaching new nipples.
Open the box and lay out all the parts. Your first job is to install the Temperature and Pressure (T&P) relief valve. This safety device is non-negotiable, and you must use the new one that came with the heater. Find the threaded opening on the top or side of the tank. Wrap the valve’s threads with pipe tape (I use the pink gas-rated tape for a better seal) and screw it in hand-tight. Give it another half turn with a wrench. Do not over tighten, or you risk cracking the tank’s fitting.
Next, locate the anode rod port, usually on the top of the tank next to the hot water outlet. Use a 1-1/16″ socket and a long breaker bar to unscrew the plug. Pull the rod out and inspect it. If it’s less than 50% consumed, you can put it back. If it’s heavily corroded or mostly gone, install a new one. This magnesium or aluminum rod sacrifices itself to protect your tank from rust. A quick check now can add years to your heater’s life.
Finally, screw in the new water heater nipples (often called dielectric nipples) to the hot and cold ports on top of the tank. These special nipples have a plastic liner that prevents galvanic corrosion between your copper pipes and the steel tank. Wrap their threads with pipe tape and tighten them securely. Your new heater is now prepped and ready to be moved into position.
The correct way to position and level the new water heater. Why being off-level causes premature tank failure.
Slide the new tank into its final spot. It must be level from front to back and side to side. Grab a small torpedo level and check it. If it’s not level, use non combustible shims (metal or composite shims work great) under the base to make it perfect.
A water heater that is not perfectly level will create a low spot where sediment will permanently collect. This sediment pocket gets super heated, hardens into a rock like substance, and creates a hot spot on the tank floor. That constant, localized overheating is a leading cause of premature tank failure. Take two minutes to level it right.
Also, ensure you have the required clearances. Check the unit’s manual, but typically you need 0 inches from the back and sides to combustible materials (like drywall) if the tank is listed as “zero clearance.” For venting, you usually need a 6 inch gap from the single wall vent pipe to any combustible material.
How to connect the new water heater to the water supply lines. Compare using flexible lines vs. hard piping.
You have two main choices for connecting the water lines: rigid copper pipe (hard piping) or flexible corrugated supply lines. For most DIYers, flexible lines are the clear winner. They are easier to install, allow for slight misalignment, and have built in dielectric separation. The downside is they are more expensive and some local codes restrict their use for gas water heaters – be sure to check your local regulations before using them for water supply lines for appliances.
If you choose flexible lines, simply hand tighten the supplied brass nuts onto the dielectric nipples you installed earlier, then finish tightening with a wrench. Use two wrenches one to hold the nipple steady, one to turn the nut to avoid twisting the tank’s internal fittings.
If you are hard piping with copper, you must install separate dielectric unions at the tank connections to prevent corrosion. Connect the union to the nipple, then solder your copper pipe to the other end of the union. Remember to drain the tank and open the T&P valve before soldering anywhere near it, as the residual heat can travel and damage internal plastic or rubber parts.
Connect the cold water line to the blue or cold side nipple, and the hot water line to the red or hot side nipple. This seems obvious, but I’ve been on service calls where they were reversed. If you’re setting this up for a fridge, the fridge water line should tap into the cold supply, preferably at the cold-side valve.
How to properly vent the new gas water heater. This is a CRITICAL H3 for safety and code compliance.
This is the most important step in the entire installation. Improper venting causes carbon monoxide poisoning, which can be fatal. You are likely dealing with a Type B double wall vent pipe, which is standard for gas appliances.
First, attach the draft hood (supplied with the heater) to the top of the unit. Then, begin assembling your vent pipe. Each section of vent pipe must be securely fastened with at least three sheet metal screws, and the pipe must slope upwards at least 1/4 inch per foot toward the chimney or termination cap. This upward slope ensures combustion gases can rise and exit your home.
All joints must be tight. Use a high temperature silicone sealant (rated for flue gases) on the inner pipe joints for an extra seal. The vent pipe must maintain the required clearance from combustibles (often 6 inches for single wall, 1 inch for double wall B vent). It must terminate properly outside, away from windows, doors, and soffit vents, as specified by local code and the manufacturer’s instructions.
Before you even think about turning on the gas, do a final visual check. Different gas water heater vent types—natural-draft, power-vent, or direct-vent—have specific venting requirements you should verify. The vent system must be completely assembled, unobstructed, and sealed from the water heater’s draft hood all the way to the outside termination point. If you are unsure about any part of this, stop and hire a licensed professional. Your family’s safety is not a DIY gamble.
Making the Gas Connection and First Startup
Now you’re at the most critical phase. Getting this part wrong is not an option. You are connecting a fuel line, and the startup process involves combustion inside your home. Follow these steps in order, without skipping anything.
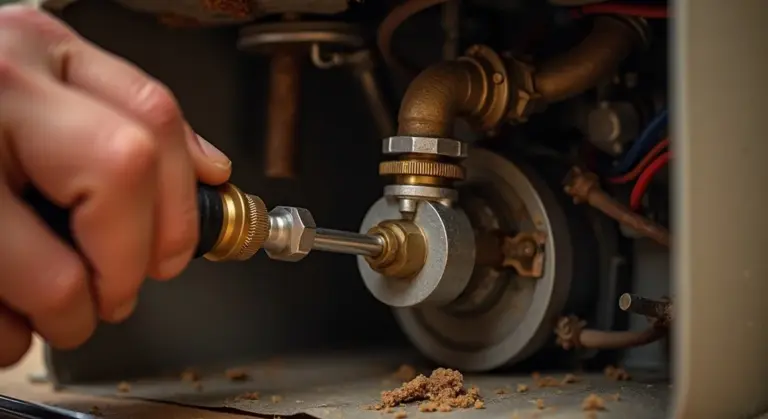
How to connect the new water heater to the gas line
You should have a new gas connector hose or approved black iron pipe ready to go from the shutoff valve to the heater’s gas control valve inlet. The threads on both ends must be clean and dry.
Apply a modest amount of pipe thread sealant (pipe dope) rated for natural gas or LP gas to the male threads. Do not put it on the first two threads. You do not want any sealant getting inside the pipe where it can break off and clog the orifice.
Use two wrenches for every connection: one to hold the fitting on the heater’s gas valve steady, and the other to tighten the connector. This prevents you from twisting and damaging the internal components of the new gas valve. Tighten firmly, but do not crank with all your might.
Before you even think about lighting the pilot, you must pressure test this new connection. Turn the gas shutoff valve to the “ON” position. Mix a small spray bottle with soapy water or use commercial leak detection fluid. Spray or brush it generously over every single fitting you just touched, including the inlet at the gas control valve. Watch for at least one full minute. If you see bubbles forming and growing, you have a leak. Turn the gas off immediately, tighten the leaking joint, and test again.
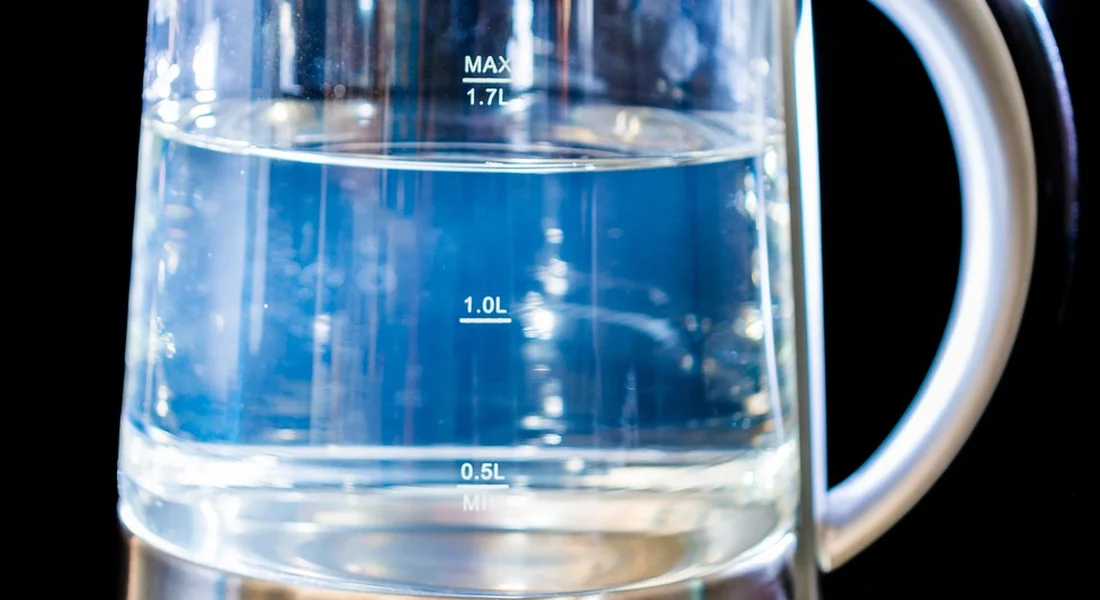
How to fill the tank with water and check for leaks
Do not introduce a flame to a dry tank. You will ruin it in minutes. The tank must be full of water first.
- Ensure the drain valve on the bottom of the new heater is fully closed.
- Open a hot water faucet somewhere in the house, like a utility sink or bathroom faucet. This allows air to escape as the tank fills.
- Slowly open the cold water shutoff valve you installed on the inlet pipe. You will hear water rushing into the tank.
Let the water run at the open hot faucet until a steady, air-free stream flows. This means the tank is full. Now, go to the water heater. On the top or side of the tank is the Temperature & Pressure (T&P) Relief Valve. It has a small lever. Lift and hold this lever open for a few seconds to purge any remaining air from the very top of the tank, then let it snap closed. Listen for the water flow to stop. Check the drain valve, the hot and cold water connections, and the T&P valve discharge pipe for any water leaks. Tighten as needed.
How to light the pilot and start the new water heater
Consult your unit’s manual, but most standard gas control valves follow the same basic sequence. The knob will have settings: OFF, PILOT, and ON.
- Turn the gas control knob from “OFF” to “PILOT.”
- Press and hold down the red or black pilot button next to the knob. This starts the gas flow to the pilot assembly.
- While holding the button down, use a long-reach lighter to ignite the pilot at the end of the pilot tube, which you can see through the viewport near the bottom of the unit.
- Keep the pilot button depressed for a full 60 seconds after the pilot lights. This heats the thermocouple, a safety device that proves the flame is present.
- After one minute, slowly release the button. The pilot should stay lit. If it goes out, repeat steps 2-4, holding the button down longer.
- Once the pilot remains lit on its own, turn the knob from “PILOT” to “ON.”
You will now hear the main burner ignite. The heater has started its first heating cycle.
The immediate safety checks after installation
Your job is not done just because the burner is running. You need to verify the system is operating safely.
First, look at the flame color through the viewport. A proper natural gas flame should be a crisp blue with maybe a small yellow tip. A large, lazy, mostly yellow or orange flame indicates a problem, like a dirty burner orifice (unlikely on a new unit) or a lack of combustion air.
Next, verify the draft. Hold a match or a thin piece of tissue paper near the draft hood (the inverted funnel at the top of the heater where the flue pipe connects). The smoke or paper should be drawn up into the hood. If it’s pushed away, you have a downdraft, which is dangerous and will send carbon monoxide into your living space.
Finally, use your nose. Sniff around the base of the water heater and the gas line connection. You should smell nothing. If you detect even a faint rotten egg odor (the smell added to gas), shut the gas valve off immediately and re-check your connections for leaks.
Let the heater run through a full cycle and heat the tank. Monitor it. The exterior should not get excessively hot, and you should hear no unusual noises like rumbling or whistling from the burner. This is a good point to review the gas water heater installation operation to confirm proper gas connections and venting. If all checks pass, you have successfully and safely installed your gas water heater.
Your Long-Term Care Plan: Gas Water Heater Maintenance
Replacing the heater is the hard part. Keeping it running for 15 years is about consistent, simple care. This is your maintenance schedule. Treat it like changing your car’s oil. It prevents big, expensive problems.
The Simple Maintenance Schedule
Stick to this calendar. Set reminders in your phone. A little time each year saves you from a flooded basement later.
| Task | Frequency | Why It Matters |
|---|---|---|
| Flush the Tank | Every Year | Removes sediment that causes noise, inefficiency, and failure. |
| Check/Replace Anode Rod | Every 3-5 Years | Protects the steel tank from rusting out from the inside. |
| Inspect Burner & Flame | Every Year | Ensures safe, efficient operation and proper venting. |
| Verify Temperature Setting | After any service | Prevents scalding and reduces energy costs. |
This routine is non-negotiable if you want the unit to last its full lifespan.
How to Flush the Tank (Stop the Rumble)
That rumbling or popping sound is sediment (sand, minerals) getting superheated at the bottom of the tank. Flushing it out is easy.
- Turn off the gas supply at the valve on the gas line.
- Switch the unit’s control knob to “Pilot.”
- Connect a standard garden hose to the drain valve at the tank’s base. Run the other end to a floor drain, sump pit, or outside.
- Open a hot water faucet somewhere in the house (like a sink). This breaks the vacuum and lets the tank drain.
- Slowly open the tank’s drain valve. Let the water run until it’s clear, usually 3-5 gallons. If the flow stops, sediment is blocking the valve. Close it, turn the water back on briefly to stir things up, and try again.
- Close the drain valve, remove the hose, turn the gas back on, and relight the pilot if necessary.
Flushing annually prevents the sediment layer from hardening and ruining the tank. I do mine every October. It takes 15 minutes.
Checking the Anode Rod (The Tank’s Sacrifice)
Inside every tank is a metal rod, usually made of magnesium or aluminum. This is the anode rod. It’s designed to corrode instead of your steel tank lining. Think of it as a bodyguard taking a bullet.
- Turn off the gas and cold water supply to the heater.
- Drain about 2 gallons of water from the tank (see steps above). This prevents a spill.
- Locate the anode rod. It’s screwed into the top of the tank, often under a large hexagonal plastic plug.
- Use a 1-1/16″ deep socket and a long breaker bar or impact wrench to loosen it. This can be very tight.
Pull the rod out and inspect it. If less than 1/2 inch of the core wire is visible, or if the rod is less than 1/2 inch thick anywhere, replace it. A fully consumed rod means your tank is now rusting.
Replace a worn anode rod immediately. It is the single most important thing you can do to prevent tank failure.
Checking the Burner Assembly and Flame
A clean, blue flame is efficient. A lazy, yellow flame is dangerous and dirty.
- Turn the control knob to “Off” and wait five minutes for any gas to clear.
- Remove the outer access panel at the bottom of the unit to see the burner.
- Look for dust, spider webs, or rust flakes. Use a vacuum attachment or a soft brush to gently clean the burner and the small pilot assembly.
- Turn the gas back on, set the knob to “Pilot,” light it, then turn to “On.”
- Observe the flame through the viewport. It should be a steady, blue flame with a small yellow tip. A mostly yellow, flickering, or lifting flame means there’s a problem call a professional.
A clean burner chamber allows for proper combustion and prevents carbon monoxide issues. While you’re in there, sniff for any faint gas odor. If you smell gas, turn the valve off and call a technician.
Setting a Safe and Efficient Temperature
120 degrees Fahrenheit is the sweet spot. It’s hot enough for household use but prevents severe scalding and saves on gas bills. Many units come set much higher from the factory.
- Find the temperature dial. It’s usually behind an access panel on the tank’s exterior, near the gas control valve.
- Use a flathead screwdriver to adjust the dial. Many have a “Hot” setting around 120°F.
- Wait a few hours, then check the temperature at a faucet farthest from the heater. Run only hot water and use a cooking thermometer.
Adjust the dial slightly if needed. At 120°F, you might need to use less cold water in the shower mix. This setting reduces mineral buildup, saves energy, and is much safer for children and elderly family members.
When Things Don’t Go Right: Common Problems After Replacement
Even a perfect installation can have a few hiccups. Here’s how to diagnose and fix the most common post-replacement issues.
Troubleshoot a Pilot That Won’t Stay Lit (Often a Bad Thermocouple)
You light the pilot, hold the button, and it goes out the second you let go. This is almost always a thermocouple problem. This small copper probe generates a tiny electrical current to prove the pilot is lit to the gas valve. If it’s bad, the valve shuts off the gas for safety.
First, try cleaning the tip with fine sandpaper, as dust or soot can block the flame sensor. If it still fails, replace it. It’s a 15-minute job. Turn the gas control knob to ‘OFF,’ disconnect the old thermocouple’s copper lead from the valve, unscrew it from the bracket near the pilot assembly, and install the new one. I keep a universal thermocouple in my toolbox because they fail so often.
Fix a Water Heater That’s Not Getting Hot (Gas Valve Setting, Dip Tube Issue)
If you have a pilot but no hot water, start with the simple stuff. Check the gas valve knob. Is it set to a low temperature like ‘VACATION’ or ‘LOW’? Turn it to a normal setting like ‘A’ or ‘B’. Give it an hour.
If the water is lukewarm, you might have a crossed connection. During installation, it’s easy to accidentally connect the hot and cold lines to the wrong inlets on the tank. Feel the pipes: the cold inlet pipe (usually with the blue handle) should be cool, and the hot outlet pipe should get very warm after the burner runs. If they’re reversed, swap the connections.
A less common but serious issue is a missing or broken dip tube. This plastic tube directs incoming cold water to the tank bottom. Without it, cold water mixes at the top where the hot water exits, giving you only lukewarm water. You’d need to drain the tank and inspect the cold water inlet.
Address Rumbling or Banging Noises (Sediment Is the Usual Culprit)
A new tank shouldn’t make noise. Rumbling, popping, or banging means sediment is already building up and trapping water under it. The water boils under the sediment layer, causing the noise.
This is your cue to start a regular flushing routine to extend your tank’s life and efficiency. Here’s how to flush it now:
- Turn off the gas control knob.
- Connect a garden hose to the drain valve and run it to a floor drain or outside.
- Open a hot water faucet in the house to let air in.
- Open the drain valve and let it run until the water runs completely clear (about 5-10 gallons).
- Close the drain valve, turn the gas back on, and relight the pilot.
Do this once a year.
Solve the Problem of Discolored Water (Connect Dielectric Unions to Prevent Corrosion)
Rusty or yellow water from a brand-new tank points to a missing part: the dielectric union. Connecting copper pipes directly to the steel tank nipples creates an electrochemical reaction. The steel corrodes rapidly, staining your water.
Dielectric unions are insulating fittings that stop this corrosion by preventing the two different metals from touching. They are mandatory in most codes. If you see bare copper pipe threaded directly into the tank, you need to install them. Shut off the water and gas, drain the tank, and install a union on both the hot and cold connections. The discoloration should clear after running the water for a few minutes.
Explain What a Whistling Tank Usually Means (High Pressure or a Faulty T&P Valve)
A high-pitched whistle from the tank or its pipes is often pressure-related. The Temperature and Pressure (T&P) Relief Valve is the first suspect. It may be venting slightly if your home’s water pressure is too high (above 80 PSI). Test your pressure with a gauge on a hose bib.
If pressure is normal, the valve itself might be faulty or have debris in it. You can try lifting the valve’s test lever to flush it, which can clear sediment and stop the noise. If the whistling continues, replace the T&P valve. Never cap it or ignore it; this is a critical safety device.
The other cause can be a restricted water flow, like from a partially closed shut-off valve, causing a whistling sound as water squeezes through.
The Final Reality Check
A professional technician can swap out a gas water heater in about three hours. If you’re doing it yourself, block off a full weekend. You need time to gather tools, make multiple trips to the hardware store, and handle unexpected issues like rusted fittings. Rushing a gas appliance installation is how mistakes happen, so give yourself the grace of an entire Saturday and Sunday. Water heater installation time can be more variable than it looks, especially when old pipes or venting must be updated. Planning for potential delays helps you avoid a rushed, stressful job.
When Age Makes Replacement the Only Smart Choice
If your gas water heater is over 10 years old, stop considering repairs. Replace it. The average lifespan of a tank heater is 8-12 years. Beyond that, sediment buildup is severe, the tank liner is failing, and efficiency plummets. Putting money into an old heater is like fixing the transmission on a car with a rusted-out frame-it’s a temporary solution for a terminal problem. Repairing it is often more costly than replacing. Newer models are also more energy-efficient, so replacement saves you money on gas bills immediately.
Choosing the Right Size: It’s About Flow, Not Just Gallons
Picking a 50-gallon tank because your old one was 50 gallons is a common mistake. You need to match the heater to your home’s peak demand using the First Hour Rating (FHR). The FHR tells you how many gallons of hot water the heater can deliver in one hour, starting with a full tank.
Think of it this way: the tank size is the gas tank in your car. The First Hour Rating is the horsepower. You need enough horsepower to meet your demand.
To find your needed FHR, estimate your peak morning usage:
- Shower: 20 gallons
- Shower: 20 gallons
- Washing Machine: 20 gallons
- Kitchen Sink: 10 gallons
For this example, you’d need a water heater with a First Hour Rating of at least 70 gallons. A 50-gallon tank with a high-recovery burner can often meet this, while a weak 50-gallon model cannot. Always check the yellow EnergyGuide label on the heater for the FHR number.
| Household Size | Recommended First Hour Rating (Guideline) |
|---|---|
| 1-2 people | 50-60 gallons |
| 3-4 people | 60-70 gallons |
| 5+ people | 70+ gallons |
The Warranty Fine Print You Must Read
Register your new water heater’s warranty online the same day you install it. Manufacturers often deny claims if the unit isn’t registered within 30-90 days. Understand what you’re getting: the warranty almost always covers only the replacement of the defective part (like the tank or burner). It does not cover labor costs for a service call, any water damage to your home, or the cost of delivery and disposal of the old unit. Keep your receipt and the installation manual in a safe place-you will need them for any claim. If your setup includes a water softener, the water softener warranty coverage may be separate from the water heater’s. Check both warranties to understand what’s protected and for how long.
Common Questions
What’s the #1 safety check I should do after connecting the gas line?
Before even thinking about lighting the pilot, you must test for leaks. Spray a generous amount of soapy water on every single gas fitting you touched, including the new connector and the valve inlet. If you see any bubbles forming and growing, turn the gas off immediately, tighten the connection, and test again.
My new heater is installed. How do I know the pilot and burner are working safely?
First, look at the flame through the viewport; it should be a steady blue with a small yellow tip. Second, verify the draft by holding a lit match near the draft hood-the smoke should be drawn up into the vent. Any yellow flames or poor draft means shut it down and call a pro.
How often do I really need to flush the tank?
Once a year, no excuses. This simple 15-minute task prevents sediment from hardening on the tank floor, which causes rumbling noises, inefficiency, and is the leading cause of premature tank failure. Mark your calendar-it’s the cheapest insurance you can buy for your heater.
Why is the vent pipe so critical, and what’s the main thing to check?
Improper venting leads to carbon monoxide poisoning. The absolute rule is that the pipe must slope upward at least 1/4 inch per foot all the way to the termination point outside. Before startup, do a final visual to ensure every joint is screwed together tightly with at least three sheet metal screws.
When should I stop DIY troubleshooting and call a professional?
Call a licensed technician if you smell gas at any point, if the burner flame is mostly yellow or orange, or if you have any doubt about the venting. Your family’s safety is not a place to experiment. A pro call is far cheaper than the cost of a dangerous mistake.
Keeping Your Gas Water Heater Efficient and Safe
Test for gas leaks with soapy water on all connections the moment your installation is complete. If you notice any drips or damp spots, that could signal common leak causes such as loose fittings or valve seepage. Schedule a biannual tank flush to clear sediment, which preserves heating efficiency and prevents premature failure.
Bob McArthur
Bob is a an HVAC and plumbing industry veteran. He has professionally helped homeowners resolve issues around water softeners, heaters and all things related to water systems and plumbing around their homes. His trusted advice has helped countless of his clients save time, money and effort in home water systems maintenance and he now here to help you and give you first hand actionable advice. In his spare time, Bob also reviews home water systems such as tankless heaters, water softeners etc and helps home owners make the best choice for their dwelling. He lives around the Detroit area and occasionally consults on residential and commercial projects. Feel free to reach out to him via the contact us form.