How to Adjust Your Well Pump Pressure Switch and Set It Right
If your water pressure is weak or the pump won’t stop running, the pressure switch is likely out of whack.
This guide will walk you through finding and testing the switch, making the adjustments safely, and the correct cut-in and cut-out pressure settings for your home.
I’ve turned wrenches on hundreds of these systems. Here’s the straight talk: a proper adjustment takes ten minutes and prevents pump burnout.
How Your Well Pump Pressure Switch Actually Works
Think of it like a light switch that your water pressure flips. Inside the little metal box is a flexible rubber diaphragm. When system water pressure pushes on it, it moves. That movement directly opens or closes an electrical contact, just like flipping a wall switch.
That simple mechanical action is the entire job: telling your pump motor when to start and when to stop.
You’ll hear two key terms:
- Cut-in Pressure: The low pressure point where the switch clicks ON to start the pump. For a 40/60 system, this is 40 psi.
- Cut-off Pressure: The high pressure point where the switch clicks OFF to stop the pump. For that same 40/60 system, this is 60 psi.
The pressure tank is the pump’s best friend. It holds a cushion of compressed air. When you turn on a faucet, water comes from the tank first. This lets you draw a gallon or two before the pressure drops to the cut-in point and the pump kicks on. Without that air cushion, the pump would start for a single flush. It would cycle on and off every few seconds and burn out fast.
Most residential switches come from the factory set to a common range. You’ll see 30/50 psi or 40/60 psi stamped right on the switch.These factory settings are just a starting point, and you can adjust them within the switch’s rated range. I set my own system to 40/60 because it gives a strong shower without making the pump work too hard.
Red Flags: Is Your Pressure Switch the Real Problem?
Not every water pressure issue is a bad switch. Here’s how to spot the real clues that point directly to it.
The Pump Won’t Stop Running
If your pump runs non-stop, that’s an emergency. The pressure switch contacts are likely welded shut in the “on” position, or you have a massive leak draining the system faster than the pump can fill it. Pressure loss in the system can cause such issues.
Let this go on for even an hour, and you risk burning out the pump motor, which is a much more expensive fix. Shut off the pump’s power at the breaker immediately and start checking for leaks. If things are dry, the switch is the prime suspect. If the breaker trips, the well pump pressure switch can be the culprit. We’ll cover testing and adjustments in the next steps.
Your Faucets Pulse or Sputter
This feels like the water is hiccuping. It’s called short cycling. The pump is turning on and off way too quickly, sometimes in less than a minute.
This almost always points to a waterlogged pressure tank, not a switch setting. The tank’s air cushion is gone, filled with water. With no buffer, pressure changes are instant. The pump kicks on for three seconds, hits cut-off, shuts off, and then immediately turns back on when you barely open a tap. Check your tank’s air charge with a tire gauge before you touch the switch.
Pressure is Consistently Low or High
If your shower is always weak and the gauge never reaches the high number, your cut-off setting might be too low. If pressure is sky-high and your pipes are banging, the cut-off might be set too high.
But rule out other issues first. A clogged sediment filter, a failing pressure tank, or mineral-clogged pipes can mimic low pressure.A true switch setting problem means the system operates at a steady, but unsatisfactory, pressure across all faucets.
You Hear Constant Clicking from the Switch
A healthy switch clicks decisively once when the pump starts and once when it stops. A rapid “chatter-click-click-click” sound is bad news.
This is often caused by dirty or pitted electrical contacts inside the switch. They arc and spark instead of making a clean connection.That chattering sound means the switch is failing and should be replaced; adjusting it won’t help. I had this happen in my old shop. The constant arcing can also damage the pump control box over time.
Gathering Your Tools: The Well Tinkerer’s Checklist

Do not start this job until you have every item on this list within arm’s reach. Fumbling for a tool with live electricity nearby is how accidents and costly mistakes happen. I learned this the hard way years ago on a service call, and now my truck is always stocked.
- Basic hand tools for adjustment and disassembly.
- Accurate pressure testing equipment.
- Full personal protective equipment.
- Common replacement parts for the pressure switch and its connections.
Essential Tools
These are the non-negotiables. You will use every one of them.
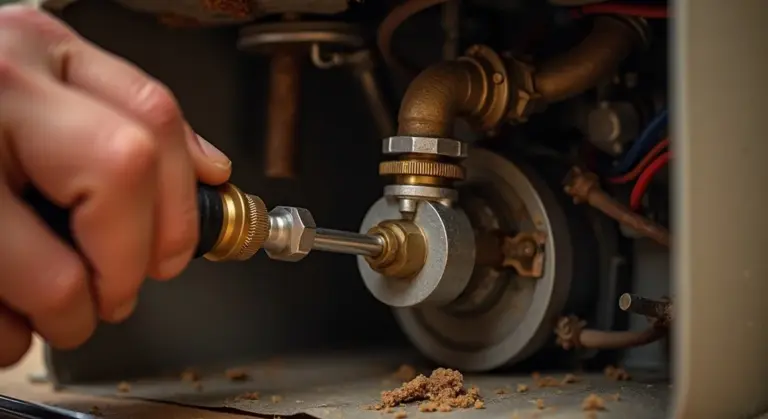
- A standard flat-head screwdriver is for adjusting the set screws on the pressure switch. Do not use a Phillips head; it can slip and damage the screw.
- An adjustable wrench fits the union nuts on the pipe and the pressure switch itself. A 10-inch wrench gives you good leverage.
- A simple tire pressure gauge checks the air pre-charge in your pressure tank. This step is critical. If the tank’s air charge is wrong, adjusting the switch will not fix your pressure problems.
- You must have a separate, reliable pressure gauge that screws onto a hose bib. This verifies the actual water pressure in your system. The gauge on the tank is often unreliable. I use a standard 0-100 psi gauge with a 1/4″ male connection; they cost about $10 and are worth every penny.
Safety Gear is Non-Negotiable
This work involves electricity and metal edges. Protect yourself.
- Wear safety glasses. When you crack open a pipe union or probe the switch, old water and debris can spray out.
- Put on work gloves. The pressure switch has sharp metal covers and terminals.
- Cut a piece of cardboard to cover the open electrical contacts after you turn off the power. This prevents any accidental contact while your hands are busy with the wrench. I keep a small square in my tool bag just for this.
Potential Replacement Parts
Sometimes adjustment isn’t enough. If the switch is faulty, you will need to replace it. Have these parts ready so you can finish the job in one trip.
- A 1/4″ brass nipple and a roll of pipe thread tape (Teflon tape). If you need to remove the old pressure switch, the nipple it’s mounted on can corrode and snap. Having a new one and tape on hand lets you install the new switch immediately.
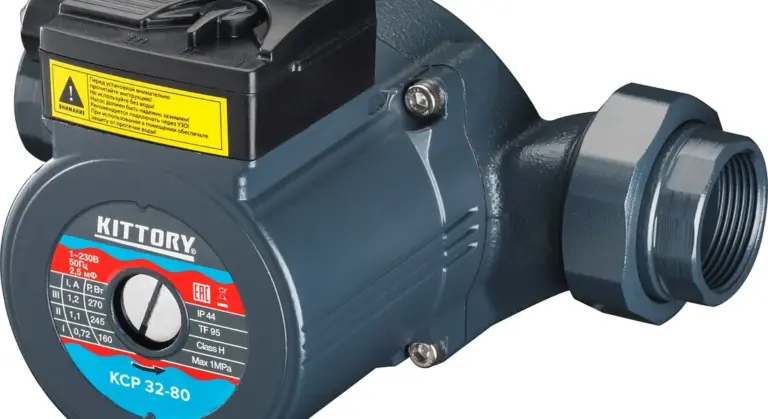
- A generic pressure switch. The most common settings are 30/50 psi or 40/60 psi. Know which one your system uses before you buy. Keeping a spare switch in your basement is a cheap insurance policy against a sudden pressure loss. My own well system has a 40/60 switch, and I always have an extra in a labeled bin.
The Right Pressure Settings for Your Home
You want one number. I get it. But the correct setting is actually a range. Your pressure switch turns the pump on at a low pressure (cut-in) and off at a higher pressure (cut-out). The goal is to keep your water pressure consistent and strong without making the pump cycle on and off constantly.
The Standard 20 PSI Spread
Think of your pressure switch like a car’s cruise control. You set a minimum and maximum speed. For well pumps, that standard “speed range” is a 20 PSI difference. The two most common settings are 30/50 PSI and 40/60 PSI. Replacing your pressure switch with these settings ensures consistent water pressure.
With a 30/50 setting, your pump kicks on when pressure drops to 30 PSI and shuts off when it hits 50 PSI.
For most modern homes running multiple showers, appliances, and sprinklers, a 40/60 PSI setting is the better choice. It gives you stronger pressure at the tap and helps prevent that annoying pressure drop when two fixtures are running. The trade-off is slightly higher stress on your plumbing joints, but for a sound system, it’s worth it.
Adjusting a 30/50 Switch to 40/60 (and Vice Versa)
Yes, you can absolutely adjust a 30/50 switch to 40/60. You are shifting the entire operating range up by 10 PSI.
Under the switch cover, you’ll find two nuts on two springs. One spring is large, one is smaller.
- The larger spring and nut control the cut-out pressure (the 50 in 30/50). Turning this nut clockwise increases the shut-off pressure.
- The smaller spring and nut controls the range, or differential (the 20 PSI spread). It sets how far the pressure drops before the pump kicks back on.
To shift from 30/50 to 40/60, turn both adjustment nuts clockwise exactly the same amount-about two full turns each. You may also want to review the sump pump float levels to ensure the switch activates at the correct water height. A related guide on adjusting sump pump float levels can help with proper setup. Check the pressure with a gauge at a hose bib. To lower from 40/60 to 30/50, turn both nuts counterclockwise equally. Always adjust with the power to the pump circuit turned OFF.
Special Case: Adjusting a Drummond Shallow Well Pump
If you’re asking “can I adjust the Drummond shallow well pump,” the answer is yes, but the switch looks different. On many Drummond models, the pressure switch is integrated into the pump housing or pressure tank connection, not a separate square box.
The adjustment principle remains identical: find the single or pair of adjustment screws, usually requiring a flat-head screwdriver. Turning clockwise increases pressure. Identify the cut-in and cut-out settings by watching the pressure gauge as the pump cycles. The process is the same, just in a more compact package.
Pressure, Flow, and the “GPM” Question
This is a crucial mix-up. Pressure (PSI) is the force behind the water. Flow (GPM – Gallons Per Minute) is the volume of water moving.
You can have high pressure (like a pinched garden hose) with very low flow. Your pressure switch only controls the PSI in your tank.
So, if you’re asking “how can I lower my well pump GPM,” the pressure switch is the wrong tool. The pump’s GPM output is determined by its horsepower and design, and your well’s actual yield; it is not adjustable by the switch. The only way to reduce system flow is to install a flow-restricting valve, which is rarely a good solution for a home. You adjust pressure. The pump delivers its set flow at that pressure.
Step-by-Step: How to Adjust Your Well Pump Pressure Switch
This is the hands-on part. Follow these steps in order. Skipping around can waste your time or damage your system.
Step 1: Safety First – Cutting the Power
This step is non-negotiable. The pressure switch has live electrical terminals. You must completely disconnect the power.
- Go to your home’s main electrical panel and locate the circuit breaker for the well pump.
- Switch it firmly to the OFF position.
- Now, verify the power is off. Use a non-contact voltage tester on the wires leading into the pressure switch. Do not proceed until you get a “no voltage” reading from your tester.
I keep my tester in the same toolbox as my pump tools. I use it every single time, even if I just flipped the breaker myself. It’s that important.
Step 2: Diagnose Before You Adjust
Most pressure problems aren’t caused by the switch. Adjusting it first is like tuning a car’s engine with a flat tire. Check these two things first.
First, check the pressure tank’s air pre-charge. The tank’s bladder must have the correct air pressure for the switch to work properly.
- Shut off the pump power (you just did this).
- Open a hose bib or faucet to drain all water pressure from the system. Leave it open.
- Find the tank’s air valve (it looks like a tire valve stem). Use a standard tire pressure gauge to check the air pressure.
The air pressure must be set to 2 psi below your pump’s “cut-in” pressure (the pressure when the pump turns on). If your switch is set for 40/60, your tank air charge should be 38 psi.
Second, note your current switch settings. With the power still off, look at the pressure gauge on your system (often near the pressure switch or at a hose bib). Jot down the current pressure. Then, restore power briefly and run water until the pump kicks on. Note that pressure (cut-in). Shut the water off and watch the gauge climb until the pump shuts off. Note that pressure (cut-off). This tells you exactly what you’re working with.
Step 3: Know Your Nuts – The Range and Differential
Open the plastic cover on the pressure switch. You’ll see two adjustment nuts on large springs.
- The larger nut (usually on top or on a larger spring) adjusts the range. Turning this changes both the cut-in and cut-off pressure together.
- The smaller nut (usually directly under the big one) adjusts the differential. This changes only the spread, or difference, between the cut-in and cut-off pressure.
Use a wrench. Before turning anything, gently place a second wrench on the outer, larger nut to hold it steady. You only want to turn the inner nut you are adjusting, otherwise you’ll change both settings at once and get lost.
Step 4: Making the Adjustment
The rule is simple: turn a nut clockwise to increase pressure, counter-clockwise to decrease.
Make tiny adjustments. A quarter-turn is a lot. After each small tweak:
- Put the cover back on (the switch needs it to operate safely).
- Restore power at the breaker.
- Run the test from Step 2 to see your new cut-in and cut-off points.
If you need to raise your overall pressure (say, from 30/50 to 40/60), turn the large range nut clockwise a little. If your spread is too wide or narrow (you want a consistent 20 psi difference), adjust the smaller differential nut.
Step 5: Testing and Fine-Tuning
This is the repeat cycle. Turn on a faucet and let the water run until the pump activates. Listen for the click and watch the gauge for your cut-in pressure. Immediately shut the faucet off.
Watch the gauge climb as the pump fills the tank. It will stop at your cut-off pressure. You should hear another distinct click. Your system is set correctly when the pump cycles on and off at your desired pressures consistently for two or three cycles in a row.
If the pump short cycles (turns on and off rapidly with little water use), your tank’s air charge is likely wrong, not the switch. Go back to Step 2. If the switch won’t hold a setting or the pump won’t turn on/off, the switch contacts may be worn out and the entire unit needs replacement.
The DIY vs. Pro Verdict: When to Call for Backup
Adjusting the pressure switch is a common fix, but you need to know your limits. Giving this job a difficulty rating depends on the task. Adjusting the set points on an existing, functional switch is a 4 out of 10. Swapping out the entire switch for a new one jumps to a 7 out of 10 because it involves dealing with live electrical connections. If you’re considering manually operating a well pump pressure switch, review safety precautions and manufacturer guidelines first. A concise guide can help you decide whether to proceed or call a professional.
You Can Handle This If…
This is a job for a confident DIYer. You can proceed if you match this list.
- The switch is just out of adjustment. Your pump cycles on and off, but the cut-in and cut-out pressures are simply too high or too low for your needs.
- The electrical connections are clean and secure. When you remove the cover, the wire terminals are tight, and there’s no green corrosion or black soot on the contacts.
- You are comfortable with basic electrical safety. This means you know how to shut off the correct circuit breaker at your panel and verify the power is off with a multimeter or non-contact voltage tester before touching any wires.
If you check these boxes, a simple adjustment with a wrench and a pressure gauge is a straightforward Saturday morning project. I’ve done it in my own pump house more than once. Have the right tools ready: an accurate tire pressure gauge for a quick check, or a dedicated 0-100 psi water pressure gauge that screws onto a hose bib for a more precise reading. For a full tune-up, you’ll also want to adjust the well pump points timing to ensure the switch engages at the right moment. That quick, related step can be explored in the next steps.
Call a Licensed Well Pro If…
Some problems are red flags. Ignoring them can lead to pump failure or an electrical hazard. Call for backup if you see any of this.
- You see arcing, burning, or melted wires at the switch. This indicates a failing switch or a serious overload. The internal contacts are likely welded or pitted. This switch is a fire risk and needs full replacement by someone who can diagnose why it failed.
- The pump itself is failing or the pressure tank is waterlogged. If your pump runs continuously or the pressure gauge needle flutters wildly, you have a tank or pump issue. Adjusting the switch on a failing system is like adjusting the thermostat on a broken furnace.
- Adjustments do not change the pump’s behavior. You turn the nuts, but the pump still kicks on at 20 psi and off at 40 psi, no matter what. The switch mechanism is stuck or broken internally and needs replacement.
I’ve been on service calls where a homeowner spent days tweaking a switch, only for us to find a ruptured bladder in the pressure tank. Knowing when to stop saves you time and money.
A Quick Code and Compliance Check
Homeowner repairs exist in a gray area. Here’s what you should know about the rules.
Adjusting the set screws on an existing, installed switch is generally considered maintenance. Any new electrical work, like running a new circuit or replacing the entire switch and its wiring, must meet National Electrical Code (NEC) standards. This often requires a permit and inspection in many municipalities.
Always use pressure switches with clear UL (Underwriters Laboratories) or CSA (Canadian Standards Association) certification. This mark is usually stamped right on the metal base. It’s your guarantee the device was built to a recognized safety standard. Don’t install uncertified electrical components on your home’s system.
Beyond the Switch: Keeping Your Whole System Healthy
A correctly set switch is only part of the equation. Your well system is a team: the pump, the switch, and the pressure tank. Ignoring the tank is like tuning an engine but never changing the oil. This simple maintenance roadmap prevents the most common well system failures.
Pressure Tank Maintenance Schedule
The pressure tank is your pump’s best friend. Its job is to store water under pressure so the pump doesn’t have to start every time you open a faucet. If the tank fails, the pump takes all the stress.
The most critical task is checking the tank’s air pre-charge every six months with the water pressure drained to zero. Use a standard tire gauge on the tank’s air valve (it looks like the one on your car tire). The air pressure must be 2 PSI below the pump’s cut-in pressure. For a common 40/60 switch, that means 38 PSI.
- Turn off the pump’s power.
- Open a faucet to drain all water pressure (the gauge should read 0).
- Check the air pressure with your tire gauge.
- Add air with a bicycle pump or small compressor if it’s low. Release air if it’s too high.
Listen for waterlogging. A healthy tank should sound hollow when you tap it. If it sounds solid or full from top to bottom, the internal bladder is likely ruptured. You’ll also notice the pump cycling on and off rapidly when you run water. That’s your cue to replace the tank.
Switch and Component Checkup
Once a year, give your pressure switch a visual inspection. Moisture and corrosion are its biggest enemies. Look for green or white crusty deposits on the electrical contacts and the small tube that connects it to the water line.
Ensure your pressure gauge is accurate by comparing it to a known good gauge, or simply replace an old, foggy gauge every few years. A faulty gauge will lie to you, making any adjustment guesswork. I keep a spare liquid-filled gauge in my toolbox for this quick check. Simply install it at a hose bib or drain port to verify your system gauge’s reading.
While you’re there, listen. The switch should give a firm, distinct “click” when it activates. A weak or chattering sound can mean the contacts are worn or the mechanism is gummed up.
The Water Science of Pressure and Drawdown
Drawdown is the usable water your tank delivers between the pump turning on and off. Think of it as the tank’s useful capacity. For a 40/60 psi setting, the tank holds water from 40 psi up to 60 psi. The amount of water you can use from 60 psi down to 40 psi before the pump kicks on is the drawdown.
A larger tank provides a greater drawdown volume, which means your pump cycles less often, dramatically extending its life. A tiny tank might cause the pump to start 50 times a day. A properly sized tank can reduce that to 10 cycles. Every start is a surge of electricity and mechanical stress. My own rule is to install the largest tank that fits the space. It’s the single best upgrade for pump longevity.
The math is simple. A typical 20-gallon tank might only give you 5 gallons of drawdown. An 80-gallon tank could provide over 20 gallons. More water stored means longer showers and less pump wear. It’s a win-win.
Recommended Products for a Reliable Well System
Getting your pressure dialed in is one thing. Keeping it that way requires a few good parts. Having the right components on your shelf prevents a small problem from turning into a day without water. I keep these three categories of items in my own well house for quick diagnostics and repairs.
A Solid Brass Pressure Switch
When your old switch starts chattering or fails to turn the pump on, you need a dependable replacement. A standard Square D-type switch is the industry workhorse for a reason-its simple design is proven and reliable. Look for a switch with a brass body, not plastic. The brass can handle vibration and moisture much better over the years.
Always get a switch with a built-in lever. This lever lets you manually activate the pump for testing or for quickly restoring water during a troubleshooting session, which is incredibly handy. Before you buy, you must match the switch’s electrical rating (like 30/50 psi or 40/60 psi) and voltage (120V or 240V) to your existing pump’s specifications.
A Quality Liquid-Filled Pressure Gauge
You cannot adjust what you cannot measure accurately. A dry gauge’s needle will bounce and flutter with every pump cycle, making it hard to get a precise reading. A liquid-filled gauge dampens the needle movement, giving you a stable, easy-to-read pressure at a glance. The fluid also protects the internal mechanism from corrosion.
For a standard home system, a 0-100 psi range is perfect. Install it on a tee fitting right at the pressure switch or pressure tank. If your gauge is old and stuck at zero or fogged up, replace it. A faulty gauge will lead you to make incorrect adjustments and potentially damage your pump.
A Proper Well System Tool Kit
Don’t fumble around in a toolbox when you’re dealing with water and electricity. Keep these basics together in a small kit near your pressure tank:
- An adjustable wrench for fitting the gauge and tightening switch connections.
- Flathead and Phillips screwdrivers for opening the switch cover and adjusting the set screws.
- High-quality pipe tape (Teflon tape) for sealing any threaded fittings you need to open.
- A non-contact voltage tester. This is non-negotiable-always verify the power is off at the switch before you touch any wires.
With these tools and parts ready, a pressure adjustment or emergency swap becomes a 15-minute job instead of a frantic trip to the hardware store.
Common Questions
What pressure setting should my home have, 30/50 or 40/60?
For most modern homes, 40/60 PSI is the better standard. It provides stronger, more consistent pressure for multiple showers and appliances. A 30/50 setting is acceptable but may feel weak if you’re running several fixtures at once.
How do I know what my pressure switch is rated for?
Look for the rating stamped directly on the metal body of the switch, often near the adjustment nuts. It will clearly state something like “30-50 PSI” or “40-60 PSI”. This is the factory setting and the range within which you can safely adjust it.
What’s the most important safety step before adjusting the switch?
You must shut off the power at the circuit breaker and then verify it’s off with a non-contact voltage tester. Never rely on just flipping the breaker; always test the wires at the switch. Working on a live switch is a serious electrical hazard.
I adjusted the switch, but my pressure problems didn’t fix it. Why?
A faulty switch setting is just one cause of pressure issues. More often, the problem is a waterlogged pressure tank or a loss of air pre-charge. Always test your tank’s air pressure with a tire gauge before and after adjusting the switch.
What do the two nuts inside the pressure switch actually do?
The larger nut shifts the entire pressure range (both cut-in and cut-off) up or down. The smaller nut changes only the differential, or the spread, between the on and off pressures. Make tiny, quarter-turn adjustments and retest your system after each change.
Maintaining Consistent Well Pressure
Before touching any screws on the switch, always cut the power to the pump and test the system’s pressure with a gauge. Make a habit of checking that gauge every few months; a sudden drop is your first clue that the switch or tank needs attention.
Bob McArthur
Bob is a an HVAC and plumbing industry veteran. He has professionally helped homeowners resolve issues around water softeners, heaters and all things related to water systems and plumbing around their homes. His trusted advice has helped countless of his clients save time, money and effort in home water systems maintenance and he now here to help you and give you first hand actionable advice. In his spare time, Bob also reviews home water systems such as tankless heaters, water softeners etc and helps home owners make the best choice for their dwelling. He lives around the Detroit area and occasionally consults on residential and commercial projects. Feel free to reach out to him via the contact us form.