Backflow Preventer Repair: Your Step-by-Step Rebuild Guide
Your backflow preventer is leaking or stuck, risking contaminated water. Fix it now before it fails inspection or causes damage.
Follow this practical guide to get it done right. We will cover safety shutdown, complete disassembly, part inspection and cleaning, seal and valve replacement, and final leak testing.
I’ve rebuilt these on hundreds of service calls. Here’s the takeaway: if the body is sound, a rebuild kit and an afternoon of work beat a costly replacement every time.
How Do You Spot a Bad Backflow Preventer? (The Red Flags)
How do you identify a faulty backflow preventer? You look for the obvious signs it’s given up. It’s not subtle.
The Clear Signs of Failure
- Constant dripping from the relief valve. A few drops after a pressure change is normal. A steady trickle or stream is a failed seal. I found this on my own irrigation backflow device last summer. The drip line had eroded a hole in my patio paver.
- Sudden, unexplained loss of water pressure. If your shower pressure plummets or a faucet slows to a crawl, a stuck check valve inside the preventer could be blocking flow.
- Discolored, cloudy, or smelly water. This is the scariest sign. It means contaminated water from your sprinkler system or a boiler has already siphoned back into your drinking lines.
- Visible leaks from the device body or test cocks. Corrosion and cracked housings are a clear verdict. It’s done.
- It fails the annual test. This isn’t a visible sign to you, but it’s the official diagnosis from a pro.
What “Backflow” Actually Feels Like
Think of a garden hose left in a muddy puddle. If your home’s water pressure drops suddenly (like if a fire hydrant is used nearby), that suction can pull the muddy water from the hose back into your home’s pipes. A backflow preventer stops that reverse flow. When it fails, you might not “see” it happen until you get that bad-smelling water from the tap.
Fixing an Air Lock (A Simple DIY Check)
Sometimes low pressure isn’t a broken part. It’s just trapped air. You can try to bleed the preventer.
- Locate the test cocks. These are the small, usually quarter-turn valves on the device.
- With a hose bib open downstream (like an outdoor faucet), slowly open the #1 test cock (the one on the inlet side).
- Let water and air sputter out for 10 seconds, then close it.
- Open the downstream hose bib fully to flush the line.
If pressure restores, you had an airlock. If pressure is still bad, the problem is mechanical.
Is This a DIY Job or a Call to the Pros?
Let’s be real. This isn’t fixing a leaky faucet.
Difficulty Rating: 7.5/10
Why the high score? It’s a precision assembly. Rebuilding it requires disassembling spring-loaded check valves and delicate seals in the right order. One mistake and it won’t hold pressure or, worse, it won’t prevent backflow. You’re also working on the main water line to your house. A major error means no water or a flood.
Where to Draw the Line
A handy homeowner can handle some tasks. A licensed professional is needed for others.
DIY Zone (If you’re comfortable):
- Cleaning sediment from the strainer screens.
- Replacing external relief valve covers or simple O-rings if you have the exact kit.
- Bleeding air from the device as described above.
Pro Zone (Call a Certified Tester):
- Any internal disassembly or rebuild with a kit.
- Soldering or threading the device into the main line.
- The mandatory annual pressure performance test.
The Legal and Code Reasons
This is the big one. The International Plumbing Code (IPC) and Uniform Plumbing Code (UPC) require annual testing of backflow preventers by a certified tester. Even if you rebuild it perfectly, the law and your water utility require a pro to test and certify it. They have calibrated gauges to measure exact pressure drops you can’t. No tag from a pro means your device is not legally compliant.
Repair or Replace?
When should a backflow preventer be replaced instead of repaired? It’s a math and condition problem.
- Repair if the body is in good shape (no major corrosion, cracks) and a full OEM rebuild kit costs less than half the price of a new unit. For a common $150 device, a $40 kit makes sense. For a $500 commercial unit, a $200 rebuild is smart.
- Replace if the brass body is cracked or heavily pitted, if internal parts are frozen with corrosion, or if the cost of the rebuild kit nears 60-70% of a new one. Labor is the same for both jobs. Installing new, modern parts is often better than reviving a 15-year-old assembly.
Gathering Your Gear: The Essential Tool Kit
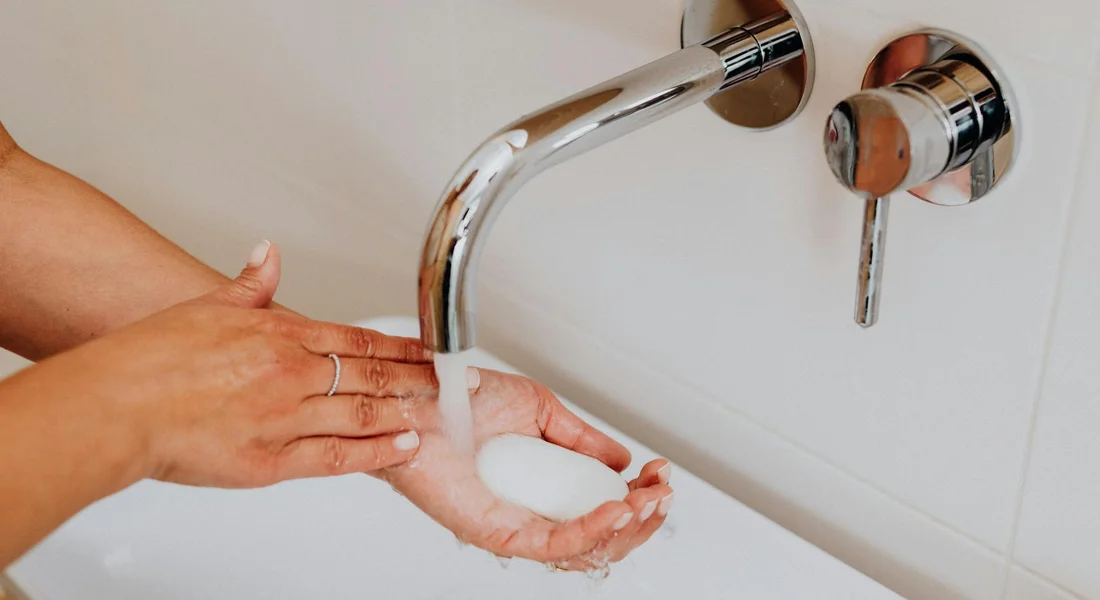
Before you touch a single bolt, get your tools ready. A proper kit saves you from frantic trips to the hardware store mid job. Here is exactly what you need on the bench.
What tools are required for repairing a backflow preventer?
This is your checklist. Grab these items first.
- Two adjustable wrenches (or a set of open-end wrenches that fit your union nuts).
- Phillips and flat-head screwdriver set.
- A large bucket or pan to catch residual water.
- A wire brush (brass is best to avoid damaging metal parts).
- Silicone-based plumber’s grease. Do not use petroleum jelly.
- A set of Allen keys (hex keys). Many covers use these.
- Needle-nose pliers for retrieving small parts.
- A flashlight or work light.
You might also need a valve key if your backflow preventer has buried shutoff valves, which is common for lawn irrigation systems. This is a handy tip when you install or maintain a sprinkler backflow preventer. Find the valve box and use the key to turn the quarter-turn ball valves to the off position.
Kits: A Simple Clean vs. A Full Rebuild
You won’t know if you need a simple cleaning or a full rebuild until you open the device. Have both options ready. Here is the difference.
| Basic Cleaning Kit | Full Rebuild Kit |
|---|---|
| Includes common O-rings and gaskets. | Includes all O-rings, gaskets, poppet seals, and springs. |
| Meant for minor leaks and seal replacement. | Includes replacement check valve assemblies (the ‘poppets’). |
| Good for annual maintenance. | Necessary for cracked check valves or failed relief valves. |
| Lower cost, available generically. | Higher cost, often model-specific. |
I keep a generic O-ring kit in my truck, but for my home’s RPZ unit, I ordered the exact manufacturer rebuild kit online. It’s worth the wait for a perfect fit.
Shutting It Down: For Repair and for Winter
You must isolate the device. Locate the shutoff valves on both the inlet and outlet sides of the backflow preventer and close them. To properly turn off a backflow preventer, you must close valves on both sides and then open the test cocks and relief valve to drain all pressure.
Can you shut it off for winter? Absolutely. This is called winterizing. After shutting the valves and draining the unit, you should also use an air compressor to blow out any remaining water from the downstream piping (like irrigation lines). Leaving water inside to freeze is a guaranteed way to crack the brass body, turning a simple rebuild into a very expensive replacement.
The Step-by-Step Tear-Down and Inspection
Safety is not the first step. It’s the only step. Get this wrong and you’ll have a basement fountain.
Critical Safety First
Do not skip this sequence.
- Shut off the main water supply to the house.
- Close the isolation valves on both sides of the backflow preventer.
- Open a downstream faucet (like a hose bib) to drain system pressure.
- Slowly open all four test cocks on the backflow device (they are usually numbered 1-4).
- Open the relief valve on the top of the device. You should hear a hiss of air, not a gush of water.
- Place your bucket underneath. There will still be some water in the body.
If water continues to flow after opening the test cocks, your isolation valves are not holding, and you must stop and call a pro. Faulty shutoffs are a common reason DIYers get soaked.
What are the steps to disassemble a backflow preventer?
Follow this order. Take photos with your phone after each step if you’re worried about remembering how parts go back together.
Step 1: Remove the Test Cocks
Using an adjustable wrench, unscrew the small test cocks (the little faucet-like valves). Set them aside carefully. The screws inside are delicate.
Step 2: Unbolt the Top Cover
Remove the screws or bolts holding the main top cover or relief valve housing. On my device, this required a 5/16″ Allen key. Lift the cover straight off. You’ll now see the relief valve spring and the first check valve. From here, the placement of the check valve directly influences deep-well function. In the next steps, we’ll discuss proper seating and orientation to ensure optimal flow.
Step 3: Remove the Check Valve Modules
Carefully lift out the first check valve assembly (poppet, spring, and seat). Then, unbolt the middle section of the device to access the second check valve. Remove it the same way. Lay each part out in order on a clean towel so you know which goes where and which way it faces.
Step 4: Remove the Relief Valve
If your model has a separate relief valve diaphragm, remove it now by taking out its retaining screws. Note how the diaphragm and spring are oriented.
The Inspection: What to Look For
Now, play detective. Clean each part with water and your wire brush. Avoid harsh chemicals. Inspect everything under good light.
- Cracked or Warped Poppets (Check Valves): These are the heart of the device. Like a heart valve, they must seal perfectly. If they are nicked, worn smooth, or cracked, they must be replaced. No amount of cleaning will fix a bad poppet.
- Worn or Flattened O-Rings: Check every groove. Stretched, brittle, or misshapen O-rings are the most common cause of leaks.
- Corroded or Weakened Springs: Springs lose tension over time. Compare the two. If one is noticeably shorter or more compressed, replace both.
- Mineral Scale and Debris: Crusty buildup on seats or poppets prevents sealing. Clean it off gently with vinegar if brushing doesn’t work.
The inspection tells you if you’re doing a clean-and-grease job or using the full rebuild kit. If the check valves look good, just replace all the O-rings and grease everything. If the poppets or springs are bad, install the new ones from your kit. A full rebuild makes the device like new for another decade. For a quick reference, see our sump pump check valve guide. It covers valve sizing, installation tips, and common issues.
Cleaning, Rebuilding, and Putting It All Back
How to Clean Every Internal Component
Cleaning is not just about making parts look new. It is about removing the mineral scale that prevents seals from closing fully. That scale is your enemy.
Start with the check valves and the relief valve seat. These metal surfaces must be perfectly smooth. For a household cleaner, white vinegar works well. For tougher scale, a product like CLR is stronger. Soak the parts in your chosen cleaner for at least 30 minutes to dissolve the hard water deposits.
Use a soft-bristled brush, like an old toothbrush, to gently scrub the seats and valve bodies. Do not use metal brushes or scrapers. You will scratch the mating surfaces and cause leaks.
Rinse every part thoroughly with clean water. Dry them completely with a lint-free cloth. An old cotton t-shirt works perfectly. The goal is zero grit, zero lint, and zero cleaner residue left behind.
Swapping Out the Worn-Out Parts
Your rebuild kit has new parts. Your old parts are a map. Lay each old O-ring, spring, and seal next to its new counterpart from the kit before you install anything.
Matching them side-by-side ensures you do not put a seal in the wrong groove or use the wrong spring tension. This is the most common rebuild error I see on service calls.
Once matched, apply a thin coat of silicone-based plumber’s grease to every rubber seal and O-ring. This grease lubricates the seal for installation, helps it seat properly, and prevents it from drying out and cracking. Do not use petroleum jelly or other lubricants. They will degrade the rubber over time.
The Reassembly Sequence That Matters
Reassembly is the reverse of disassembly. That sounds simple, but the order is critical. Refer to the photos you took earlier.
Start by placing the cleaned check valve components into the lower body. Then, install the new relief valve assembly. When tightening the body bolts, use a crisscross pattern, just like tightening a car tire. This ensures even pressure on the seals. If you’re replacing or adjusting a water heater relief valve, follow the next steps to complete the process and verify proper operation.
If your manual provides torque specs (like 15 ft-lbs), use a torque wrench. If not, tighten the bolts firmly by hand with a wrench, then give each one an extra quarter-turn. Do not crank them down with all your strength. You will crack the valve body.
After reassembly, you must adjust the relief valve. Open the test cocks. Slowly turn the adjustment screw on the relief valve clockwise until you feel resistance (this is the closing point). Then, open it by turning counterclockwise one full turn. This is a standard starting point for proper operation.
Testing, Mistakes, and Keeping It Working
How Do You Test It After the Repair?
You can perform a basic function test at home. First, do a visual check. With the water turned back on, look for drips or sprays from the body bolts or test cocks. A single drip means a seal is not seated right.
Next, do a flow test. Open a hose bib or faucet downstream from the preventer. Let the water run. Then, quickly close the faucet. You should not see any water discharging from the relief valve outlet during this sudden pressure change.
A proper pressure decay test with gauges hooked to the test cocks is a job for a certified tester. Your city’s cross-connection control program likely requires an annual test by a pro. Your job is to ensure the unit holds pressure and does not leak visibly.
Common Mistakes You Must Avoid
What are common mistakes to avoid during backflow preventer repair? I have seen these three stop a job cold.
- Forcing bolts. If a bolt will not thread in easily, it is cross-threaded. Back it out and start again. Stripping the threads in a plastic or brass body means buying a whole new valve.
- Using the wrong lubricant. Vaseline, motor oil, or dish soap will eat away at rubber seals. Use only plumber’s grease labeled safe for potable water.
- Forgetting to open the upstream and downstream shut-off valves fully after the repair. A partially open valve can create chatter and damage your new internals.
Your New Maintenance Roadmap
Think of your backflow preventer like your furnace filter. It needs regular attention to work when you need it. Follow this simple schedule.
- Every 3 months: Do a 2-minute visual inspection. Look for leaks, corrosion, or debris around the vents.
- Every year: Before winter, shut off the water, disassemble the valve, and clean all internal components as described above. Replace any worn seals.
- Every year: Hire a certified professional to perform the official, legally required pressure test. They have the gauges and the license.
The “water science” is simple. Water contains dissolved minerals like calcium and magnesium. When water sits or evaporates inside the valve, these minerals solidify into scale. Scale holds seats open. Similarly, dissimilar metals (like brass and steel) in contact with water can create galvanic corrosion, which pits metal surfaces. Annual cleaning physically removes this scale and stops corrosion from getting a foothold.
For long-term care, always shut off and drain the preventer if it will be exposed to freezing temperatures. During any work, wear safety glasses. Sprays from pressurized lines are dangerous. Know your local plumbing code requirements, as they are the final authority on installation and testing. Also consider frozen pipes prevention solutions—such as insulation, heat tape, and proper drainage—to reduce risk during cold spells. These measures complement the shut-off and drainage practices above and will be linked in the next steps for more detail.
Common Questions
How do I know if my repair was successful before calling for the official test?
First, with the water back on, do a thorough visual check for any drips or leaks from the body or test cocks-there should be none. Next, perform a flow test by quickly opening and closing a downstream faucet; no water should discharge from the relief valve during this pressure change. These are good basic checks, but the legally required pressure performance test must still be completed by a certified technician with proper gauges.
What’s the single biggest mistake homeowners make during a DIY attempt?
The most critical error is not verifying the water is completely off and depressurized before starting. If your isolation valves don’t hold and you open the device, you’ll cause a major flood. Another common misstep is using the wrong lubricant, like petroleum jelly, which will degrade the rubber seals over time.
When is replacement the only sensible option instead of a rebuild?
Replace the entire unit if the main valve body has any cracks, deep corrosion pits, or significant threads. It’s also time for a new one if internal parts are frozen solid with mineral deposits or if the cost of the specific rebuild kit is nearly as much as a new device. Installing a new unit is often smarter than fighting a 15-year-old assembly. When evaluating water heater repair vs replace, consider the unit’s age, repair history, and energy efficiency. A newer model can offer better reliability and lower operating costs over time.
What safety gear is non-negotiable for this job?
Always wear safety glasses-sprays from unexpected pressurized lines can cause serious eye injury. Sturdy gloves are also recommended to protect your hands from sharp metal edges and mineral deposits. Good lighting is a tool for safety, too, allowing you to see clearly and avoid mistakes.
Can I use common household cleaners to dissolve the scale inside?
Yes, white vinegar is a safe and effective soak for dissolving typical mineral scale on internal metal parts. For heavier deposits, a commercial descaling product like CLR can be used. No matter what you use, you must rinse every component thoroughly with clean water afterward to prevent contaminating your potable water lines.
Final Tips for Backflow Preventer Reliability
Pressure test your backflow preventer immediately after any repair to ensure it seals and functions correctly. Schedule an annual inspection to catch wear early and keep your water system safe.
Written by Bob McArthur. Bob is a an HVAC and plumbing industry veteran. He has professionally helped homeowners resolve issues around water softeners, heaters and all things related to water systems and plumbing around their homes. His trusted advice has helped countless of his clients save time, money and effort in home water systems maintenance and he now here to help you and give you first hand actionable advice. In his spare time, Bob also reviews home water systems such as tankless heaters, water softeners etc and helps home owners make the best choice for their dwelling. He lives around the Detroit area and occasionally consults on residential and commercial projects. Feel free to reach out to him via the contact us form.