Water Heater Not Heating? How to Check if It’s On
Your hot water vanished. Let’s find out if your water heater is actually running.
We will cover checking the power source, inspecting the pilot light, and testing the heating elements.
I fix these for a living. Start with the breaker-it’s the most common fix.
Safety First: What to Do Before You Touch Anything
Your first job is to make the unit safe to work on. This is not a suggestion.
For an electric water heater, go to your main electrical panel and turn off the correct 30-amp double-pole breaker. For a gas unit, find the gas control valve on the heater and turn the knob to the “pilot” or “off” position. Only then should you remove an access panel or touch any wiring. These prep steps also apply if you’re installing or adjusting an electric water heater. In the next steps, you’ll find the installation and adjustment guide with relevant links.
Working on live 240-volt circuits or gas lines is dangerous. Local plumbing and electrical codes (like the IPC and NEC) often require a licensed professional for this work. If you smell gas or see damaged wiring, stop immediately and call a pro.
Your Homeowner’s Tool Kit
You don’t need a truck full of gear. These few items will let you diagnose most power and heating issues safely.
- Non-contact Voltage Tester: This is your first-line safety tool. It beeps and lights up when it detects live voltage without touching the wire. I keep one in my pocket on every job.
- Multimeter: For confirming power is off or testing heating elements. A basic digital model is perfect.
- Flashlight: Water heater closets and basements are dark. You need to see what you’re doing.
- Work Gloves: Protects your hands from sharp sheet metal edges on the access panels.
- A Cup: For checking water temperature at a faucet. Simple but effective.
The First Check: Is Your Water Heater Getting Power?
Always start with the easiest possibility. More often than you’d think, the problem is a simple lack of power.
Step 1: Check the Breaker and Outlet
Go to your main electrical panel. Look for a breaker that is “tripped” – it will be in a middle position, not fully ON or OFF. You are looking for a double-pole breaker, which is two breakers tied together with a single handle, usually labeled for 30 amps. It might be marked “water heater” or “WH.” Flip it fully OFF, then back to ON.
Some water heaters, especially in garages or basements, plug into a switched outlet. Check for a nearby light switch on the wall that might control the outlet the heater uses. Flip it on.
Step 2: Test for Power at the Unit
With the access panel still on, use your non-contact voltage tester. Carefully hold the tip near the junction box on top of the water heater where the power cables enter. If the tester beeps and lights up, power is reaching the unit.
If there’s no power here, the issue is between the panel and the heater – a tripped breaker, a bad disconnect switch, or faulty wiring. If there is power, the issue is likely inside the heater with an element or thermostat.
Step 3: Dealing with an Older Fuse Box
If your home has a fuse box, you need to find the correct fuse. Look for a round, glass fuse labeled 30 amp. The metal strip inside should be intact. If it’s melted or broken, the fuse is blown. You must replace it with an identical 30-amp fuse. Never put a larger amp fuse in its place – that’s a major fire hazard.
Step 4: Testing a Dedicated Power Switch
Some installations have a separate switch on the wall near the heater, inside a gray box. This is a disconnect switch. Flip it off and on. To test it, turn the switch off, then remove the cover plate carefully (breaker should still be on at the panel for this test). Using your non-contact tester, check for power on the wires coming *into* the switch. If there’s power going in but not coming out when the switch is on, the switch itself has failed and needs replacement.
Checking a Gas Water Heater: The Pilot Light is Key
Start at the gas control valve. You will find it at the base of the water heater, behind a metal access panel. Before you do anything, ensure the room has good airflow and eliminate any sources of ignition like candles or running motors. For a complete, step-by-step walkthrough, refer to the gas water heater troubleshooting guide. It will walk you through safety considerations and common checks as you proceed.
To remove the panel, you usually need a Phillips screwdriver. Take out the screws and set the panel aside safely. On many newer models, there is a small viewing window built into the panel itself. You can often check the pilot light through this window without full removal.
Look through that viewing window at the base of the control valve. If you see a small, steady blue flame, your pilot light is on and the heater should be working. If the window is cloudy, use a flashlight. No flame or a weak, yellow flicker means the pilot is out. If you need help relighting, see our water heater pilot light troubleshooting guide. It walks you through safe, step-by-step relighting tips.
Here is a quick water science snippet. That small pilot flame heats a device called a thermocouple. The thermocouple acts as a safety switch by generating a tiny electrical signal only when it is hot, which commands the gas valve to stay open. If the pilot blows out, the thermocouple cools, the signal stops, and the gas valve shuts to prevent a dangerous leak.
Relighting the pilot is straightforward but demands caution. The steps below are general. Your first and most important step is to locate and read the manufacturer’s relighting instructions on the label attached to your water heater. They are the final authority. Note that light relight pilot water heater models can vary by manufacturer, so model-specific guidance matters. We will link to those model-specific instructions in the next steps.
- Turn the gas control knob from “On” to “Pilot.”
- Press and hold down the red reset button (or the knob itself on some models).
- While holding the button, use a long match or grill lighter to ignite the pilot through the lighting hole.
- Keep the button depressed for about 60 seconds after the pilot lights, then release it slowly.
- Turn the knob from “Pilot” to “On.” You should hear the main burner click on if the tank needs heat.
If the pilot refuses to stay lit after you release the button, the thermocouple is likely bad. I keep a spare universal thermocouple in my toolbox because it is a common failure point.
One more simple check. Trace the gas line back from the control valve to find the main manual shutoff valve. The valve handle should be parallel to the gas pipe to indicate it is open. If it is turned perpendicular to the pipe, the gas is off. Align it with the pipe to restore supply.
Checking an Electric Water Heater: Thermostats and Elements
Your first move is always safety. Go to your home’s circuit breaker panel and turn off the power to the water heater. Do not skip this step. Verify the power is off with a non-contact voltage tester before touching any panels. Follow water heater safety guidelines for additional precautions.
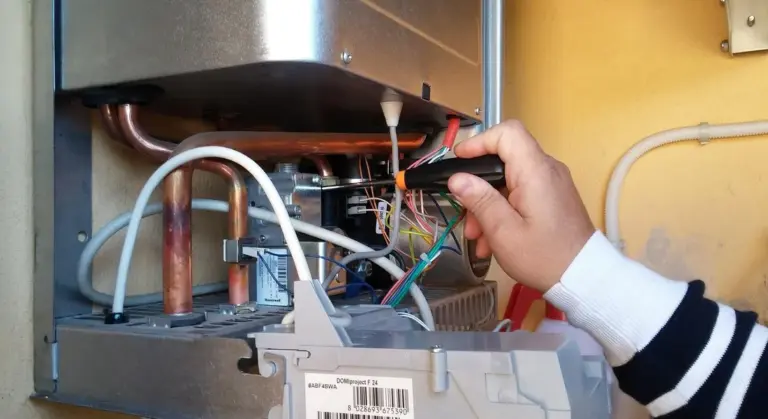
With the power confirmed off, remove the access panels on the side of the tank. They are typically held by one or two screws. Behind these panels, you will find the thermostats and, behind a separate insulation cover, the heating elements.
You will see one or two thermostats, each with a temperature dial. The dial should be set to 120°F (49°C) for a balance of safety, comfort, and energy efficiency. Next to the dial is a red, rectangular button. This is the high-limit reset. If this button is popped out, it means the thermostat has tripped because the water got too hot.
To check and adjust the thermostat settings, use a flat-head screwdriver on the dial. Set it to 120°F. If your heater has two thermostats (one for an upper and lower element), set both to the same temperature. In my last house, I found the upper thermostat cranked to 140°F, which explained the skyrocketing electric bills.
If the thermostats are set correctly and the reset button is pushed in, but you still have no hot water after restoring power, the heating elements are the next suspects. Testing these elements for failure requires a multimeter to check for electrical continuity, which is the logical next diagnostic step.
How to Test Electric Water Heater Heating Elements

If your water is lukewarm at best, a failed heating element is a prime suspect. Testing them with a multimeter is a straightforward diagnostic. Safety is not optional here. You are dealing with high voltage and water.
Safety First: The Non-Negotiables
Before you touch anything, complete these steps. I skip them in my own basement at my own peril.
- Go to your home’s main electrical panel and find the breaker for the water heater. Switch it to the OFF position.
- Use a non-contact voltage tester on the wires at the water heater to double-check the power is truly off.
- Close the cold water inlet valve on top of the water heater.
- Connect a garden hose to the drain valve at the bottom and run it to a floor drain or outside. Open the drain valve and a hot water faucet in the house to relieve pressure and drain a few gallons of water from the tank. This prevents a flood when you remove the element.
The Multimeter Test Procedure
Each element has two terminals. You’ll test for two failures: a broken element (no continuity) and a shorted element (ground fault).
Testing for Continuity (a Complete Circuit):
- Set your multimeter to the resistance (Ohms Ω) setting.
- Remove the plastic wire covers and disconnect the two wires from the element’s terminals.
- Touch one multimeter probe to each of the element’s terminals. A good lower-wattage (4500W) element will typically show 10-16 Ohms. A higher-wattage (5500W) element will read 8-12 Ohms.
- If your meter reads “O.L” (Open Loop) or infinity, the element is broken and must be replaced.
Testing for a Ground Fault (Short to Tank):
- Keep your multimeter on the resistance (Ohms Ω) setting.
- Touch one probe to a clean, bare metal spot on the water heater tank.
- Touch the other probe to one of the element’s terminals.
- The meter should read “O.L” (no continuity). Repeat for the other terminal.
- If you get any resistance reading (like 0 or 10 Ohms), the element is shorted to the tank and is faulty.
Clear Signs of a Faulty Heating Element
You don’t always need a multimeter to suspect an element. Your hot water tells the story.
- Water never gets fully hot. The thermostat calls for heat, but a dead element can’t deliver.
- Hot water runs out extremely fast. If only one of two elements works, your tank’s capacity is effectively halved.
- The breaker trips repeatedly. A shorted element draws excessive current, overloading the circuit.
DIY vs. Pro Verdict
Difficulty Rating: 6/10. Physically replacing a bad element is a common DIY job. The hard part is doing it correctly. The wiring must be perfect to prevent a short, and the new element’s gasket must seal completely to avoid a major leak. If you are not confident in making watertight electrical connections, call a technician.
How to Know Your Water Heater is Actually Heating
Sometimes the heater is working, but you need proof. Use your senses and a simple tool for confirmation.
The Simple “Touch Test”
Find the two pipes connected to the top of the tank. One is the cold water inlet, the other is the hot water outlet. After the heater has been idle for an hour, feel both pipes.
The cold inlet pipe should feel cool. The hot outlet pipe should feel warm to very hot. If both are cold, the heater isn’t running. If the hot pipe is only lukewarm, it’s not heating to the set temperature.
Listen for Operational Sounds
Put your ear near the unit when it should be heating.
- Electric Heaters: Listen for a very low hum or quiet buzz. That’s the sound of the elements energizing and heating.
- Gas Heaters: You’ll hear the distinct “whoosh” of the main burner igniting and the steady sound of the gas flame.
Banging or rumbling sounds are a red flag. This is sediment at the bottom of the tank superheating and exploding into steam. It strains the tank and reduces efficiency. The tank needs to be flushed.
Check the Water Temperature
For the most accurate check, use a cooking thermometer. Run the hot water at a faucet closest to the water heater into a mug or glass. Let it run for a minute to clear the pipe of cooled water.
Insert the thermometer. For safety and efficiency, your water should be around 120°F (49°C). If it’s significantly lower, adjust the thermostat on the heater. If it won’t reach temperature, you have a problem with the heating system.
Check for Error Codes
Modern water heaters with digital displays will often show an error code (like “E01” or “F1”) if a sensor or component fails. Consult your unit’s manual. A blinking light on a simpler model often follows a code pattern you can decipher with the manual. If your unit also emits a beeping pattern, that beeping is usually tied to the same fault and you can find the details in the water heater abc error beeping section of the manual.
Troubleshooting and When to Call a Professional
You’ve checked for power, pilot lights, and heating elements. Sometimes the problem is bigger than a tripped breaker or a cold thermocouple. These are the clear red flags that tell you to stop and assess the situation.
The “Red Flag” Troubleshooting Guide
1. The Smell of Rotten Eggs
This is a critical sign. That sulfur smell usually means one of two things. First, and most dangerous, is a natural gas leak. Gas companies add a chemical called mercaptan to give gas that distinctive odor. If you smell it near the water heater, get everyone out of the house immediately. Do not turn any lights or appliances on or off. Call your gas company or emergency services from outside.
The other common cause is sulfur bacteria in your water reacting with a depleted anode rod in the tank. This is not an immediate safety hazard but means your tank is losing its corrosion protection. The fix involves replacing the anode rod, and sometimes shocking your plumbing system with hydrogen peroxide or chlorine bleach.
2. Water Pooling Under the Tank
A small amount of condensation on the tank or pipes on a humid day is normal. Actual water forming a puddle on the floor is a major problem. First, dry the area completely. Then check all the pipe connections, the T&P relief valve, and the drain valve for drips. If the water is coming from the tank itself, usually from a seam or the bottom, the internal tank has failed. A leaking tank cannot be repaired; the entire water heater must be replaced.
3. No Hot Water After All Checks
You confirmed power is on, the pilot is lit (for gas), or the elements are getting voltage (for electric), but the water stays cold. This points directly to a failed component. For gas heaters, the gas control valve is likely faulty. For electric heaters, one or both heating elements are probably burnt out and need replacement. Before replacing parts, use a multimeter to test them for continuity to be sure. For a structured, step-by-step approach, see our water heater not heating troubleshooting guide. It walks you through safety checks, testing procedures, and common fixes.
4. Discolored or Rusty Water
If brown or reddish water comes from your hot taps only, the inside of your tank is rusting. This happens when the sacrificial anode rod is completely gone and the tank steel is exposed to the water. Rusty water means your water heater is actively corroding and its lifespan is severely shortened. You can try replacing the anode rod to slow the corrosion, but the damage is done. Start planning for a replacement.
Create a Simple System Maintenance Roadmap
Most water heater failures are slow. Good maintenance catches problems early and extends your tank’s life by years. I do these two things at my own house.
Test the Temperature & Pressure (T&P) Relief Valve Every 6 Months
This valve is a critical safety device that prevents the tank from exploding if it overheats. Testing it is simple. Place a bucket under the discharge pipe (usually on the side of the tank). Carefully lift the valve’s test lever for a few seconds until you hear a rush of hot water and steam into the bucket. Let it snap back. If no water comes out, or it continues to drip after releasing, the valve is bad and must be replaced immediately.
Drain and Flush the Tank Annually to Remove Sediment
Minerals in your water settle at the bottom of the tank. This sediment insulates the water from the heat source, making the heater work harder. It also causes rumbling noises and can clog the drain valve. Turn off the power or gas. Connect a standard garden hose to the drain valve and run it to a floor drain or outside. Open the valve and let a few gallons flow out until the water runs clear. This simple flush can significantly improve efficiency.
The Final, Firm DIY vs. Pro Verdict
Knowing your limits saves money and prevents disasters. As a technician, here is my straightforward rule.
Any work involving the gas line, gas valve replacement, or a suspected tank leak requires a licensed plumber. Gas work is not for DIY. A mistake can lead to fire, explosion, or carbon monoxide poisoning. A professional also carries the insurance and liability.
For electric heaters, swapping a verified bad heating element or thermostat is a common DIY job if you are comfortable with basic wiring and circuit testing. Electrical diagnosis beyond a simple element swap often needs an electrician. If you are tracing down a faulty circuit board or complex wiring issue, call a pro.
Recommended Products for Upkeep
When you need parts, don’t buy the cheapest option. These are the items I keep on my service truck and in my own basement.
- Heating Elements: Look for low-watt-density (LWD) or ultra-low-watt-density (ULWD) elements. They last longer and reduce sediment build-up compared to standard elements. Brands like Camco or Richmond are reliable.
- Anode Rods: Consider a powered anode rod if you have sulfur smell issues, or a combo aluminum/zinc rod for general use. They are the best upgrade you can make for tank longevity.
- Draining Hose: A standard, heavy-duty 3/4-inch garden hose dedicated to this task. Keep it nearby. The cheap vinyl ones can kink and melt from the hot water, so get a rubber one.
Common Questions
How do I know if my water heater is even trying to heat?
Use your senses. After an hour of no hot water use, feel the pipes on top of the tank; the hot water outlet should be warm. Listen closely-you should hear a low hum (electric) or the burner firing (gas). If both are absent, it’s not receiving the command or power to start.
What do different sounds from my water heater mean?
A steady hum or burner roar is normal operation. Loud popping or rumbling is a red flag for sediment buildup, which hurts efficiency and can damage the tank. That specific noise means it’s time for an annual flush to clear the mineral deposits from the bottom.
My pilot light keeps going out after I relight it. What’s wrong?
A pilot that won’t stay lit usually points to a faulty thermocouple. This safety sensor must be heated by the pilot flame to keep the gas valve open. If it’s worn out, it won’t send the proper signal, causing the valve to shut. This is a common, straightforward part replacement.
My water heater has a blinking light or error code. What should I do first?
Don’t panic. An error code is the unit’s way of diagnosing itself. Your first action is to find the manual (often available online with your model number) and look up that specific code. It will tell you if it’s a simple reset or indicates a failed component that needs professional service.
I’ve checked everything in the guide, but I still have no hot water. Now what?
If power, pilot, and basic settings are confirmed, the issue is likely a failed internal component like a gas control valve or heating element. This is the point where systematic testing with a multimeter is required. If you’re not comfortable with this diagnostic step, it’s time to call a licensed technician.
Final Water Heater Verification Tips
Always start your check with the power and pilot light, since problems here are frequent and easy to fix. If both are working, then test the heating elements to confirm your heater is on and heating properly.
Bob is a an HVAC and plumbing industry veteran. He has professionally helped homeowners resolve issues around water softeners, heaters and all things related to water systems and plumbing around their homes. His trusted advice has helped countless of his clients save time, money and effort in home water systems maintenance and he now here to help you and give you first hand actionable advice. In his spare time, Bob also reviews home water systems such as tankless heaters, water softeners etc and helps home owners make the best choice for their dwelling. He lives around the Detroit area and occasionally consults on residential and commercial projects. Feel free to reach out to him via the contact us form.