Disconnect Water Lines Like a Pro: Sinks, Toilets, Washers
That water line is leaking behind your toilet, or you need to swap out a faucet. Do it wrong and you’ll have a flood on your hands.
We will cover locating your shut-off valves, the two tools you actually need, the simple steps for each fixture type, and how to deal with a stubborn connection.
I’ve been under sinks and behind washers for twenty years. Here’s your one takeaway: if you skip shutting off the water first, you’re asking for a mess.
Gear Up and Get Safe: Your Pre-Work Checklist
Rushing in causes floods. I learned this the hard way years ago on a service call, watching a homeowner scramble for every towel they owned after a small drip turned into a stream. Ten minutes of prep saves an hour of mopping. Let’s get you set up right.
Your first job is to prepare the area to prevent water damage, and this is non-negotiable. Clear everything from under the sink or behind the toilet. Lay down old towels or a small bath mat to catch drips. Have a shallow bucket or a small plastic container ready to catch water from the line when you disconnect it. A flashlight or work light is crucial for seeing in dark cabinets.
How Do I Turn Off the Water Supply Before Starting?
Find the right valve. Do not skip this step. The goal is to stop water at the fixture, not the whole house.
- For Sinks: Look under the sink for two small valves, one for hot and one for cold. These are called angle stops. Turn the handle clockwise until it stops. If it’s a lever-style valve, turn it a quarter-turn so it’s perpendicular to the water line.
- For Toilets: The shutoff is usually on the wall or floor behind the toilet. It’s a single valve connected to the fill valve supply line. Turn it clockwise until snug.
- For Washing Machines: These are typically two individual valves (hot and cold) on the wall behind the machine. Turn both handles clockwise to shut off. Some setups have a single dual-outlet valve box.
Now, test your work. Turn on the sink faucet or flush the toilet. A trickle of leftover water in the lines is normal, but a steady flow means the valve isn’t fully closed. If the valve is old and leaks or won’t shut off completely, your last resort is the main house shutoff. Find it now, before you have an emergency.
What Tools Do I Need on Hand?
You don’t need a fancy toolbox. These basics will handle 95% of disconnects.
- Adjustable wrenches (two are ideal)
- Slip-joint pliers
- Basin wrench (for tight sink spaces)
- Flashlight
- Bucket and towels
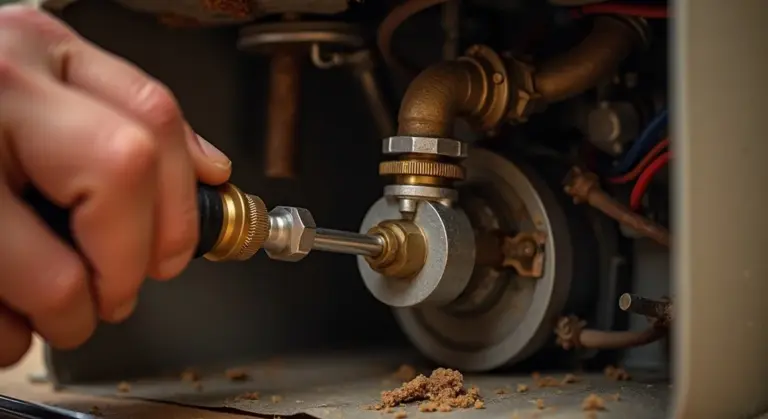
Always have a new, generic supply line ready before you start. Old lines corrode and can fail when you touch them. A spare 12” or 20” flexible stainless steel line is cheap insurance. Here’s a pro tip: when loosening a connection, use a second wrench to hold the fixture nut steady. You turn one wrench counter-clockwise while the other prevents the pipe or valve from twisting and breaking.
The Main Event: Disconnecting Lines from Each Fixture
With the water off and your tools laid out, you’re ready. This is the hands-on part. Move slowly, keep your light aimed, and remember: righty-tighty, lefty-loosey.
How Do I Disconnect the Supply Lines from a Sink Faucet?
Crawl under the sink with your light. You’ll see two supply lines (usually flexible braided hose) connecting the angle stop valves to the faucet tailpieces.
- Place your bucket under the connection you’re working on.
- For flexible lines: Use one wrench on the compression nut at the faucet tailpiece. Use a second wrench to hold the tailpiece itself steady. Turn the nut on the supply line counter-clockwise. It should spin off by hand after a few turns.
- For rigid copper lines: The process is similar, but these can be more stubborn. Use your two wrenches with care to avoid kinking the copper.
A basin wrench is your best friend for sink faucets with no room to swing a regular wrench. Its long handle and pivoting jaw grab nuts in the tightest spots. Once the line is free, some water will drain into your bucket. Point the open line into the bucket as you move it away.
How Do I Disconnect the Supply Lines from a Toilet?
This is often the simplest disconnect. Locate where the flexible supply line connects to the bottom of the toilet tank at the fill valve. For toilet water supply line repair, that connection is usually the first place to inspect for leaks or wear. A quick fix is often tightening or replacing the line here.
- Hold the fill valve shank inside the tank steady with one hand or a wrench. You don’t want it spinning.
- With your other wrench, loosen the coupling nut on the supply line (the nut on the line itself) by turning it counter-clockwise.
- Once loose, unscrew it by hand. Be ready for a cup or two of water to come out of the line.
If the nut won’t budge or the valve spins, you’ve hit the common “can’t disconnect water line from toilet” snag. We’ll cover solving that stuck connection in the next section. Forcing it usually breaks the plastic fill valve. Before you try any more, shut off the toilet’s water supply to prevent a flood. Our turn-off toilet water supply guide walks you through the valve and safe steps.
How Do I Disconnect the Supply Lines from a Washing Machine?
These are typically the easiest. Pull the machine out carefully from the wall to access the valves and hoses.
- Ensure both hot and cold valves are firmly off.
- Grip the hose where it connects to the valve. These are usually hand-tightened, but pliers might be needed if they’re old.
- Turn the hose coupling counter-clockwise to unscrew it from the valve.
Have your bucket ready immediately, as washing machine hoses hold a surprising amount of water. Point the open end into the bucket as soon as it’s free. The drain hose is separate, usually just pressed into a standpipe or held by a clip. Just pull it out.
When Things Get Stuck: Fixing Corroded or Seized Connections
You turned the valve off, grabbed your wrench, and the supply line nut won’t move. Don’t panic. Stubborn, corroded connections are one of the most common issues in home plumbing. Every homeowner and technician runs into them. This section answers two key questions: how to handle these seized fittings and what to do if water won’t stop dripping.
How to Free a Line That Won’t Budge
Force is rarely the right first answer. You can easily snap a valve stem or crack a pipe. Start smart and work your way up.
- Penetrating Oil is Your Best Friend. Soak the connection where the nut meets the threads with a quality penetrant like PB Blaster or Liquid Wrench. Let it sit for at least 15 minutes. Apply it two or three times, tapping the fitting gently with a wrench to help vibration draw the oil in.
- Use Controlled Heat. If oil doesn’t work, heat can expand the metal nut, breaking the corrosion’s grip. Always use a hair dryer or a heat gun on a low setting, never an open flame from a torch. Wave the heat evenly around the nut for a minute or two, then try your wrench.
- Leverage Carefully. For the final stubborn nuts, use a proper wrench (not pliers) and a cheater bar. A piece of steel pipe slid over the wrench handle gives you more torque. Use steady, increasing pressure, not a sudden jerk. If it doesn’t move with substantial force, stop. You’re risking a major break.
What to Do When Water Keeps Dripping
You shut off the fixture valve, but water still drips from the line. This means the shutoff valve has failed internally and isn’t sealing.
Your immediate move is to shut off the water to the entire house at the main shutoff valve. Know where this is before you start any project. Once the main is off, the drip will stop. You can now safely remove the old supply line. The fixture’s shutoff valve will need to be replaced. If you’re working on a sink, this is a good time to consider fixing or replacing the sink supply lines as well. We’ll walk through how to do that in the next steps.
If you need a minute to locate the main valve or get a bucket, you can contain the drip. Wrap a thick rag tightly around the connection, or screw a cap onto the threaded outlet if the line is already disconnected.
When to Clean vs. When to Replace
Mineral buildup from hard water is a prime culprit for stuck parts. If you’re wondering how to clean a hard water line in a toilet, the answer often lies in the nuts and valves, not the bowl line itself.
After removing a crusty supply line, soak the nut in white vinegar for a few hours to dissolve limestone deposits. Scrub it with an old toothbrush. This can salvage a decent part.
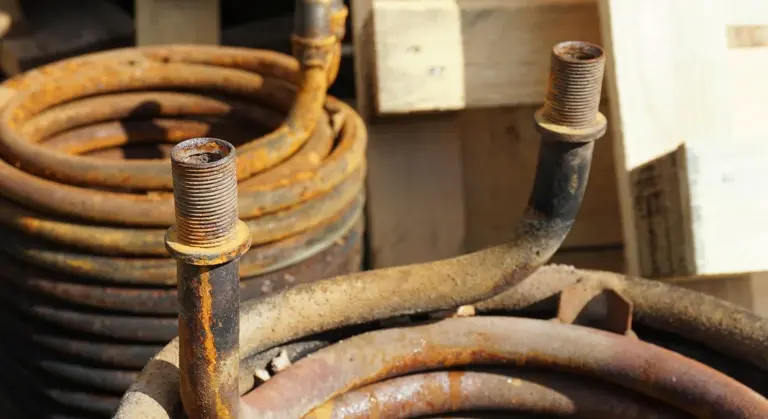
If you see heavy green corrosion (on copper) or deep rust flakes (on steel), replacement is the only safe choice. Cleaning pitted, corroded metal won’t restore a reliable seal. New braided stainless steel supply lines are inexpensive insurance against a future leak, especially compared to trying to fix a copper pipe leak in corroded sections.
The Clean Break: Capping and Reconnecting Lines
The line is disconnected. Now you either need to seal the open valve outlet (capping) or attach a new line (reconnecting). The goal is a perfect, leak-free seal.
How to Cap an Open Water Line
If you’re removing a sink for a remodel and leaving the pipes in the wall, you must cap the open ends. This keeps dirt out and prevents accidental flooding if the main valve gets turned back on.
For a threaded valve outlet, use a threaded cap of the same size (usually 1/2″). Always wrap the male threads clockwise with Teflon tape or apply pipe thread sealant (dope) before screwing on the cap. Hand-tighten, then give it a final snug turn with a wrench.
For a temporary cap on a smooth copper tube, a push-fit style plug (like a SharkBite cap) is a foolproof, tool-free solution. Just push it on until it clicks.
Reconnecting for a Leak-Free Finish
Attaching a new line is the reverse of removal, with a focus on precision.
- Ensure the rubber or plastic gasket is clean and seated inside the new supply line’s connector.
- Hand-tighten all connections first. Get them finger-tight.
- Use a wrench for the final turn. Tighten the nut until it is snug, then give it only an additional quarter to half turn. Over-tightening crushes the gasket and causes leaks.
The most crucial step is this: slowly turn the water back on at the main valve and then at the fixture valve. Watch the new connections closely for a full minute. A single drop means you need to slightly tighten that specific nut. Do this check before closing up walls or sliding appliances into place.
Water Science: Why Connections Fail and How to Prevent It
On service calls, the toughest part of a simple faucet swap is often getting the old supply line off. It’s not your strength. It’s chemistry. Water quality directly determines if a connection comes apart easily or becomes a battle. Hard water deposits often cause those stubborn fittings to seize up.
Hard water, measured in Grains Per Gallon (GPG) or Total Dissolved Solids (TDS), deposits mineral scale (mostly calcium and magnesium) inside fittings and on threads. Over years, this scale acts like concrete, seizing nuts onto their ferrules or shanks. What should be a simple quarter-turn with a wrench becomes a stripped, broken nightmare. This is why it’s important to prevent scale buildup in your water system.
Water with an unbalanced pH is just as destructive. Water that’s too acidic (low pH) aggressively eats away at metal, causing pinhole leaks. Water that’s too basic (high pH) promotes corrosion, leaving behind that familiar green or white crust on brass and copper. This corrosion weakens pipe walls and makes connections brittle.
This science explains why knowing how to clean water line in toilet is a key preventive task. The small screen on the toilet fill valve is a magnet for hard water scale. A clogged screen slows filling and strains the valve. Cleaning it yearly prevents pressure drops and fixture failure.
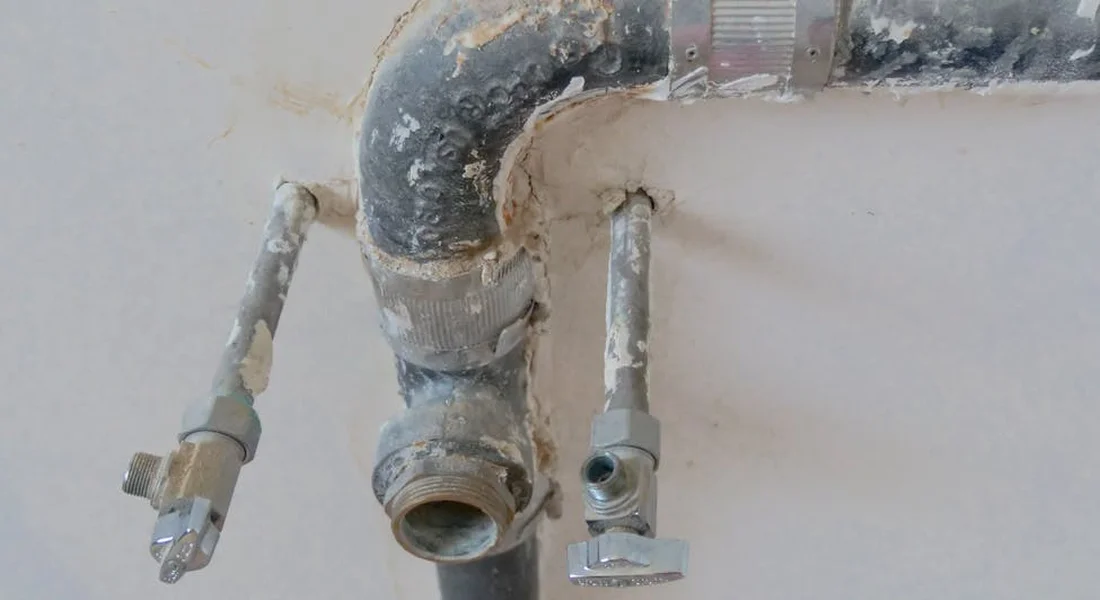
The DIY vs. Pro Verdict and Long-Term Care
Disconnecting a modern supply line from a sink is basic plumbing. Disconnecting a 30-year-old line from a galvanized steel nipple is a potential flood. Know your limits before you start. If you’re considering under-sink filtration, proper install and ongoing maintenance matter for a safe, leak-free setup. Plan ahead for fittings, valves, and filter changes.
Difficulty Rating: When to DIY and When to Call a Plumber
DIY (3/10 Difficulty): This applies to standard disconnections on fixtures installed within the last 10-15 years. You have accessible, functioning shutoff valves. The connections are brass or stainless steel and turn freely with a wrench. You’re just swapping a fixture.
Call a Pro (8/10 Difficulty): This is for severely corroded or seized connections, or any home with lead supply pipes. The definitive line is this: if the shutoff valve won’t fully stop the water, or if the pipe itself starts to twist when you turn the nut, stop immediately. You are now in leak territory. A pro has the tools and parts to repair the valve or pipe in-line without causing major damage.
Your Supply Line Maintenance Roadmap
Proactive checks prevent midnight emergencies. Follow this simple schedule:
- Every 6 Months: Do a visual and touch inspection of all exposed supply lines under sinks, behind toilets, and at the washing machine. Look for dampness, bulges, or any discoloration.
- Every 5-7 Years: Replace all flexible braided stainless steel supply lines as preventive maintenance. Their rubber liners degrade from the inside out.
- Annually (Hard Water Homes): Shut off the toilet’s water, flush to drain the tank, and unscrew the supply line from the fill valve. Check the valve’s inlet screen for mineral grit. Rinse it clean. This five-minute task preserves water pressure and fixture life.
The “Red Flag” Troubleshooting Guide
If you see any of these five signs, address the issue immediately. Do not wait.
- Any visible drip or leak, no matter how small. A drip today is a stream tomorrow.
- A green or white crusty buildup on the connection. This is active corrosion weakening the metal.
- The supply line feels soft, has a bulge, or the braided sheath is frayed. This indicates an imminent rupture.
- Water pressure from that specific fixture suddenly drops. This often means a clogged screen or a failing valve.
- The shutoff valve requires excessive force to turn or will not close fully. A valve that doesn’t work is useless in an emergency.
Common Questions
What’s the safest way to handle a connection that won’t budge?
First, soak the nut with penetrating oil like PB Blaster and wait 15 minutes. If it’s still stuck, apply gentle, even heat with a hairdryer-never an open flame. Using a second wrench to hold the valve steady prevents snapping the pipe when you apply leverage.
Water keeps dripping after I turn off the valve. Now what?
That valve has failed internally. Your immediate step is to shut off the water at the main house shutoff to stop the flow. Once the main is off, you can safely replace the faulty fixture shutoff valve.
How do I cap the supply line if I’m removing a fixture for good?
For a threaded valve, wrap the threads clockwise with Teflon tape and screw on a matching threaded cap, finishing with a snug wrench turn. For a clean copper pipe end, a push-fit style cap is a simple, tool-free solution for a secure seal.
What’s the secret to reconnecting a line without leaks?
Always use a new supply line with its gasket intact. Hand-tighten all connections first, then use a wrench for just an additional quarter to half-turn—over-tightening crushes the gasket and causes leaks. Turn the water on slowly and watch the connection for a full minute, especially when connecting to water heater supply lines.
Do you have a quick reconnection checklist?
Confirm the water is off, inspect all parts for cracks or corrosion, and ensure gaskets are clean and seated. After tightening, slowly restore water pressure at the main, then the fixture valve, while checking for drips. This final inspection is your best defense against a callback leak.
Secure Your Work and Prevent Leaks
Always turn the water off at the main valve or individual fixture stop before you touch any supply line. Keep two wrenches handy to hold fittings in place and avoid twisting pipes, which causes costly leaks. If you’re unsure where the shut off valves are, take a moment to locate shut off water lines so you can respond quickly in an emergency. This knowledge helps you shut off water fast and prevent water damage.
Bob McArthur
Bob is a an HVAC and plumbing industry veteran. He has professionally helped homeowners resolve issues around water softeners, heaters and all things related to water systems and plumbing around their homes. His trusted advice has helped countless of his clients save time, money and effort in home water systems maintenance and he now here to help you and give you first hand actionable advice. In his spare time, Bob also reviews home water systems such as tankless heaters, water softeners etc and helps home owners make the best choice for their dwelling. He lives around the Detroit area and occasionally consults on residential and commercial projects. Feel free to reach out to him via the contact us form.