Sump Pump Guide: Why You Need One and How to Install It Right
Worried about a flooded basement? A sump pump is your best defense against water damage.
We’ll cover why a sump pump is non-negotiable, how to pick the right model, and the step-by-step installation process.
I’ve pulled and fixed dozens of these from wet basements. Get the install wrong, and you’re just moving water from the pit to your floor.
What a Sump Pump Actually Does in Your Basement
Think of a sump pump as your home’s automatic basement bailing bucket. You don’t need to be there with a bucket and a mop. It sits in a hole in the floor and kicks on the second water starts to collect, pumping it away from your house. There are different sump pump work types—submersible and pedestal. Understanding these work types helps you pick the right pump for your basement.
The system has two main parts. First is the pit, called the sump. It’s a hole, usually lined with a plastic or concrete basin, dug into the lowest part of your basement or crawlspace. This is where water naturally flows and gathers. The second part is the pump itself, which sits down inside that pit.
Here’s a simple way to picture it. It works a lot like the tank of a toilet. Water fills the pit (the tank). A float switch rises with the water level (like the toilet’s float ball). Once the water hits a certain height, the switch triggers the pump. The pump then pushes the water out through a discharge pipe that leads outside, away from your foundation. The pit empties, the float drops, and the pump shuts off until the next time.
The Real Cost of Not Having One: Why Sump Pumps are Needed
This isn’t just about a damp floor. It’s about preventing expensive, structural damage. Water is heavy and relentless. Without a way to redirect it, that pressure has to go somewhere, and that somewhere is into your home’s concrete and wood.
A sump pump directly protects your foundation from cracking under hydrostatic pressure. It keeps water from seeping through the cove joint where your wall meets the floor. If you have a finished basement, it protects your drywall, flooring, and everything you store down there. I’ve seen a single storm flood ruin a home gym and a brand-new entertainment center because the homeowner thought their basement was mostly dry.
The secondary benefits are just as critical: a dry basement is a basement free from mold and pests. Mold needs moisture to grow. Eliminate the pooling water, and you eliminate the condition mold needs to take over your walls and air. Similarly, many insects and rodents are drawn to dark, damp spaces. A dry basement is a much less inviting home for them.
So why doesn’t every house have one? It comes down to your property’s specific conditions. Houses built on sandy, well-draining soil with a deep water table might never see groundwater in the basement. Houses on clay soil or in areas with a high water table absolutely will. Local building codes often require sump pumps in new construction for homes in flood-prone zones or with specific foundation types. If your house is older and on good soil, it might have been built without one. But weather patterns change, and what was a dry lot 30 years ago might not be today.
Picking the Right Sump Pump for Your Problem
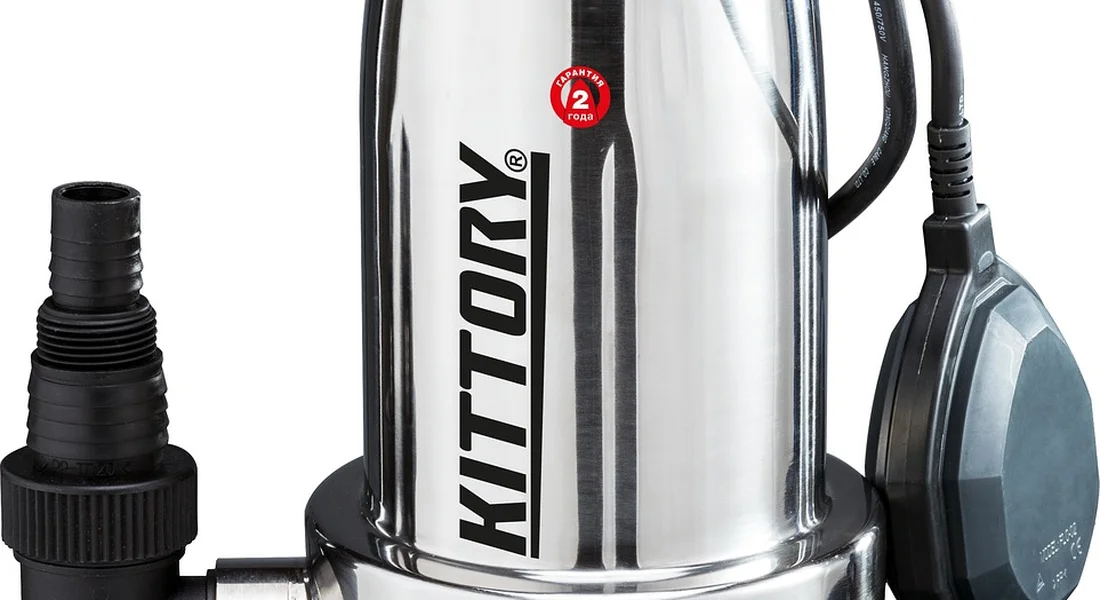
Choosing a pump isn’t about grabbing the biggest one. You match the tool to the job. Get it wrong and you waste money or still get a flooded basement.
Submersible vs. Pedestal: A Basement Reality Check
Forget the sales sheet. Here’s how they work in a real home.
- Submersible Pump: The motor and pump sit inside the sump pit, underwater. It’s quieter and out of sight. This is my choice for any finished basement or living area because it’s sealed and doesn’t look like industrial equipment. The trade-off? It can be more expensive and might have a slightly shorter lifespan if it runs constantly.
- Pedestal Pump: The motor sits on a long column above the pit, with only the pump inlet down in the water. It’s louder and takes up visual space. Go with a pedestal if your sump pit is in a utility room or crawlspace where noise and looks don’t matter, as they are often easier to service and can last longer with intermittent use.
Horsepower, Head Pressure, and Battery Backup Truths
These specs tell you what the pump can actually do.
Horsepower (HP) is about pumping volume. A 1/3 HP pump handles most residential basements. Step up to 1/2 HP if you get a lot of water fast or have a high water table.
Head pressure is how high the pump can push water vertically through the discharge pipe. Check the pump’s chart. If your pipe runs up 8 feet from the basement and then 20 feet across the yard, you need enough pressure for that total “head” height. A weak pump will spit water out weakly or not at all.
A battery backup system is not a second primary pump. It is an emergency life raft for when the power goes out during a storm. It runs on a deep-cycle marine battery. A good one will give you 5-7 hours of runtime. You must maintain the battery and test the system every few months. Without it, a power outage means your primary pump is just a paperweight in a filling pit.
Matching the Pump to Your Water Problem
Look at your basement’s history. Be honest about the water.
- Light, Occasional Seepage: A basic 1/3 HP submersible with a standard float switch is sufficient. A pedestal could also work here.
- Moderate, Regular Inflow: Choose a reliable 1/3 or 1/2 HP submersible with a tethered float switch for more precise control. A battery backup is a wise investment here.
- Heavy, Rapid Flooding: You need a robust 1/2 HP pump, and you should seriously consider a dual-pump system with a primary and a backup pump in the same pit. For serious water problems, a battery backup is not optional; it’s part of the core system.
The Tools and Mindset You Need Before You Start Digging
Installing a sump pump is a major project. Rushing in gets you hurt or makes a bigger mess. Get your gear and head right first. Take a calm, step-by-step approach. Up next, a step-by-step sump pump installation guide will walk you through the process.
The Complete Tool and Safety List
You will need all of this. No shortcuts.
- Breaking & Digging: Jackhammer (for concrete floor), sledgehammer, cold chisel, shovel, spade, wrecking bar.
- Piping & Assembly: Hacksaw or PVC cutter, corded drill with masonry and standard bits, pipe wrench, channel-lock pliers, screwdrivers, PVC primer & cement, Teflon tape.
- Safety Gear (Non-Negotiable): Safety goggles, heavy-duty work gloves, hearing protection, a respirator mask (for concrete dust), and knee pads.
The Realistic Time Commitment
If your pit needs to be dug in an existing concrete floor, a DIYer is looking at a full weekend project-possibly 12-16 hours of hard labor. A professional crew with the right tools can often do the same job in one long day, because they have the muscle and experience to work faster and solve problems on the fly. If you’re just replacing an existing pump in a ready pit, that’s a 2-3 hour job for anyone.
The First and Most Critical Step
Before you swing a hammer or push a shovel, you must know what’s under your floor.
Call 811 or your local “Call Before You Dig” service at least a few business days before you start. This is free, it’s the law, and it prevents you from hitting a gas line, electrical conduit, or water main. They mark the public lines. For anything within your home’s footprint, you need to trace where old plumbing, drain lines, or electrical might be. Hitting a sewer line while installing a flood preventer is the worst kind of irony.
Step by Step: How to Install a Sump Pump Properly
Finding the Best Spot and Digging the Pit
Find the natural low point in your basement or crawlspace first. Water always finds the lowest level, so look for damp spots, water stains, or where you’ve seen pooling after a heavy rain. In my own basement project, I found the spot by watching where a spilled bucket of water flowed.
Dig the pit once you locate the spot. The pit must be larger than your sump basin to allow for gravel backfill, typically 6 inches wider and deeper than the basin itself. A common basin is 18 inches wide and 24 inches deep, so aim for a pit about 24 inches wide and 30 inches deep.
Cutting through a concrete floor? Use a rented concrete saw or a hammer drill with a masonry bit to break through the slab safely. Wear goggles and a dust mask. After removing the concrete, dig out the soil to your final depth.
Setting the Basin, Pump, and Piping
Place the sump basin liner into the dug pit. Surround the basin with a few inches of coarse gravel for stable drainage and to keep silt from clogging the pump. The top rim of the basin should sit flush with your basement floor. This is part of digging and preparing the sump pump pit, laying the groundwork for proper installation. In the next steps, we’ll cover sizing and shaping the pit for optimal drainage.
Set the pump inside the basin now. Secure the pump to the basin bottom using the provided brackets or a weighted base to prevent movement during operation. Connect the discharge pipe directly to the pump’s outlet port, tightening it with a pipe wrench.
Install a check valve on the vertical section of the discharge pipe. This valve is critical because it stops discharged water from flowing back into the pit, which prevents the pump from short cycling and burning out. Mount it within a foot of the pump outlet, ensuring the arrow on the valve points away from the pump toward the exit.
Route the discharge pipe to the outdoors. Direct the water at least 10 feet away from your home’s foundation to prevent it from seeping back in. Keep in mind that some locations may require a greater setback than 10 feet. Check local guidelines or a contractor for the recommended sump pump discharge distance from the house to stay compliant and protect your foundation. To avoid freezing, bury the pipe below your local frost line or insulate it above ground. Check your city codes, many prohibit draining sump water into the sanitary sewer system.
The Final Test and Cleanup
Test the system with a simple pour water in procedure. Slowly pour about 5 gallons of water into the sump pit until the float switch rises and activates the pump. The pump should turn on, push water out the discharge pipe, and shut off automatically. If it doesn’t, check the power connection and float switch alignment.
Seal the lid completely after a successful test. A tightly sealed lid blocks radon gas and moist air from entering your living space, which is a common oversight in DIY installations. Use a lid with a rubber gasket or apply a bead of silicone sealant around the rim before securing it with screws.
Your Sump Pump Maintenance Schedule: Keep It Running
Follow this clear maintenance roadmap to keep your pump ready. Consistent, simple checks are far cheaper than dealing with a flooded basement.
Do these three quick checks every season, about four times a year.
- Listen for unusual noises when the pump runs, like grinding or humming, which can mean debris or a worn motor.
- Look for any new moisture or leaks around the pit, pump casing, and pipe connections.
- Test the pump by pouring a bucket of water into the pit to confirm it starts and drains properly.
Perform an annual deep clean every spring. Unplug the pump, disconnect the discharge pipe, and lift the entire unit out of the pit for inspection. Here are the steps I use at home for sump pump inspection and maintenance.
- Clean the pump intake screen and impeller of all dirt, gravel, and debris.
- Remove all sludge and sediment from the bottom of the sump pit with a wet vacuum.
- Inspect the check valve for mineral buildup or cracks, and clean or replace it if needed.
- Reinstall the pump, reconnect the piping, and run another full test cycle.
Know the replacement timeline for your equipment. A standard submersible sump pump typically lasts 7 to 10 years before needing replacement, even with good care. For a battery backup system, plan to replace the sealed lead acid battery every 3 to 5 years, as it will lose its ability to hold a full charge.
When This Job Calls for a Professional Plumber
Installing a sump pump is a common DIY project, but some situations are a professional’s game. Getting it wrong can lead to a flooded basement or damage to your home’s foundation. The consequences of a failed sump pump can be severe.
Signs a DIY Install is a Bad Idea
You should call a plumber if your project involves any of these complexities.
- Complex Drainage or Long Discharge Runs: If the water needs to be pumped more than 20 feet horizontally from your house, you’re dealing with added friction and potential freezing issues that require careful pipe sizing and slope calculation.
- Deep Footer Drains or a High Water Table: If your sump pit needs to be dug deeper than about 3 feet, or if water rushes in as fast as you can dig, you need a pro with the right equipment and safety knowledge for deep excavation.
- Electrical Complications: Any wiring that isn’t a simple plug into a nearby GFCI outlet needs a licensed electrician. This includes installing a dedicated circuit, a new outlet in the pit, or wiring for a battery backup system.
- Permit Requirements: Many localities require permits for sump pump installation, especially if it ties into municipal storm drains. A professional knows the codes and can handle the inspection.
- A Thick or Reinforced Basement Slab: Breaking through several inches of concrete, especially if it has wire mesh or rebar, is a job for a contractor with a concrete saw and jackhammer.
If you see water in the hole as you’re digging or the discharge path is not straightforward, stop and get a quote from a pro.
What Professional Installation Costs
You pay for expertise, labor, and warranty. For a standard submersible pump installation in an existing pit, expect a range of $650 to $1,800. A completely new system, where a pit must be carved from the concrete floor and drainage pipe run, typically costs between $1,200 and $3,500.
The final price depends on your pump type, the depth and difficulty of excavation, the length of discharge piping, and your local labor rates. A battery backup unit or sophisticated water alarm system will add several hundred dollars more.
Get at least three detailed, written quotes that break down labor and material costs before you choose a contractor.
Is It Worth Installing One If My Basement Has Never Flooded?
Yes. Think of a sump pump as cheap flood insurance for everything in your basement. I installed one in my dry basement five years ago, and it has kicked on dozens of times during heavy spring rains, moving thousands of gallons I never knew were there.
Water tables rise, extreme weather happens, and municipal storm drains can overload. The first sign of water on your floor is already a failure. A sump pump works silently below the floor to prevent that first sign from ever happening.
The cost of a pump and installation is a fraction of replacing a ruined water heater, furnace, or finished basement. It protects your home’s structural integrity and prevents mold. If you have a basement, installing a sump pump is one of the most proactive maintenance steps you can take.
Common Questions
Do I really need a sump pump if my basement has never flooded?
Yes. Water tables and weather patterns change. A sump pump is proactive protection; the first sign of water on your floor is already a failure. Installing one is far cheaper than repairing the water damage, mold, or structural issues it prevents.
Can I install a sump pump myself to save money?
It depends on your situation. Simple pump replacement in an existing pit is very DIY-friendly. However, breaking concrete, digging a deep new pit, or running complex discharge lines are signs to call a professional plumber to ensure it’s done safely and effectively.
What’s the single most important part of the installation?
Routing the discharge pipe properly. It must direct water at least 10 feet away from your foundation. Also, installing a check valve on the discharge line is non-negotiable; it prevents water from flowing back and burning out your pump.
Is a battery backup system really necessary?
Absolutely. Storms that bring flooding often cause power outages. A battery backup is your pump’s life raft, providing 5-7 hours of runtime. Treat it as a core part of your system, not an optional extra, and test the battery every few months.
Are there any alternatives to installing a sump pump?
For managing groundwater pressure and active seepage, no effective alternative exists. Improving exterior grading and gutter drainage is excellent preventative maintenance, but it complements, rather than replaces, a sump pump system for water that’s already entering below ground level.
Ensuring Your Sump Pump Works When You Need It
Install your sump pump in a pit deep enough to intercept water before it soaks your basement floor. Test the pump by pouring a bucket of water into the pit every few months and clear any debris to maintain reliable operation. Ensure you follow best practices for sump pump pit installation to enhance its efficiency.
Written by Bob McArthur. Bob is a an HVAC and plumbing industry veteran. He has professionally helped homeowners resolve issues around water softeners, heaters and all things related to water systems and plumbing around their homes. His trusted advice has helped countless of his clients save time, money and effort in home water systems maintenance and he now here to help you and give you first hand actionable advice. In his spare time, Bob also reviews home water systems such as tankless heaters, water softeners etc and helps home owners make the best choice for their dwelling. He lives around the Detroit area and occasionally consults on residential and commercial projects. Feel free to reach out to him via the contact us form.