Deep Well Pump Check Valve: The Right Spot and Job
Is your deep well pump losing prime or cycling non-stop? Putting the check valve in the wrong place is usually the culprit.
Let’s get straight to the fix. We will cover the single best location for installation, exactly how this valve protects your pump, and the straightforward steps to get it done.
I’ve swapped more valves than I can count. Install it directly above the submersible pump, or you’ll burn out the motor fighting backflow.
What Does a Check Valve Actually Do for My Well?
Think of a check valve as a one-way swing gate in a fence. Water from your pump can push the gate open and flow up into your house. The moment the pump shuts off, the weight of the water in the pipe above tries to flow backward. That slams the gate shut.
It keeps everything moving in one direction only: up and out.
Without this simple device, you face three major headaches. The first is water flowing back down the well. All the water your pump just pushed up the pipe would simply drain back down once the pump stops. Your pump would have to refill that entire pipe every single time it starts. That wastes energy and wears the pump out fast. It’s even more problematic if you are trying to pump water without electricity.
The second problem is pump short-cycling. If a check valve fails, water can surge back and forth in the pipes. This can trick your pressure switch into thinking the pressure is dropping, causing the pump to turn on and off rapidly. A pump that short-cycles will burn out its motor in short order, leading to a very expensive repair.
The third issue is loss of prime, mainly for shallow well jet pumps. If water drains back, the pump loses its prime. It will spin but won’t move any water, leaving you with no pressure at the taps. You can start and prime a well pump properly to prevent this problem.
So, do you need a check valve? Absolutely yes. Every pump system that lifts water from a lower point to a higher point requires one to hold the water and pressure in the pipes. It is not optional equipment. For sump pumps, a proper check valve is essential. Our sump pump check valve guide explains how to choose and install one.
Do all well pumps have one? Functionally, yes. Every system will have at least one check valve installed, either at the pump itself or in the discharge line. You might not see it, but it’s there working.
Foot Valve vs. Inline Check Valve: Which One Do You Have?
There are two main types, and where they’re installed tells you their purpose.
A foot valve is a check valve with a built-in strainer. It’s installed at the very bottom of the suction pipe, submerged in the well water. Its job is to prevent prime loss on suction-type pumps. When the pump stops, the foot valve holds the water in the suction line so the pump stays primed and ready.
An inline check valve, also called an above-ground check valve, is installed on the vertical discharge pipe after the pump, usually in your basement or well house. I have one on the pipe right before my pressure tank. Its job is to stop the heavy column of water in the discharge pipe from flowing backward and slamming into the pump when it shuts off. This protects the pump and maintains system pressure.
| Valve Type | Location | Use Case | Pros | Cons |
|---|---|---|---|---|
| Foot Valve | Bottom of the pump/suction pipe in the well. | Shallow well jet pumps; suction lines for above-ground pumps. | Prevents loss of prime; has a strainer to keep debris out. | Can clog with sediment; fails if not fully submerged. |
| Inline Check Valve | On the discharge pipe after the pump, above ground. | All pump types, especially submersibles. Critical for deep wells. | Easy to access for service or replacement; protects pump from water hammer. | If it fails, the entire discharge pipe can drain back to the pump. |
Here is the simple rule. Most deep well submersible pumps need both. The pump itself has a built-in check valve right at its outlet. You must also install an additional inline check valve on the discharge pipe near the pressure tank (https://watersystemwiki.com/check-valves-required-for-submersible-pumps). This second valve supports the weight of the water column and provides a backup.
Many shallow well and above-ground jet pump systems use just a foot valve. The foot valve holds the prime in the suction line, which is often enough for these shorter setups. Always turn off the power and relieve all water pressure before touching or testing any check valve. Priming shallow well pumps fixes are common when the prime is lost. Restoring the prime can bring water back to the fixtures quickly.
The Right Spot: Where to Install an Inline Check Valve
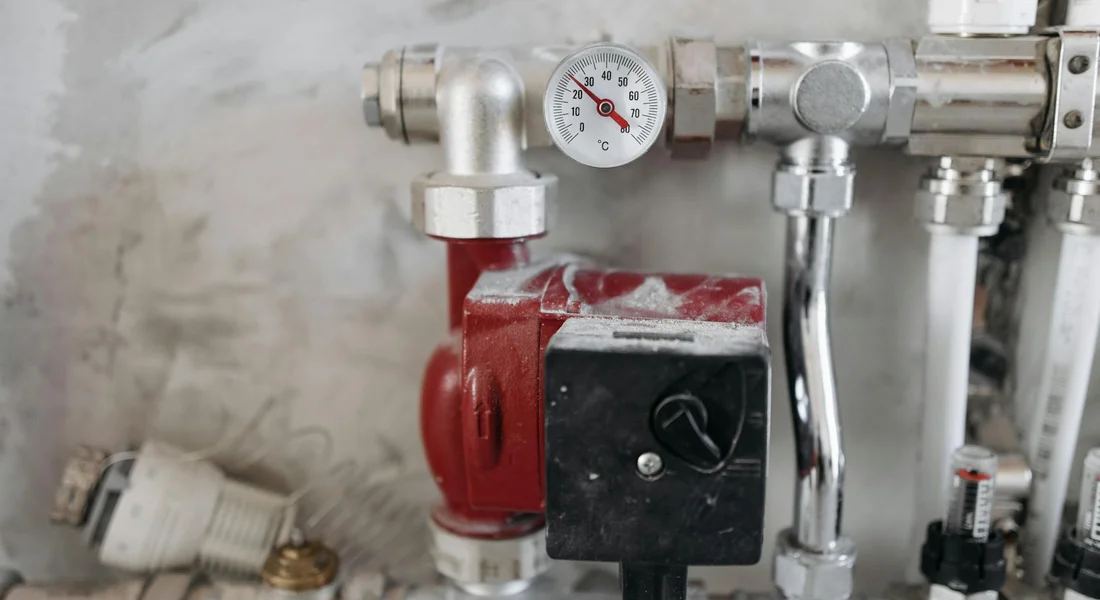
You install the main check valve on the vertical discharge pipe, between the well pump and the pressure tank. Look for a straight section of pipe coming up from the pump. That’s your spot.
Think of it like a one-way gate. Its job is to hold all the water in the pressure tank and the pipes in your house when the pump shuts off. Without it, water would flow backwards down the pipe into the well every time the pump stops. Your pump would have to work twice as hard to refill the pipe and build pressure again, causing short cycling and early burnout. It’s essential to understand the function of your well pump control box to maintain the overall health of your water system.
Installing it here ensures your system maintains pressure and your pump gets a proper rest between cycles.
Can You Add a Check Valve?
Yes, you can add a second one. You usually do this if the primary foot valve in the well has failed. The foot valve is at the bottom of the well pipe, and pulling it up for service is a major job. Adding an accessible inline valve above ground is a common and effective temporary fix. It stops the water column from draining back, saving your pump.
Just remember, two check valves in series can sometimes cause issues with water hammer or make pump startup harder for deep wells. It’s a fix, not always a perfect long-term solution if the foot valve is bad.
Code & Compliance Check
Don’t just grab any valve off the shelf. The valve must be rated for your system’s maximum pressure (check your pump’s cut-off pressure, often 60 or 80 PSI). More importantly, it must be certified for potable water. Look for the NSF/ANSI 61 or NSF/ANSI 372 certification marks on the valve or its packaging. This means the materials are safe for drinking water.
Tools & Material Checklist for the Job
Get your tools together first. It makes the job faster.
- Two pipe wrenches (one to hold, one to turn)
- Pipe cutter or hacksaw
- Teflon tape (for threaded connections) or pipe thread sealant (pipe dope)
- Measuring tape
- Bucket and rags
For the valve itself, your best choices are brass or stainless steel. I use brass on my own system. They handle high pressure and resist corrosion for decades. Avoid using a standard PVC valve on the high-pressure discharge side of a deep well pump. The pressure and potential for water hammer can crack it. If your pipe is PVC, use a schedule 80 PVC valve at a minimum, but metal is still the stronger choice.
How to Install or Replace a Check Valve: A Step-by-Step Guide
Replacing an existing above-ground check valve is a straightforward DIY job. Follow these steps.
- Shut off the power. Flip the breaker for the well pump. This is non-negotiable.
- Drain the pressure. Open a hose bib or faucet on the system side (after the pressure tank) to drain the line. Open the drain valve on the tank if it has one. You must get the system pressure to zero.
- Measure and cut. If installing a new valve, measure the valve’s length. Mark and cut out an equivalent section of the vertical discharge pipe. Use a pipe cutter for a clean, square cut.
- Prep the threads. Clean the male pipe threads. Wrap Teflon tape clockwise (2-3 wraps) or apply a bead of pipe dope.
- Install the valve. This is the critical step. The flow arrow on the valve body must point toward the pressure tank. Screw the valve into the pipe coming from the pump first. Use two wrenches-one to hold the pipe steady, one to tighten the valve. Then connect the pipe going to the tank. Do not over-tighten.
- Restore power and test. Close all faucets. Turn the pump breaker back on. Listen as the pump builds pressure and shuts off. Watch the new connections for leaks.
- Monitor the cycle. Flush a toilet or open a tap. The pump should kick on, build to its cut-off pressure, and shut off. It should stay off for a reasonable time (a minute or more) before needing to run again. If it cycles on and off every few seconds, you may have installed it backward or have another issue.
The DIY vs. Pro Verdict
Replacing an inline valve that’s already above ground? That’s a 4 out of 10 on the difficulty scale if you’re comfortable with basic tools and plumbing. The steps are clear and the parts are accessible.
Anything involving the check valve inside the well-the foot valve-is a different story. Pulling a submersible pump or the drop pipe for a jet pump is a job for a licensed well professional. They have the heavy pullers, the knowledge to avoid dropping the pump down the well, and the skill to diagnose other issues while they’re in there. Don’t risk your safety or your well trying to DIY that. Regular well pump inspection and valve maintenance can catch wear early. Include the check valve in routine maintenance for reliable operation.
Red Flag Troubleshooting: 5 Signs Your Check Valve is Failing
Think of your check valve as a silent, one-way gatekeeper. When it starts to fail, your entire system will tell you. Pay attention to these five signs, they mean your one-way gate is stuck open or won’t seal shut.
A short-cycling pump is the most common giveaway. Your pump kicks on, runs for just a few seconds, then shuts off, only to start again a minute later. This happens because water is flowing back down the well pipe, dropping the pressure in your tank too quickly. The pressure switch sees the low pressure and tells the pump to start, over and over. Common causes include a failing pressure tank or a leaky check valve. Other culprits are a mis-sized pump or a faulty pressure switch.
You’ll feel water hammer as a loud bang or shudder in your pipes when you quickly shut off a faucet or a toilet fill valve closes. The sudden shock happens because the reverse flow slams the faulty check valve closed, creating a pressure spike that travels through your pipes. It’s like a door slamming shut versus closing gently.
Listen when your pump shuts off. A healthy system is relatively quiet. If you hear a distinct clunk, gurgle, or a rushing sound back down the pipe, that’s the sound of water reversing direction because the check valve isn’t holding.
Notice your shower pressure dropping for a long time after someone flushes a toilet? If it takes an unusually long time for your pump to rebuild system pressure after normal water use, it’s a strong indicator. The pump is working to push water back up the column that drained down, not just to refill your pressure tank.
For homes with a shallow well or jet pump, a failing check valve is often the reason you lose prime. If you’re constantly pouring water into the pump housing to get it to pull water up, the check valve on the suction line is likely letting air into the system.
Check Valve Maintenance and Replacement Roadmap
Here’s the good news. A quality check valve is an “install and forget” component. There is no routine maintenance. You don’t oil it or clean it. Your only maintenance roadmap is to listen for the five troubleshooting signs above; they are your maintenance schedule. When you hear or see them, it’s time for a replacement. If a TP valve may be at fault, you can test and troubleshoot to confirm before replacing. The next steps will walk you through testing, troubleshooting, and replacing the TP valve.
The biggest enemy of a check valve isn’t wear, it’s mineral scale. If you have hard water, the dissolved minerals are a constant threat. High TDS water, specifically calcium carbonate, will foul the valve seat, preventing a tight seal. This is a solid argument for installing a water softener or conditioner before your pressure tank if your water is hard.
Recommended Product Types
When you need a replacement, skip the cheap plastic or thin brass valves. They fail quickly under constant pressure. For a deep well application, you want durability.
I install two types on my own projects and service calls. For most residential setups, a full-port brass swing check valve is excellent. The full-port design minimizes flow restriction. For systems with very high pressure or where a more positive seal is needed, a stainless steel spring check valve is the way to go. The spring assists in closing, making it more reliable against water hammer.
Always match the valve size directly to your pipe diameter. If your well pipe is 1 inch, you need a 1-inch check valve. Installing a smaller valve will choke your water flow and cause major pressure loss. The size is always stamped on the valve body.
Common Questions
1. Does the check valve have to be installed vertically?
Yes, for best operation, install it on a vertical section of pipe. Gravity helps the internal mechanism (the flapper or spring) seat properly when the pump shuts off. If you must install it horizontally, ensure the flow arrow is correct and use a spring-check style valve designed for that orientation.
2. What happens if I accidentally install the check valve backward?
Your pump will not be able to push water into your house. It will run continuously against a closed system, leading to rapid motor overheating and burnout. Always double-check that the flow arrow on the valve body points toward your pressure tank. If you’re still experiencing issues, there may be no water flow from your well pump.
3. How can I test if my existing check valve is working?
Listen closely right after the pump shuts off. You should not hear a rushing or gurgling sound back down the pipe. Also, time how long it takes for your pump to kick on after normal water use; if it starts again suspiciously fast, the valve may be leaking.
4. Is it safe to have more than one check valve in my system?
Having two (like a built-in pump valve and an inline valve) is standard and safe. However, adding extra valves as a fix can create problems. Multiple valves in series increase the risk of water hammer and make it harder for the pump to push water through, so stick to the designed setup.
5. What valve material should I choose for a replacement?
Always choose brass or stainless steel for durability and pressure resistance. Crucially, verify it has NSF/ANSI 61 certification for potable water safety. Avoid standard plastic valves on the high-pressure discharge side of a deep well pump.
Get Your Check Valve Right: A Homeowner’s Final Check
Always install the check valve on the discharge pipe, as close to the pump as possible, to stop water from draining back into the well. This single action shields your pump from unnecessary wear and maintains strong water pressure throughout your home.