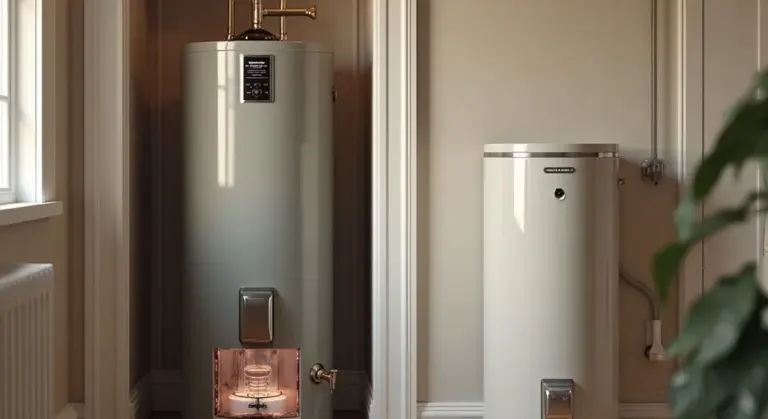
Clean Your Sump Pump Tank & Impeller: A DIY Guide
Your sump pump is your first line of defense against a flooded basement, and letting its tank and impeller get dirty is a fast way to invite disaster.
This guide will walk you through the job step-by-step, covering the critical safety steps before you start, how to properly clean the tank of sludge and debris, and the right way to scrub the pump’s impeller to clear clogs.
I’ve pulled and serviced hundreds of these pumps on service calls. Here’s the straight talk: skip the fancy cleaner additives. A garden hose, a bucket, and a stiff brush are all you really need.
How Often and Why You Need to Clean Your Sump Pump
Plan to clean your sump pump tank and impeller once a year. Late winter or early spring is the best time, right before the heavy rains and snowmelt start. You clear out a year’s worth of gunk before it has a chance to cause a spring flood. Make sure to also perform sump pump winter maintenance to keep it functioning properly all season long.
The direct answer to “How often should you clean your sump pump tank and impeller?” is once a year, without fail.
Do sump pumps need to be cleaned? Yes. Do I need to clean my sump pump? Absolutely yes. It’s not optional. The pump sits in a pit filled with the dirtiest water in your house. That water carries sand, silt, clay, and organic debris into the tank. Over time, this material settles and builds up. Cleaning your sump pump regularly is crucial, especially since no chemicals are used for sump pump maintenance.
If the sediment layer gets too high, it can be sucked into the pump. A dirty impeller-the spinning fan that moves water-loses efficiency. A clogged impeller can’t move water at all. The motor strains, overheats, and burns out. A $30 cleaning chore prevents a $400 replacement job and a $10,000 basement cleanup.
Your water’s hardness affects this. Hard water, measured in Grains per Gallon (GPG), has more dissolved minerals like calcium and magnesium. These minerals can precipitate out as scale, adding to the sediment mix. If you have a water softener, your sump pump deals with less scale, but it still gets all the physical dirt.
Think of this as your System Maintenance Roadmap. The annual cleaning is the major service. But you also have quarterly checkpoints: listen for odd sounds after a big storm, and make sure the discharge line is clear in fall. Keep a simple log on your phone. A dated note that says “cleaned pit, impeller clear” is gold when you’re trying to remember what you did last season.
Spotting Trouble: Signs Your Sump Pump Needs Cleaning Now
Don’t wait for the annual check if you see these red flags. This is your “Red Flag” Troubleshooting Guide for immediate action.
What are the signs that your sump pump tank or impeller needs cleaning? They are usually obvious if you know what to listen and look for.
- Strange Noises: Grinding, grating, or a loud humming instead of a smooth pump sound. That’s the sound of an impeller trying to spin through gravel or a worn bearing. My own pump started a weird gurgling-chugging sound last fall; it was a leaf stuck in the impeller.
- Frequent Cycling: The pump turning on and off every few minutes, even without heavy rain. This often means the sediment level is so high it’s tripping the float switch prematurely. The pump kicks on, moves a cup of water, shuts off, and repeats.
- Slow Drainage or Reduced Output: You see water entering the pit faster than the pump can evacuate it. The water level stays high. This points to a partially clogged impeller or discharge line. The pump is working, but it’s lost its strength.
- Visible Debris in the Pit: Before you even hear a problem, look. Shine a flashlight in. If you see stones, excessive silt, or debris covering the pump intake or the bottom, it’s time to clean. A layer of sediment over an inch thick is a problem.
Each of these signs connects directly to a dirty system. Frequent cycling points to a tank filled with muck. Strange noises and slow pumping almost always trace back to a clogged impeller. When you hear that grind, power down the pump and pull it for inspection. Cleaning it now is far cheaper than letting it seize up completely.
Safety and Prep: Your Non-Negotiable First Steps
What safety precautions should you take before starting the cleaning process? Treat this like you’re working on a car. You wouldn’t stick your hands near a moving fan belt. A sump pump is an electrical device sitting in water. The rules are simple and non-negotiable.
Kill the Power. Completely.
Do not just unplug it. Go to your main electrical panel and find the breaker for your sump pump. Flip it to the OFF position. Many sump pumps are hardwired, not plugged in, so this is the only way to be sure the circuit is dead. I’ve been on service calls where a homeowner just unplugged the unit, not realizing a backup pump was still live on a separate circuit. Check for a second pump or a separate alarm and kill those breakers too. Once power is restored, you may need to reset the sump pump to resume operation after the outage. Follow the manufacturer’s reset instructions before testing the unit.
Check Your Discharge Setup
Before you touch anything, look at where your pump sends the water. That pipe running out of your house is governed by your local plumbing code, which is based on the International Plumbing Code (IPC). Your discharge line must direct water away from your foundation and cannot create a nuisance or ice hazard for your neighbors. Common violations I see are dumping it right next to the house or onto a public sidewalk. If your setup looks questionable, correcting it is your first job, not cleaning the pump.
Gear Up: Your Simple PPE Kit
You’re dealing with stagnant basin water, sediment, and possibly debris. Protect yourself.
- Rubber Gloves: Thick household gloves are fine. You don’t want that water on your skin.
- Safety Glasses: A must. Sludge can splash when you pull the pump out.
- Old Clothes & Knee Pads: You’ll be kneeling on a damp floor. A cheap set of knee pads from the hardware store is a game-changer.
- A Headlamp or Work Light: Basements and pits are dark. You need both hands free and clear light to see what you’re doing.
Get your tools ready next: a bucket, a hose for rinsing (if you have a floor drain), a scrub brush, and maybe a wet/dry vacuum. With the power off and your gear on, you’re safe to start the real work.
Gathering Your Gear: The Tools and Materials Checklist
What tools and materials are needed to clean a sump pump tank and impeller? The right gear makes the job faster and protects the pump from damage. Here is the definitive list I gather for every cleaning job in my own basement.
- Bucket: For bailing out any remaining water in the pit.
- Garden Hose: To rinse the tank and the pump housing outdoors.
- Scrub Brush: A stiff-bristled plastic brush works best for scraping sludge.
- Old Towels or Rags: For drying components and cleaning up spills.
- Screwdrivers: Both flat-head and Phillips to remove the pump cover and any hose clamps.
- Shop Vacuum: For sucking up the last bits of water and fine sediment from the pit.
Can you clean a sump pump with a shopvac? Yes, a shop vac is perfect for the final dry-out of the pit after you bail most water, but do not use it as your primary water removal tool. It’s a finishing step, not the main event. For a more complete approach, see the sump pump inspection maintenance guide for full upkeep steps. It highlights valve checks, seals, and testing the pump. Finally, be smart and have a replacement check valve and spare hose clamps on hand. You don’t want to reassemble everything only to find a cracked valve or a stripped clamp, forcing another trip to the hardware store.
Cast Iron vs. Plastic: What Your Pump is Made Of Matters
Are cast iron sump pumps vs plastic a big deal? Absolutely. The material changes how you clean and what you look for. In my service calls, I see both types regularly.
Let’s talk about cast iron sump pumps. They are heavier and often considered more durable for heavy, continuous use. But do cast iron sump pumps rust? They absolutely can, especially inside the volute (the pump housing) and on the impeller. When cleaning a cast iron pump, inspect the impeller and housing interior for rust scale, which can flake off and cause clogs or reduce efficiency. You can scrub it away carefully with your brush.
Plastic pumps are lighter and completely corrosion-proof, which is a major advantage in a wet environment. Are cast iron sump pumps better? Not always. For most residential setups, a quality plastic pump is more than sufficient and easier to handle. The key difference for cleaning is that plastic impellers are more flexible, so you should be gentler when scrubbing to avoid cracking a fin. Avoid harsh chemical cleaners on plastic components, as they can cause brittleness over time.
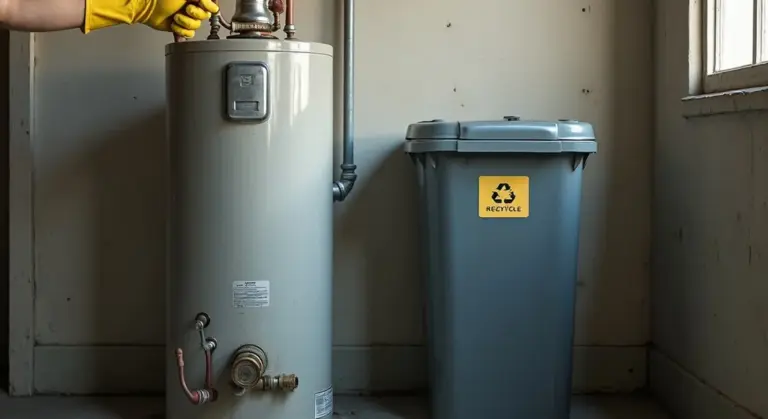
The Step-by-Step Cleanout: Tank and Pump Removal
How do you disconnect and remove the sump pump from the tank? It’s a straightforward job if you follow the right order. Properly maintaining your sump pump includes safely disconnecting it before servicing. This process gets the pump out safely so you can clean the pit and service the pump itself.
- Power Down. Go to your home’s main electrical panel and switch off the circuit breaker that powers the sump pump. Do not rely on just unplugging it. This is non-negotiable for safety.
- Disconnect the Discharge Pipe. Your pump is connected to a pipe that sends water outside. Most modern systems use PVC or ABS plastic piping, connected with a rubber coupler and stainless steel hose clamps. Simply loosen the clamps on the coupler at the pump discharge with a screwdriver or nut driver. The pipe should pull free. If your system is old and uses threaded connections, you’ll need to unscrew the pipe from the pump’s discharge port.
- Lift the Pump Out. Grab the pump housing firmly, not by the power cord or the float switch cord. Lift it straight up and out of the sump pit. Some pumps have a check valve; be careful not to bang it against the side of the liner.
- Place in a Bucket. Set the pump in a large bucket or on a tarp. Water and debris will drip from it. This keeps your floor clean and gives you a stable place to work on the pump later.
Avoid using cast iron piping for your sump pump discharge. Cast iron corrodes from the inside out from constant moisture. Flakes of rust can break off, travel back down the pipe, and jam your pump’s impeller. Stick with schedule 40 PVC when dealing with common sump pump failure causes.
Scrubbing the Sump Pit: Cleaning the Tank Interior
What is the proper way to clean the interior of the sump pump tank? You want to remove all the muck that settles at the bottom. This sludge is what your pump sits in and what can get sucked into the impeller. Additionally, make sure the sump pump pit itself is clean and free of sediment. A clean pit helps prevent debris from being drawn into the pump and keeps the system running smoothly.
Start with a wet/dry shop vacuum. Use it to remove any standing water left in the pit. Get the nozzle down into the sludge at the bottom and vacuum it all out. You’ll be surprised how much sand and grit collects there.
Next, scrub the walls and floor of the pit liner. A stiff-bristled brush and some water does the trick. For tough stains, a little dish soap is fine. Rinse everything thoroughly with a garden hose, directing the dirty water back to the center of the pit to be vacuumed out again.
While the pit is empty, take a look at the inlet where water enters from the drain tile. If there’s a screen or grate, clear any debris from it. This is also a good time to check if the drain tile itself is clear, which is a bigger project but critical for good inflow.
Water Science Snippet: Understanding the Gunk
The sediment in your sump pit isn’t just dirt. It’s a mix of fine sand, clay, silt, and often organic matter like decomposing leaves. This comes from the water soaking through the soil around your foundation.
The mineral portion, like sand and clay, is directly related to the Total Dissolved Solids (TDS) in your groundwater. High TDS water is essentially “hard” water, carrying more minerals in solution that can precipitate out as fine particles. This gritty paste is abrasive. It wears down the impeller and seals inside your pump far faster than clean water would. Cleaning the pit isn’t just about preventing a clog today, it’s a main maintenance task that extends the pump’s working life by years.
Focus on the Heart: Safely Cleaning the Impeller
How do you safely clean the pump’s impeller to remove debris? This is the most delicate part of the job. The impeller is the spinning fan-like part that moves the water.
First, you need to access it. On most submersible pumps, you look at the bottom intake screen. Often, this screen unscrews or pops off. Some models have a separate volute cover (the housing around the impeller) held by screws. Check your pump’s manual.
Once you can see the impeller vanes, use a small brush (an old toothbrush is perfect), a toothpick, or a blast from a hose to clear out hair, fibrous roots, gravel, and grit. Work gently. The key is to never bend or pry the impeller vanes. Think of them like precise fan blades. Bending them even slightly throws off the balance, causing vibration and premature failure. If a stone is truly wedged and won’t come out with gentle picking, the pump may need more serious repair.
The Inspection: What to Check for Wear and Damage
You’ve got the pump out and the tank is rinsed. Before you put everything back, you have a perfect chance to prevent the next failure. What should you check on the pump during the cleaning process for wear or damage? Every component that sees water, moves, or carries electricity needs a close look.
This inspection is your frontline defense. Catching a small problem now saves you from a flooded basement later.
Your Pre-Reassembly Checklist
Lay the pump on a dry rag and go through this list methodically. Have a notepad handy to jot down part numbers for anything that looks suspect.
- Impeller for Cracks or Debris: Spin the impeller by hand inside its housing. It should turn freely without grating. Look through the discharge opening with a flashlight. Check for hairline cracks or chips on the plastic fins. Even a small crack will grow under stress. Any debris wedged in here is a major cause of motor burnout and must be cleared completely.
- Seals and Gaskets for Brittleness: Find the main seal where the motor shaft enters the pump volute. Look for corrosion on the metal seal face. Pinch the rubber parts of the seal and any housing gaskets. They should be pliable, not hard or cracked. A brittle seal will leak water into the motor, killing it fast.
- Power Cord for Frays or Cuts: Follow the entire cord from the plug to where it enters the pump housing. Look for any nicks in the insulation, especially near the top of the pit where it rubs against the rim. Feel for soft spots. A compromised cord is a serious shock and fire hazard.
- Float Switch for Free Movement: Manually actuate the float arm or tether up and down its full range. It should move smoothly without sticking. Listen for the distinct “click” of the internal switch at the top and bottom of travel. A sticky float is the most common reason a pump won’t turn on automatically.
- Check Valve for Proper Operation: Shake the check valve you removed from the discharge pipe. You should hear the flapper or spring mechanism move. Blow through it from the pump side; air should pass. Try blowing from the exit side; it should seal shut. A failed valve allows water to flow back into the pit, causing the pump to cycle constantly.
What to Do If You Find Damage
If an inspection item fails, you need a replacement part. Don’t try to patch a cracked impeller or tape a frayed cord.
When sourcing replacements, insist on parts specifically certified for wastewater or sump pump use. These are built to handle the solids, corrosive elements, and constant moisture found in a sump pit. A standard plumbing gasket or a non-rated pump seal will fail quickly in this harsh environment. Your pump’s model number, usually on the motor housing tag, is the key to finding the right match.
At my own house, I found the float switch on my secondary pump was just slightly sticking. A quick clean and a drop of pump-safe silicone lubricant on the pivot point saved me a $40 replacement and guaranteed it would rise when needed.
Reassembly, Reinstall, and Test Run
You’ve got the tank and impeller clean. Now you need to put it all back together and make sure it works. This process is straightforward if you reverse your removal steps carefully.
How do you reassemble and reinstall the sump pump after cleaning?
Reassembly is the reverse of disassembly. Follow the same steps you used to take it apart, but in the opposite order.
- Reattach the cleaned impeller housing or volute to the pump motor. Ensure any gasket or O-ring is properly seated.
- Carefully lower the pump unit back into the empty sump basin. Make sure it sits flat and upright on the bottom.
- Reconnect the float switch tether or rod, ensuring it has free movement without snagging on the basin wall or pipe.
The most critical step is reconnecting the discharge pipe securely to prevent leaks that can cause basement water damage. Hand-tighten the threaded connection, then give it another quarter to half turn with a pipe wrench. If you have a rubber coupling, ensure the hose clamps are tight and seated beyond the ridges on the pipe. Don’t forget to reinstall the check valve if you have one, and make sure the arrow points away from the pump toward the outside.
The Final Test Procedure
Don’t just plug it in and walk away. You need to verify the pump cycles correctly. Here’s the test I run on every service call.
- Restore power to the sump pump at the outlet or circuit breaker.
- Slowly pour about 5 gallons of water into the sump pit. A standard bucket holds roughly 3 gallons, so two buckets will do.
- Watch the float mechanism. It should rise with the water level and trigger the pump to activate automatically.
- Listen. You should hear the motor running and water being pushed up the discharge pipe.
- Observe the water level. The pump should run until the water is evacuated down to the pump’s shut-off point, then turn off automatically.
- Check outside. Confirm water is exiting the discharge point away from your foundation.
If the pump turns on and successfully moves all 5 gallons out of the pit, your cleaning and reassembly were a success. If it doesn’t start, double-check the power connection and float movement. If it starts but doesn’t move water, you may have an air lock or a leak in the discharge line sucking in air. This test confirms everything is sealed, connected, and ready for the next real storm.
Keeping It Clear: Your Ongoing Prevention Plan
Let’s address a common question I get. What maintenance steps can help prevent future clogs and ensure reliable operation? The answer isn’t complicated, but it requires a simple schedule. Think of it like changing the oil in your car, but for your basement.
If you skip this, you’re betting on your pump during the worst storm of the year. I don’t make that bet with my home. Here is the straightforward system maintenance roadmap I follow and recommend to every homeowner.
Your Annual Deep Clean
Once a year, when things are dry, give the pit and pump the full treatment you just learned. This is non-negotiable. Schedule your annual sump pump cleaning for late fall, before the freeze-thaw cycle and spring rains begin. This timing ensures it’s absolutely ready for the heaviest demand. Unplug the pump, remove it, scoop out any settled silt, and wipe down the inside of the tank. Inspect the check valve and give the impeller a visual check for any new nicks or wear. This 30-minute job is your best defense against a catastrophic failure.
Your Monthly Wet-Season Test
From early spring through late fall, test your pump every month. Don’t just listen for it to click on. You need to see it move water. To perform a real test, slowly pour about 5 gallons of water into the sump pit until the float triggers the pump. Watch and listen. The pump should start, move all the water out briskly, and shut off cleanly. If it struggles, gurgles, or doesn’t shut off, you’ve caught a problem early. This monthly check takes two minutes and gives you immense peace of mind.
Your Discharge Line Duty
The pump’s work is pointless if the water just dumps right next to your foundation. This is the most common mistake I see. Your discharge line must be clear of obstructions and must direct water at least 10 feet away from your home’s foundation to be effective. Every season, check where the pipe exits your house. Clear away leaves, dirt, and rodent nests. In winter, ensure the opening isn’t blocked by ice. A buried discharge line should have a pop-up emitter that works freely. If the water pools near the wall, it’s just recycling back into your basement.
Smart Upgrades for Reliability
The basic pump does a job. A few smart upgrades make it a system you can trust. First, install a sealed, airtight lid on your sump crock. The open pits in many homes are like a welcome mat for dust, laundry lint, and humidity. A sealed lid keeps this debris out of the pit, which directly reduces what can clog the impeller. It also controls radon gas and reduces basement moisture. They are simple retrofit kits. In the next steps, you’ll find the sump pump components installation steps. These guide you through the rest of the setup.
Second, install a battery backup pump system. Your primary pump runs on grid power. When the storm knocks out your electricity, the water doesn’t stop coming. A quality battery backup unit has its own pump and float switch. A battery backup pump is the only thing that will protect your home when the main power goes out during a flood event. I have one on my system. It’s not a luxury item; it’s a critical part of a complete water management plan for your home.
One final safety tip: your sump pump should be plugged into a GFCI outlet. If that outlet trips, your pump is dead. Test your GFCI reset button monthly when you test the pump. If you have a battery backup, it should be on a separate, non-GFCI circuit to ensure it remains active if the primary outlet fails. This level of detail is what separates a working pump from a reliable system.
The DIY vs. Pro Verdict: When to Call for Help
Cleaning your sump pump is a solid homeowner task. Let’s put a number on it.
Difficulty Rating: 4 out of 10
This job is more about grunt work and caution than complex skill. A rating of 4 means you can absolutely do this if you’re okay with some lifting, basic tools, and dealing with dirty water. The challenge isn’t technical know how, it’s the physical process of pulling up a heavy, slimy pump and cleaning it thoroughly without damaging the components.
Where to Draw the Line
You are in your lane for the core cleaning and inspection. Your job is to maintain the system. A pro’s job is to fix or replace major parts of it.
Handle this yourself:
- The full cleaning process for the basin, pump, and impeller.
- Inspecting the pump case, impeller, and check valve for wear or debris.
- Testing the pump operation by pouring in water after reassembly.
- Cleaning the inlet screen on a pedestal pump.
Call a licensed plumber immediately for:
- Any repairs to the pump motor itself (unusual noises, failure to start).
- Replacing the entire sump pump unit.
- Issues with the discharge pipe or check valve that require re piping.
- Any problem related to the perimeter drain tile system (weeping tile).
- Any work on the electrical wiring, outlet, or float switch wiring.
Should You Clean the Sump Pump Yourself or Call a Plumber?
For 90% of homeowners, this is a clear DIY task. The cost benefit is huge. A service call just for inspection can run $150 before any work begins. Doing it yourself costs your time and maybe a new check valve (about $20).
Think of it like changing your car’s oil versus rebuilding its transmission. One is routine maintenance, the other is major surgery. You clean the pump to prevent the failure that requires the plumber. If during your cleaning you find a cracked pump housing, a shredded impeller, or corroded wires, your inspection just paid for itself. You call the pro with a specific problem, not for a mystery fee.
| Task | Who Should Do It | Why |
| Vacuuming out the sump basin | Homeowner | Simple cleanup, no technical skill needed. |
| Scrubbing mineral scale off the impeller | Homeowner | Requires patience, not expertise. |
| Replacing a worn check valve | Homeowner (usually) | A straightforward part swap if the pipes are accessible. |
| Pump motor hums but doesn’t pump | Licensed Plumber | Indicates a seized impeller or failed motor, internal repair needed. |
| Water is leaking back into basin rapidly | Licensed Plumber | Likely a failed check valve buried underground or in the discharge line. |
My rule is simple. If the problem is dirt, grime, or minor buildup, you fix it. If the problem is mechanical, electrical, or involves hidden plumbing, you call for backup. Sticking to that line keeps your basement dry and your wallet intact.
Common Questions
What’s the bare minimum tool kit I need for this job?
You need a bucket, a garden hose, a stiff plastic brush, and screwdrivers. A wet/dry vacuum is very helpful for the final clean-out but not strictly mandatory. That’s it-skip the fancy cleaners and stick to these basics.
What’s the most common mistake people make when putting the pump back?
Forgetting to ensure the pump sits perfectly flat and upright on the pit floor. An off-kilter pump can jam the float switch or vibrate excessively. Also, always double-check that hose clamps on discharge couplings are tight beyond the pipe’s ridges to prevent leaks.
How do I test the system after cleaning to know it’s really working?
After restoring power, slowly pour about 5 gallons of water into the empty pit. The float must rise, trigger the pump, and move all the water out before shutting off automatically. Listen for smooth operation and confirm water is exiting the discharge line outside, away from your foundation.
What’s one simple habit to prevent clogs between annual cleanings?
Every month during the wet season, visually inspect the pit with a flashlight. If you see a significant layer of sediment or debris, it’s time for an extra clean-out. This two-minute check can prevent the gunk from ever reaching your pump’s impeller.
During cleaning, when should I replace a part instead of just cleaning it?
Replace any part that is physically damaged, not just dirty. This includes a cracked impeller, a brittle and leaking seal, a frayed power cord, or a check valve that doesn’t seal. Using a worn part puts the entire system at risk of immediate failure.
My Rule for a Dependable Sump Pump
Disconnect the power and remove all sludge from the tank before it sets like concrete. A thorough impeller cleaning during this routine stops minor debris from locking up the pump during a storm.
Bob McArthur
Bob is a an HVAC and plumbing industry veteran. He has professionally helped homeowners resolve issues around water softeners, heaters and all things related to water systems and plumbing around their homes. His trusted advice has helped countless of his clients save time, money and effort in home water systems maintenance and he now here to help you and give you first hand actionable advice. In his spare time, Bob also reviews home water systems such as tankless heaters, water softeners etc and helps home owners make the best choice for their dwelling. He lives around the Detroit area and occasionally consults on residential and commercial projects. Feel free to reach out to him via the contact us form.