Dial It In: Your Guide to Water Softener Settings and Salt
You’re tired of guessing how much salt to add. You’re not sure if the buttons you’re pushing are even doing anything. Let’s fix that.
This article will show you the simple steps to get your softener working perfectly. We will cover checking your actual water hardness, adjusting the regeneration timer and hardness setting, keeping the salt tank right, and spotting common setup mistakes.
I’ve pulled and rebuilt hundreds of these units. Here’s the first thing to know: dumping in extra salt “just in case” is a waste of your money.
Spot the Clues: How Do I Know if My Water Softener Needs Adjusting?
Your water softener will give you clear signals when it’s not dialed in. If your fixtures, skin, or laundry start telling you something’s wrong, your softener settings are the first place to look. Sometimes, you may need to turn off the water softener to verify the issue. This quick step helps confirm whether the problem is with the softener or somewhere else. Here are the classic red flags.
- Showers feel scummy and leave a film on glass doors.
- Dishes and glasses come out of the dishwasher with white spots or film.
- Skin and hair feel dry, itchy, or coated after showering.
- You’re using more soap, shampoo, or laundry detergent than usual to get a lather.
- The salt in the brine tank isn’t going down, or it’s disappearing way too fast.
Try the simple hand feel test. Wet your hands with softened water and work up a lather with plain bar soap. Rinse completely. Properly softened water feels slippery or silky. Hard water feels slimy, like there’s a residue you can’t rinse off.
Before you touch any settings, always check the brine tank first. Shine a flashlight in and look for a salt bridge. That’s a hard, hollow crust of salt creating an empty space above the water. Poke it with a broom handle. If you find one, break it up and remove the chunks. Also, feel the salt. If it’s a wet, sludgy mess, you have mushy salt. Scoop it out and refill with fresh salt pellets. A bridge or mush stops the brine from forming, so no softening happens.
This answers two common questions. “How do I know if my water softener needs adjusting?” Look for the symptoms above. “What are the signs of incorrect salt levels?” Salt that doesn’t deplete points to a bridge or system fault. Salt that vanishes quickly can mean a leak or a timer set to regenerate too often.
Gather Your Tools and Test Your Water
You can’t fix what you don’t measure. To find your optimal settings, you need one key number: your raw water hardness. Grab these items first.
- Water Hardness Test Strip Kit: Get one that measures in grains per gallon (GPG).
- Notepad and Pen: Write your numbers down.
- Flashlight: For checking the brine tank and control valve labels.
- A Clean Cup: No contaminants.
- Your Softener’s Manual: If you have it. If not, the model number on the valve will help you find it online.
Here’s how to test your incoming water hardness. Find a water source that is not softened. This is usually an outdoor spigot, a basement sink before the softener, or the cold water line to your kitchen sink if it’s plumbed separately. Run the cold water for a full minute to clear the pipes. Fill your clean cup. Dip one test strip into the water for the time specified on the bottle, usually just a second. Pull it out, shake off the excess, and wait the full read time. Compare the pad colors to the chart on the bottle. This number, in GPG, is the single most important setting for your softener.
Let’s talk water science for a minute. Hardness is measured in Grains Per Gallon (GPG). One grain is a tiny unit, like a pinch of salt. Your test strip measures the calcium and magnesium in your water. A softener swaps those hardness minerals for sodium or potassium ions. It doesn’t remove other stuff, so your Total Dissolved Solids (TDS) stays about the same. It also doesn’t significantly change your water’s pH. Your goal for softened water is 0 to 1 GPG. That’s perfectly soft.
This process directly answers “How do I test the hardness of my incoming water?” and gives you the key number for “how do i set my water softener hardness.” Write that GPG number down. You’ll need it next.
How to Set Your Water Softener’s Brain: The Control Head
The control head is your softener’s brain. Getting its settings wrong wastes salt and water or leaves your home with hard water. You need to program two main things: the hardness number and how often the system regenerates.
You find your water’s hardness with a test strip. The number is in grains per gallon (GPG). Your first instinct will be to set the softener to that exact number. Don’t. Instead, use that reading to calculate the softener’s capacity size. Sizing by capacity ensures you account for daily water use and regenerations.
Set the hardness number 2-4 GPG higher than your test strip result to account for mineral variations and resin efficiency. This buffer ensures the resin beads catch all the hardness minerals before the system needs to recharge. If your strip reads 10 GPG, program your unit for 12 to 14 GPG.
To adjust it, you need to find the control valve. It’s usually a box on top of the mineral tank. Older models have a mechanical dial you turn. Newer ones have a digital keypad.
- Look for buttons labeled “Hardness,” “Program,” or “Settings.”
- Press and hold the correct button to enter programming mode.
- Use the up/down arrows to set the GPG number you calculated.
- Press “Save” or wait for it to beep and exit.
The single most important step is to find your owner’s manual online for your specific model (like Fleck or Autotrol), as the button sequences vary. If you lost it, search “(Your Model Number) manual PDF.”
After adjusting, test your softened water. A good test strip will give you the answer. Aim for 0-1 GPG coming from your softener. Anything higher means your settings are off or the unit is malfunctioning.
How Do I Adjust the Regeneration Cycle Settings?
Regeneration is when the softener cleans itself with salt brine. During regeneration, water flows through the system to flush and recharge the resin. This can briefly increase water use. You control when this happens. There are two main system types, and you must know which one you have.
- Time-Clock (Clock-Based): Regenerates on a set schedule, like every 3 days at 2 AM, whether it needs to or not.
- Demand-Initiated (Metered): Has a water meter. It regenerates only after a set amount of softened water has been used.
Metered units are more efficient and modern.
For a time-clock unit, you need to calculate the days between regenerations. You need your softener’s grain capacity (find it on the unit label or manual) and your household’s average water use.
Use this simple formula: (Household gallons per day / Softener grain capacity) = Days between regenerations. A family of four uses about 300 gallons daily. If you have a 30,000-grain system: 300 / 30,000 = 0.01. This means it uses its capacity every day, so it must regenerate daily.
For a metered unit, you set the reserve capacity. This is a safety cushion of soft water left before it regenerates. A good rule is to set it to your family’s one-day water use. For that same family using 300 gallons a day, you’d set the reserve to 300 gallons. The unit will then regenerate once it has softened enough water to leave just that 300-gallon reserve.
After you change the hardness setting, you must reset the system. You almost always need to manually trigger a regeneration cycle after programming new settings. This immediately recharges the resin with the new calculation in mind. Find the “Regen” or “Cycle” button and press it. The unit will run for about 90 minutes. Do this at a time when you won’t need soft water for a couple of hours.
The Salt Tank: Choosing, Filling, and Reading It
Your brine tank isn’t just a bucket for salt. It’s where the regeneration magic happens. Ignore it, and your whole system fails. Watch it, and you’ll catch most problems before they leave you with hard water.
If your water feels hard or you see salt issues, run through this quick “Red Flag” guide first.
- Salt Bridge: This is a hollow crust that forms over an empty space. The salt looks full, but underneath is air. Poke the salt with a broom handle. If it’s hard and you hit a void, you’ve found a bridge. Break it up completely.
- Mushy Salt Sludge: A layer of wet, muddy salt at the bottom means dirt and impurities aren’t dissolving. This gunk can clog the system. You’ll need to scoop it out during your next cleaning.
- No Water in Brine Tank: The tank should have a few inches of water. If it’s bone dry, the softener isn’t filling it. This points to a clogged brine line or a failed fill valve.
- Water Level Too High: If water is near the top of the salt, the system isn’t drawing the brine out. A clogged injector, screen, or a stuck brine valve is the usual suspect.
- Strange Odors: A rotten egg smell often means bacteria is feeding on iron in the salt. Musty smells can come from old sludge. Both call for a full tank cleanout.
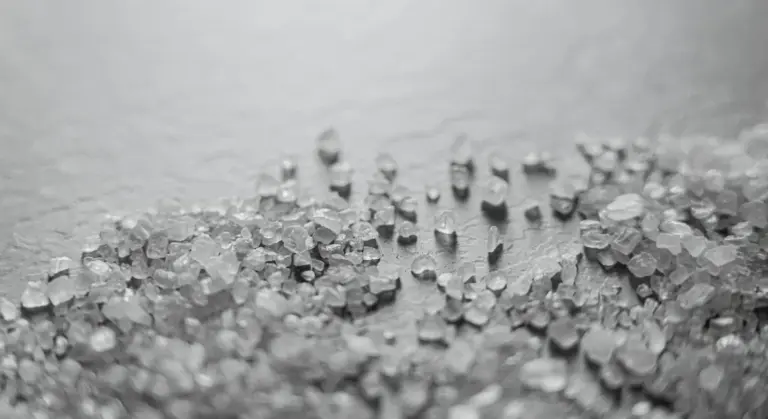
What Type of Salt Should I Use for My Water Softener?
Not all salt is the same. The wrong kind makes a mess and costs you more in cleanings. Here’s the breakdown.
For nearly every homeowner, clean, high-purity evaporated pellets are the best choice to minimize maintenance and ensure reliable operation.
How Do I Properly Add Salt to the Brine Tank?
Dumping a bag in is easy. Doing it right prevents problems. Follow these steps.
- Lift the lid and look. Never just assume the salt level is what it seems from the outside.
- Check for a salt bridge. Take a long tool, like a broom handle, and gently poke the salt. If you hit a hard crust then feel nothing, break through it until you hit solid salt or the bottom.
- If the salt is low, add your chosen salt pellets. Pour them in carefully to avoid creating dust.
- Keep the salt level between one-third and one-half full. This is the sweet spot.
- Never let the tank run completely empty. This can cause an air lock in the brine line.
- Do not overfill it to the top. Excess salt can solidify into a solid mass, creating a “salt dam” you’ll have to chip out.
Aim to keep salt in the tank at all times, topping it up when it gets to the halfway point.
What Does the Brine Tank Water Level Indicate?
The water in the brine tank tells a story. You need to know how to read it. After a regeneration cycle finishes, you should see several inches of water at the bottom, with the salt sitting above it. This is normal. The water level should stay constant between cycles and not rise too high in a waterlogged tank.
A constantly full tank, with water right up to the salt, means the softener is not drawing the brine into the mineral tank. The most common causes are a clogged injector, a dirty injector screen, or a brine valve that’s stuck shut.
A completely dry tank means the system is not adding water to make brine in the first place. Check for a kinked or clogged brine line, or a faulty fill valve control.
You might be wondering how often you need to do these checks. Make it a habit. A monthly visual check takes 30 seconds. Look at the salt level and glance at the water. When the salt is about half gone, add another bag. This routine prevents almost all salt-related failures.
Dialing in the Salt Efficiency Setting

Think of the salt efficiency setting as your softener’s advanced fine-tuning. This is not the basic hardness number or regen time. It has different names depending on your brand, like Salt Dosage, BFTC (Brine Fill Time Compensation), or Capacity Setting.
This setting directly controls how much salt dissolves during each regeneration to clean the resin beads. Getting it right is the key to balancing performance and cost.
The Fundamental Trade-Off
You are choosing between two priorities:
- Higher Salt Setting: More salty brine washes the resin more thoroughly. This gives you maximum softening capacity and is best for very hard water. The downside is you use more salt and water per cycle.
- Lower Salt Setting: This saves salt and water. For many homes, it’s perfectly adequate. But if set too low for your hardness, the resin doesn’t get fully cleaned. Over months, it can lose its capacity and you’ll get hardness “breaking through” into your water.
It’s a long-term balance. A slightly higher setting guarantees clean resin. An overly low setting slowly starves it.
How to Find Your Starting Point
Your first move should always be to find the manufacturer’s default. This is your safe baseline.
What is the optimal salt setting for my specific water softener model? The absolute best place to find this is your owner’s manual. If you’ve lost it, search online for your model number and “technical manual” or “default settings.” Do not guess, and always make sure you use the best salt for water softeners.
For example, a common default for many 1-cubic-foot systems is around 8.0 lbs of salt per regeneration. My own unit at home runs efficiently at 6.0 lbs because my water isn’t extreme. I started at the manual’s 8.0 lbs and adjusted down only after confirming my water stayed soft.
When and How to Adjust
Do not touch this setting just to experiment. Only adjust it if you have a diagnosed problem.
Start adjusting if you consistently notice signs of hardness despite having your base hardness number and regeneration frequency set correctly. Signs include spotty dishes, stiff laundry, or soap that won’t lather.
If you need to adjust, change this setting in small increments. Move it one step (e.g., from 6.0 to 7.0 lbs). Then run for 2-3 weeks and test your water softness with a test strip. Give the system time to show a change.
The goal is the lowest setting that still keeps your water reliably soft for the full period between regenerations. This maximizes salt efficiency without sacrificing performance.
My Water Still Isn’t Soft: What Now?
You adjusted the settings, you checked the salt, but the water is still hard. It’s frustrating. This is a common service call I get. Let’s run through a logical checklist. We’ll start simple and move to the more complex issues.
How to Troubleshoot Your Water Softener After Adjusting Settings
Follow these steps in order. Don’t skip ahead. You need to rule out the easy fixes before tearing into the unit.
-
Did you wait for a full regeneration cycle? This is the most common mistake. If you just changed the hardness number or time of day, the softener won’t clean itself instantly. You must manually start a regeneration cycle or wait for it to run on its next scheduled time. Check your manual for the “regen” or “cycle” button. Run it, then wait a few hours for it to complete and test again.
-
Re-test your raw and softened water. Your initial hardness test might have been wrong. Get a good test strip kit. Test the water from a hose bib or the cold line before the softener (that’s your raw, untreated water). Write that number down. Then test the water from a faucet after the softener. A properly working and adjusted softener should reduce hardness to 0-1 grain per gallon (GPG). If your raw water is 20 GPG and your softened is 18 GPG, the unit isn’t working. If your raw is 20 and softened is 0, your water is soft and the problem is elsewhere. If the softened water isn’t staying soft or the cycle isn’t renewing properly, regeneration troubleshooting may be needed. In the next steps, we’ll guide you through common regeneration issues and fixes.
-
Check for a stuck bypass valve. Look at the plumbing on your softener. There will be a bypass valve, usually with a knob or lever. It has three positions: “Service” (water flows through softener), “Bypass” (water goes around it), and sometimes a mid-point for changing tanks. Make absolutely sure it’s fully in the “Service” position. I’ve seen knobs that look turned but aren’t seated fully. Jiggle it to be sure.
-
Inspect the brine tank for salt bridges or mushy salt. Shut off the softener. Take a broom handle and gently poke down into the salt. Try to touch the bottom of the tank. If you hit a hard crust a few inches down, you have a salt bridge. The salt looks full, but water can’t reach it below the crust. Break it up. If the salt is a wet, slushy mush, you need to remove most of it. Scoop out the mush, leave a few inches of dry salt at the bottom, and refill with fresh pellets.
-
Consider the age and condition of the resin. The resin beads inside the main tank are what actually remove the hardness. They don’t last forever. If your unit is 15+ years old, the resin may be fouled, degraded, or simply exhausted. My own house had a 20-year-old unit when I moved in. Adjusting settings did nothing because the resin was shot. You can sometimes revive it with a specialized resin cleaner, but often, it means replacing the resin media or the entire tank.
-
Time to call a professional for a valve inspection. If you’ve done all the above and your water is still hard, the internal valve likely has a problem. A seal could be torn, a piston stuck, or an injector clogged. This is where you need to decide if you want to tackle a rebuild kit or call a tech. Diagnosing and fixing the valve requires taking the control head apart. It’s a precise job. For most homeowners, this is the point where calling a qualified technician makes the most sense for a definitive diagnosis.
Remember, you can you adjust water softener settings all day, but if there’s a physical blockage, mechanical failure, or spent media, those adjustments won’t help. When a water softener isn’t softening efficiently, the issue is often a hardware or media problem rather than a setting. This checklist helps you find the real problem.
Common Questions
How often should I check and adjust the salt levels?
Make it a monthly habit to visually inspect the brine tank for salt level and water condition. Top up salt when it drops to the halfway point to maintain consistent brine strength. Regular checks prevent bridges, mush, and system failures before they affect your water.
What type of salt should I use for my water softener?
For nearly all homes, high-purity evaporated salt pellets are the best choice-they dissolve cleanly with minimal residue. Avoid solar salt crystals that create sludge and require more tank maintenance. If you’re on a sodium-restricted diet, potassium chloride works but is less efficient and more costly.
How do I properly add salt to the brine tank?
Always check for salt bridges first by poking the salt with a broom handle. Add pellets carefully to keep the salt level between one-third and half full. Never overfill or let the tank run empty to prevent air locks or solid salt masses that hinder operation.
What does the brine tank water level indicate?
After regeneration, a few inches of water below the salt is normal. Water level at the top of the salt signals a clog or valve issue preventing brine draw. A completely dry tank means the fill system has failed-check lines and valves promptly.
What is the optimal salt setting for my specific water softener model?
Always start with the manufacturer’s default setting from your owner’s manual or online resources. Only adjust this salt dosage in small increments if hardness issues persist after verifying other settings. Aim for the lowest setting that reliably keeps your water soft between regenerations.
Putting It All Together and Next Steps
The single most important step is to manually test your water’s hardness with a strip after your last regeneration to see your real results. Treat your softener’s settings as a starting point that you fine-tune based on your home’s actual water use and test results over time. Doing so helps maintain water softener efficiency by aligning the system with real usage and preventing waste. Regular checks also help spot issues early and keep the unit running smoothly.
Bob is a an HVAC and plumbing industry veteran. He has professionally helped homeowners resolve issues around water softeners, heaters and all things related to water systems and plumbing around their homes. His trusted advice has helped countless of his clients save time, money and effort in home water systems maintenance and he now here to help you and give you first hand actionable advice. In his spare time, Bob also reviews home water systems such as tankless heaters, water softeners etc and helps home owners make the best choice for their dwelling. He lives around the Detroit area and occasionally consults on residential and commercial projects. Feel free to reach out to him via the contact us form.