How to Flush Your Water Heater to Remove Sediment & Boost Efficiency
Is your hot water running low or taking forever to heat up? That rumbling noise isn’t your tank’s stomach growling; it’s sediment burning on the bottom.
This guide walks you through a full system flush. We will cover how to safely drain your tank, the best method for cleaning out sludge, a simple maintenance schedule, and the signs your sediment problem is too big for a simple flush.
I’ve serviced hundreds of these tanks. The process for cleaning an electric water heater is the same as for a gas model. Your main tools are a garden hose and some patience.
The Heater is Trying to Tell You Something
How can you tell if your water heater has sediment buildup? The heater will literally tell you, if you know how to listen. Unusual noises—popping, banging, or rumbling—often point to sediment or mineral buildup. Identifying these sounds can guide you to simple fixes or when it’s time to call a professional. Ignoring these signs is like ignoring a check engine light. Eventually, the repair bill gets much bigger.
The Three Main Symptoms
Listen and look for these clear warnings.
- Strange Noises: This is the big one. You’ll hear popping, rumbling, or cracking sounds coming from the tank. It sounds like rocks tumbling in a dryer. This is sediment at the bottom getting superheated by the burner or element, then erupting as steam bubbles through the muck.
- Running Out of Hot Water Fast: Your showers go cold in half the time. Sediment acts like an insulating blanket between the heat source and the water. The heater works harder and longer to heat less water, destroying your efficiency.
- Discolored or Gritty Water: Rusty brown water, or fine sand-like particles coming from your hot water taps only, means sediment is breaking loose and traveling through your pipes.
Red Flag Troubleshooting Guide
Not every symptom means “flush me.” Some mean “I’m broken.” Here’s how to tell the difference.
Flush It Yourself (DIY Territory):
- You hear rumbling noises but you still get a normal amount of hot water.
- The hot water runs out slightly faster than it used to, but the heater is otherwise quiet.
- You see a bit of grit at the bottom of a sink, but the water color is mostly clear.
Call a Professional (Pro Territory):
- You have NO hot water. This is almost never just sediment. For electric heaters, it’s usually a failed heating element or thermostat. For gas, it could be a failed thermocouple or gas valve.
- The water is consistently a dark rust color from every hot tap. This could indicate a severely corroded tank liner or anode rod, not just sediment. The tank may be failing.
- You see water leaking from the tank itself. Sediment doesn’t cause leaks. A leak means the tank is corroded through. You need a new water heater.
Safety and Tools: The Non-Negotiable First Step
This isn’t a place to cut corners. Scalding water and electrical or gas lines are serious. Doing this right protects you and your home.
Critical Safety Precautions
Follow these steps in order. Do not skip any.
- Turn Off the Power or Gas. For an electric heater, go to your home’s main circuit breaker panel and switch off the breaker dedicated to the water heater. For a gas heater, turn the gas control knob on the unit to the “Pilot” or “Off” position.
- Shut off the cold water supply. Find the valve on the pipe entering the top of the heater and turn it clockwise until it stops.
- Let the water cool. Wait at least 5-6 hours. Draining 50+ gallons of 120+ degree water is dangerous and can melt your garden hose.
- Open a hot water faucet in your house, like a sink on an upper floor. This relieves vacuum pressure so the tank can drain completely.
- Plan your drainage. Run a garden hose from the drain valve to a floor drain, sump pump, or outside. A 5-gallon bucket is for small spills, not the entire tank.
Must-Have Tools
You don’t need a fancy kit. Gather this simple list:
- A standard garden hose (at least 5/8″ diameter, 6+ feet long).
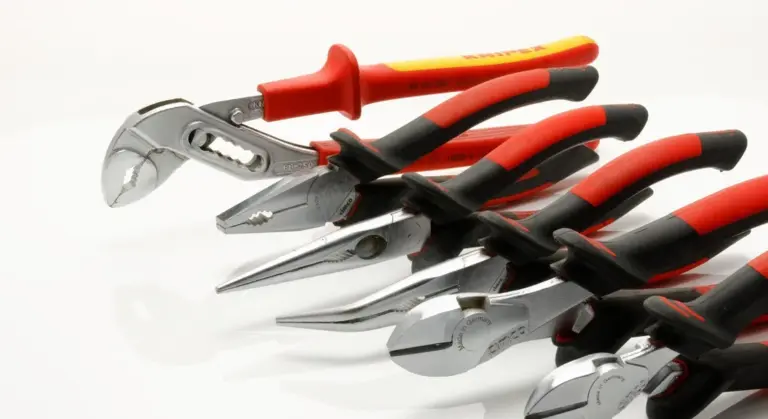
- Adjustable pliers or channel-lock pliers.
- A flat-head screwdriver (for some older drain valves).
- A 5-gallon bucket (for catching the first, grittiest blast of water).
- Work gloves and safety glasses.
If your drain valve is the cheap plastic kind and breaks, replace it with a standard 3/4″ NPT brass ball valve. It’s a common, IPC/UPC compliant fitting any hardware store carries. It won’t break next time.
Difficulty Rating
For a basic flush with a working drain valve, this is a 4 out of 10 in DIY difficulty. It’s mostly about patience and following steps. If the drain valve is completely seized or breaks off, the difficulty jumps to a 7 out of 10. You’ll need to drain the tank from another point, like the temperature and pressure relief valve line, and then replace the drain valve, which requires more plumbing skill.
The One-Stop Flush: Core Steps for Any Water Heater

Before we split into electric and gas specifics, let’s get the universal process down. These core steps are your foundation for a safe and effective flush. Gather a standard garden hose, a flathead screwdriver or a valve key, and a pair of channel-lock pliers.
Step-by-Step Guide to Draining Your Water Heater
1. Turn Off the Water and Energy Source
Locate the cold water supply valve on the pipe feeding the top of your heater. Turn it clockwise until it stops. This prevents new cold water from refilling the tank while you drain it. Next, shut off the power. For electric, go to your breaker box. For gas, turn the control knob on the unit. We’ll cover the precise details for each type next.
2. Let the Water Cool and Connect Your Hose
Water in the tank is dangerously hot. Wait at least 5-6 hours for it to cool. Connecting a hose to a full tank of scalding water is a serious burn risk, so patience here is a safety step. Once cool, screw your garden hose onto the drain valve at the bottom of the tank. Run the other end to a floor drain, utility sink, or outside.
3. Open a Hot Water Faucet and the Drain Valve
Go to a sink or tub and open the hot water faucet all the way. This breaks the vacuum inside the plumbing, allowing the tank to drain freely. Now, open the water heater’s drain valve. Use your screwdriver, valve key, or pliers to turn it counter-clockwise. Expect an initial surge of water through the hose.
What helped me: Before running a long hose outside, I use a 2-foot scrap piece of hose and a 5-gallon bucket to test the drain valve flow. If it’s flowing, I switch to the full hose. If it’s barely dribbling or clogged, I know I have a problem to solve before committing to the full drain process.
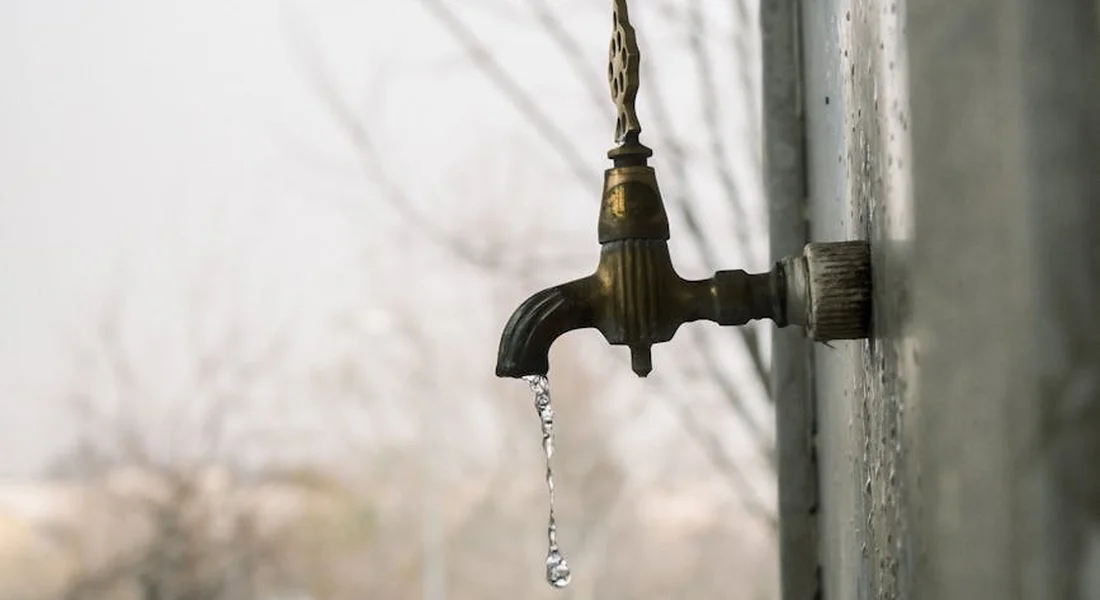
4. Flush Until the Water Runs Clear
Let the tank drain completely. Once empty, briefly turn the cold water supply valve back on. Let a few gallons blast into the tank and out the hose to stir up and flush out loosened sediment. Repeat this until the water exiting the hose looks clear.
5. Close Everything Up and Refill
Close the drain valve tightly. Turn the cold water supply valve back on fully. Keep that hot water faucet you opened earlier still running. You will hear air and water sputtering out. Once a steady stream of water flows from the faucet with no air pockets, turn it off. Your tank is now full. You can then restore power or relight the pilot, which we’ll detail next.
Key Differences: Flushing an Electric vs. Gas Water Heater
How Do You Drain an Electric Water Heater?
The non-negotiable rule for electric heaters is this: you must turn off the power at the circuit breaker. Do not rely on a wall switch. Find the correct breaker in your panel and flip it to OFF. Doing so is especially important when troubleshooting an electric water heater that keeps tripping the breaker.
This protects the heating elements from dry-firing, which destroys them instantly when the tank is empty and the power is on. The elements are submerged in water during normal operation. If they heat up in an empty tank, they burn out like a light bulb in air. After you have completed the flush and confirmed the tank is 100% full of water, you can return to the breaker and turn the power back on.
How Do You Drain a Gas Water Heater?
For a gas unit, locate the control valve on the front. Turn the knob from “ON” to “PILOT.” This shuts off the gas burners but leaves the pilot light lit (if you have a standing pilot). On some newer models, you may simply turn it to “OFF.” Consult your manual if unsure.
Gas heaters have a different internal structure. The flue runs up through the center of the tank. Sediment often forms a dense layer at the very bottom, right in the combustion chamber area below the tank. A thorough flush is vital for gas heaters because heavy sediment here acts like an insulator, forcing the burner to work harder and longer to heat the water above it. After refilling, turn the control knob back to “ON” to resume normal operation.
What If Your Drain Valve Is Clogged or Stuck?
This is a universal headache. A drain valve that won’t open or only trickles is often jammed with hardened sediment.
First, try gentle persuasion. With the valve in the closed position, tap the side of its metal body lightly with a wrench or hammer. Sometimes this can break the sediment seal. If it opens but flows poorly, you can try carefully inserting a thin, stiff wire (like a straightened coat hanger) up into the valve opening to dislodge the clog.
Know when to stop. If the valve is a cheap plastic gate valve and won’t budge, applying more force will almost certainly break it. A broken drain valve on a full water heater causes a catastrophic flood. At that point, your job changes from maintenance to repair. You need a plumber to replace the valve, which may require draining the tank via other means or even temporarily removing it. Investing in a professional to install a robust, full-port brass ball valve is a permanent solution for future flushes.
Does a Clean Tank Really Work Better? The Efficiency Truth
Yes. A clean tank works significantly better. The difference in your energy bill and your heater’s lifespan is not small—especially when you properly clean and descale your tankless heater.
How Does Removing Sediment Improve Efficiency?
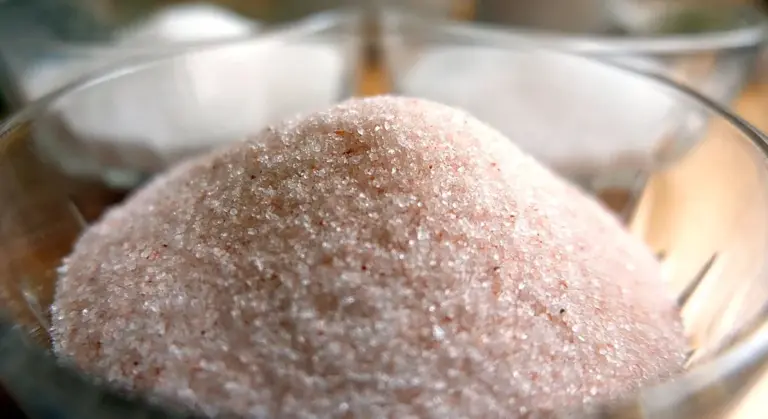
Think of your water heater like a big kettle on a stove. Now imagine a one-inch layer of sand and rocks sitting at the bottom of that kettle. Before the burner can even start to heat the water, it has to waste energy heating up that layer of useless rock. Hard water leaves a mineral scale on the heater, choking heat transfer. That buildup makes the unit work harder and waste energy.
That’s exactly what happens inside your tank. Sediment-sand, silt, and mineral scale-settles at the bottom. On an electric heater, it buries the lower heating element. On a gas heater, it creates an insulating barrier between the flame and the water. Your system has to work harder and longer to deliver the same amount of hot water.
Removing that insulating layer lets the heat transfer directly into the water, which is what you’re paying for.
Lower Bills and Less Strain
Less wasted energy means lower monthly bills. You might not notice it after one flush, but over a year, the savings add up. More importantly, you’re removing constant strain from the tank. Small tweaks to your water heater can push those savings even further. Easy energy-saving tips for water heating bills can make a big difference.
That sediment layer causes hotspots. The metal at the bottom of the tank gets much hotter than it’s designed to, which weakens it over time. This leads to premature failure and leaks. I’ve seen heavily sedimented tanks fail in 5-7 years, while a maintained one can last 12-15.
A simple annual flush is the cheapest insurance policy you can buy for your water heater. It directly delays the need for a costly replacement.
Chemicals vs. Physical Flushing
Homeowners always ask about descaling chemicals. For the main tank, a vigorous physical flush with a garden hose is the best method. You need to stir up and evacuate the sludge.
Chemical descalers have their place, but it’s more specific. They are excellent for cleaning a severely scaled-up dip tube or a removed heating element. You can soak those parts in a diluted solution.
I avoid pouring harsh chemicals into a connected tank. You can’t fully control where they go or guarantee a complete rinse, and they can damage anode rods and tank linings. If you have extremely hard water and heavy scale, calling a pro for a powered flush is safer and more effective than experimenting with store-bought solutions.
For routine maintenance, water and velocity are your best tools. Save the chemicals for small, removable parts.
Keeping It Clean: Your Water Heater Maintenance Roadmap
How often should you flush your water heater? The honest answer is, it depends entirely on what’s in your water. The mineral content, or hardness, is the biggest factor. More minerals mean more sediment and scale forms faster inside your tank.
Think of it like a coffee maker. Use distilled water and it stays clean. Use tap water full of minerals and you’ll get a crusty buildup in no time. Your water heater is the same.
Your Simple Flush Schedule
Base your maintenance on your home’s water hardness. If you have a softener, you’re already ahead. If not, you’re battling hard water directly. This table gives you a clear starting point. To keep your system performing efficiently, include regular softener maintenance in your plan. Regular checks help maintain water softener efficiency and extend resin life.
| Your Water Condition | Recommended Flush Frequency |
| Soft Water (from a working softener) | Once a year |
| Hard Water (no softener, typical well or municipal supply) | Every 6 months |
| Very Hard Water (severe scaling, white crust everywhere) | Every 3-4 months, or more frequently |
“More frequently” means if you hear loud rumbling or popping sounds from the heater, or your hot water runs out faster than it used to, don’t wait-flush it. In my own home with a well, I mark the calendar for every six months, right when I change the furnace filter. It’s a good habit.
This Isn’t a Solo Job: Link to Your Whole Water System
Your water heater doesn’t exist in a vacuum. Its health is directly tied to the equipment upstream. Ignoring these other components makes your flush less effective.
Before you drain your heater, always check two other things:
- Your Softener’s Salt Level: An empty brine tank means you’re sending hard water straight to your heater. All that fresh flushing work is undone as new scale forms immediately. Top off the salt.
- Your Pre-Filters: If you have a whole-house sediment filter or other pre-treatment, a clogged filter restricts flow and can let grit pass through. Change the filter cartridge according to its pressure drop or your manufacturer’s schedule.
Treating your entire water system as one connected unit is the real secret to long appliance life and efficiency.
Here’s the technician perspective: I’ve been to homes where the owner faithfully flushed their heater but wondered why it kept failing. Nine times out of ten, their softener was broken or their whole-house filter was a solid block of mud. Maintenance is a team sport for your plumbing. That’s where understanding the most common water heater repair options comes into play. The usual fixes are thermostat or heating element replacements, or a thorough sediment flush.
The DIY vs. Pro Verdict: When to Put the Wrench Down
Knowing where to draw the line saves you money and prevents a simple maintenance job from becoming a major repair. Let’s clear up those final questions.
Can a Water Heater Be Damaged During the Cleaning Process?
Yes, absolutely. The most common way homeowners damage their heater during a flush is by forcing things. The brass drain valve is a prime target. If it’s old or corroded, cranking it open too hard can shear the stem right off. Now you have a constant leak you can’t stop without shutting off all water to the house. Overtightening hose connections on plastic valves can crack them, too.
Sediment itself can cause damage if you rush the process. A hard-packed layer of sediment can act like a plug. If you open the drain valve full-blast immediately, the sudden vacuum and pressure shift inside the tank can stress welds and fittings. Always start with a slow, partial flush to break up the sediment gently.
What Are the Signs That a Water Heater Needs Professional Servicing Instead of a DIY Flush?
A flush is maintenance. These signs point to a repair. If you see any of these, close your toolbox and call a licensed plumber or HVAC technician.
- Leaks from the tank body itself (not from a pipe connection or the valve). A puddle under the middle of the tank means the steel tank is corroded through. It cannot be fixed. The heater must be replaced.
- A rotten, corroded pressure relief valve (TPRV) or drain valve that won’t operate or is fused in place. Forcing it will cause a flood.
- No hot water at all after a flush. On an electric heater, this usually means a failed heating element. On a gas unit, it could be a thermocouple, gas valve, or burner issue.
- The smell of natural gas or propane (rotten eggs) near a gas water heater. This is an immediate safety hazard. Turn off the gas supply at the shutoff valve and call a pro.
- Visible flame rollout (fire coming out from under the tank) or a sooty, yellow burner flame instead of a crisp blue one on a gas model.
Defining the Clear Line
The line is simple. DIY is for routine, preventative flushing through the existing drain valve. You are working on the water side of the system with the power and fuel completely off. Your goal is to drain water and loose sediment.
A licensed professional is needed for any repair that involves gas lines, electrical element replacement, internal tank components, or fixing active leaks. They have the tools and certifications to work on sealed combustion chambers, high-voltage connections, and gas pressure safely. Replacing a heating element or thermocouple might look easy on a video, but a small mistake can lead to electric shock, a gas leak, or a water leak inside the control compartment.
Reiterating the Difficulty Rating
A basic sediment flush is a 2 out of 10 on the DIY difficulty scale. It requires a garden hose, a bucket, and following steps carefully. It’s well within most homeowners’ abilities and is the single best thing you can do for your heater’s lifespan.
Any task that moves you from “draining water” to “replacing a core component” jumps the difficulty to an 8 or 9. You are now interfacing with high-risk systems. This is the point where calling a pro isn’t an admission of defeat, it’s the smart, safe, and often more cost-effective choice. They can diagnose the real issue and get it fixed right the first time.
Common Questions
What safety precautions should be taken before starting?
Always turn off the power at the breaker for electric units or set the gas valve to pilot/off for gas. Shut off the cold water supply and let the tank cool for 5-6 hours to avoid scalding. Open a hot water faucet upstairs to relieve vacuum pressure before draining.
How can you tell if your water heater has sediment buildup?
Listen for rumbling or popping noises from the tank, which indicate sediment burning. Notice if hot water runs out faster than usual, as sediment insulates the heat source. Check for gritty particles or discoloration in hot water from your taps.
What should you do if the drain valve is clogged?
First, gently tap the valve with a wrench to break up sediment. If it flows poorly, carefully insert a stiff wire to dislodge the clog. If it won’t budge or breaks, stop and call a professional to avoid flooding.
Are there any chemicals or solutions recommended for descaling?
For routine maintenance, physical flushing with water is best. Save chemicals for soaking removed parts like heating elements or dip tubes. Avoid pouring harsh descalers into the tank, as they can damage internal components.
Can a water heater be damaged during the cleaning process?
Yes, forcing a stuck drain valve can break it, causing leaks. Dry-firing electric elements by restoring power before the tank is full will destroy them. Always follow steps carefully and know when to call a pro.
Keeping Your Water Heater Efficient
Drain your water heater tank once a year to flush out sediment. This regular cleaning restores heating efficiency and extends the unit’s life.
Bob McArthur
Bob is a an HVAC and plumbing industry veteran. He has professionally helped homeowners resolve issues around water softeners, heaters and all things related to water systems and plumbing around their homes. His trusted advice has helped countless of his clients save time, money and effort in home water systems maintenance and he now here to help you and give you first hand actionable advice. In his spare time, Bob also reviews home water systems such as tankless heaters, water softeners etc and helps home owners make the best choice for their dwelling. He lives around the Detroit area and occasionally consults on residential and commercial projects. Feel free to reach out to him via the contact us form.