Replace and Adjust Your Water Heater Pressure Relief Valve, A Homeowner’s Guide
Your water heater’s pressure relief valve is leaking or stuck. That means it’s not doing its job, and you need to fix it fast.
We will cover spotting a bad valve, gathering the right tools, the full replacement walkthrough, adjusting the new valve, and a final leak check.
I’ve fixed these on hundreds of tanks. Here’s the deal: test it twice so you only have to do this job once.
What This Valve Does and Why It Can’t Be Ignored
Think of your water heater as a big, sealed kettle. When you heat water, it expands. In a closed system, that expansion has nowhere to go, so pressure builds. In a home heater, that expansion is exactly what water heater expansion safety features like expansion tanks and relief valves are designed to manage.
The temperature and pressure relief valve, or T&P valve, is the only escape hatch. It’s a simple spring-loaded plug. When pressure inside the tank gets too high (usually 150 psi) or the water gets too hot (usually 210°F), the spring compresses. This lifts the seal and lets a burst of hot water and steam out a discharge pipe, safely relieving the pressure.
The valve is like the weighted lid on a old-fashioned pressure cooker; if it gets stuck shut, the pressure keeps climbing with no release.
This is not a theoretical problem. A tank under extreme pressure can rupture. That rupture is essentially an explosion, capable of launching a water heater through floors and ceilings. Every plumbing code requires a T&P valve for this exact reason. It is the most critical safety device on the appliance.
What happens if you don’t have a pressure relief valve on a water heater? You have a bomb in your basement. It’s that straightforward. The valve is a mandatory, non-negotiable safety component. If yours is missing, installing one is not a DIY upgrade—it’s an emergency call to a licensed plumber.
The Telltale Signs You Need a New Pressure Relief Valve
This valve is a wear item. You need to know when it’s failing. Watch for these red flags:
- Constant Dripping or Leaking: A slow, steady drip from the valve or its discharge pipe means the seal is worn and can’t seat properly anymore. It’s not doing its job of holding pressure.
- No Drip During Testing: You should test the valve every six months by lifting its test lever. If no water comes out the discharge pipe, it’s seized shut and useless.
- Mineral Crust or Corrosion: A white, chalky buildup or rust around the valve body is a visual sign of failure. The minerals are jamming the mechanism.
- It’s Old: If you can’t remember the last time you replaced it and your heater is over 5 years old, just swap it. They’re cheap insurance.
Can the pressure valve on a water heater be repaired? No. It’s a sealed, calibrated unit. You never repair a T&P valve; you replace it with a new one of the correct pressure and temperature rating for your tank. Attempting to clean or fix a stuck valve is a dangerous gamble with your home’s safety. When dealing with water heater issues, it’s essential to understand when to repair and when to replace parts.
Water Science Snippet: Why Valves Get Stuck
The hot water in your tank is full of dissolved minerals, or Total Dissolved Solids (TDS). Heat causes these minerals to fall out of solution and form rock-like scale. This scale loves to build up on the valve’s internal spring and sealing surfaces. Over years, that scale acts like cement, gluing the valve permanently open or, more dangerously, permanently shut. Hard water accelerates this process dramatically.
The DIY Difficulty Rating and “When to Call a Pro” Verdict
Replacing a water heater pressure relief valve (TPR valve) is a 6 out of 10 on the DIY scale. It is a simple mechanical swap. If you can confidently use a pipe wrench and follow a sequence, you can likely handle it. After installation, test the valve to confirm it relieves at the correct pressure. If it doesn’t operate as expected, you may need to troubleshoot or replace the TPR valve.
The job gets complicated by two things: access and corrosion. The valve is usually on the side or top of the tank in a tight space. If it has been quietly weeping for years, the threaded connection can be severely corroded.
When to Call a Licensed Plumber
Pick up the phone for a professional in these situations:
- The valve body or the tank’s threaded opening is heavily corroded. Forcing a corroded valve can damage the tank’s fitting, turning a simple valve job into a major water heater replacement.
- Access is terrible. If you cannot safely get a good grip with two wrenches (one to hold the tank fitting, one to turn the valve), you risk injury or damage.
- You read these points and feel any hesitation. A pro will have this done in 30 minutes.
Code & Compliance Check
Your new valve is not a suggestion. It is a critical safety device. The replacement valve must have a certification stamp from ASME or ANSI to be legal and safe. It also must match your water heater’s required pressure and temperature rating. You will find these ratings on a tag on the side of your heater and on the old valve’s body.
A common homeowner FAQ is: “Do I need a plumber to replace a pressure relief valve?” The answer is no, not if the installation is straightforward and the parts are in good shape. You are legally allowed to work on your own home’s plumbing. But the question really is: should you? If your scenario matches any of the “call a pro” points above, the smart answer is yes.
Your Toolbox: What You Need for the Job
Gather everything first. Nothing is worse than having a valve half-out and water dribbling while you run to the hardware store.
Tools & Materials Checklist
- Pipe wrench (12-inch is ideal)
- Channel-lock pliers or a second adjustable wrench
- A large bucket (at least 5-gallon)
- A short garden hose that fits the valve’s discharge pipe
- Teflon tape (for water applications) or pipe thread sealant (“pipe dope”)
- The correct new T&P Relief Valve
Buying the Right Replacement Valve
Do not guess. You need an exact match for three specifications. The old valve is your guide. Unscrew it and take it to the store with you.
The pressure rating is the most critical number, and for most residential tank heaters, it is 150 PSI. The temperature rating is typically 210°F. The valve body will be stamped with these numbers. Your new valve must have ratings equal to or higher than the old one.
Finally, you need the correct thread. This leads to another common FAQ: “What threads are water heater pressure relief valves?” Almost all standard residential water heaters use a 3/4-inch National Pipe Taper (NPT) male thread. The valve screws directly into a female fitting on the tank. A small percentage of older or commercial units may use 1-inch NPT. Your old valve is the final answer — just make sure it matches up with any local codes for shut-off valves in the system.
The Step-by-Step Replacement Guide
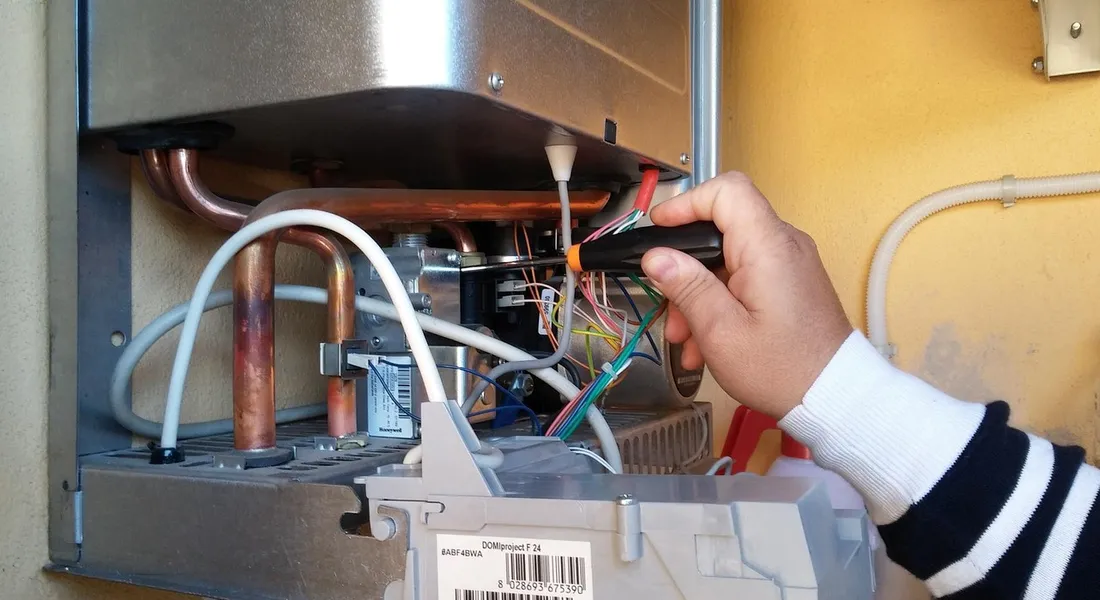
Do not skip steps. Doing this job right keeps your home safe from a potential tank explosion. Follow these steps in order.
-
Turn Off the Water and Power
First, shut off the cold water supply to the heater. Find the dedicated shutoff valve on the cold water pipe leading into the tank and turn it clockwise until it stops.
Next, kill the power to prevent the heater from trying to fire up while it’s empty. For an electric heater, flip the correct double-pole breaker in your main panel to OFF. For gas, find the gas valve on the supply line and turn the knob to the “PILOT” setting.
-
Relieve Pressure in the Tank
Connect a standard garden hose to the tank’s drain valve at the bottom. Run the other end to a floor drain or outside. Open the drain valve for about 15-20 seconds. You only need to drain a gallon or two, just enough to drop the pressure below the hot water pipes. Close the drain valve.
-
Remove the Old Pressure Relief Valve
Place a bucket directly under the pressure relief valve. Use a pipe wrench to grip the hexagonal base of the old valve. Turn it counter-clockwise to unthread it from the tank. It will take some force. Water will spill into the bucket as it comes loose.
-
Install the New Pressure Relief Valve
Clean the threaded opening in the tank with a rag. Wrap the male threads of your new, matching valve with 3-4 layers of Teflon tape, going clockwise. Hand-thread the new valve into the tank opening until it’s snug. Then, use your wrench to give it one final quarter-turn. Do not overtighten.
-
Test for Immediate Leaks
Slowly open the cold water supply valve you closed in step one. This begins refilling the tank. Listen for air hissing from nearby faucets (this is normal). Once water runs from your hot side faucets, the tank is full. Now, press the test lever on the new valve upwards halfway until you get a solid burst of water from the discharge pipe. Let it snap back. Watch the valve’s base and threads for any seepage or drips; if it’s dry, your install is sealed.
-
Restore Power to the Heater
This is critical: only restore power after the tank is 100% full of water. For electric, flip the breaker back to ON. For gas, turn the gas control knob from “PILOT” to “ON.” You should hear the burner ignite. Allow an hour for the tank to fully heat.
What Helped Me: I always keep a big bucket and a pile of old towels right under the valve during this job. I also lay out my pipe wrench, Teflon tape, and the new valve on a towel before I start. Having everything in arm’s reach saves a huge mess.
How to Test and Adjust Your New Pressure Relief Valve
Let’s clear up a major confusion. The pressure setting on a relief valve is not adjustable by you. A 150 PSI valve is factory-set to open at 150 PSI. When people ask how to adjust it, they usually mean testing it and adjusting the pressure switch settings around it.
The Correct Way to Test the Valve
Test your valve every 6 months. Lift the test lever straight up halfway for one second. You should get a strong burst of water out of the discharge pipe, then it should stop completely when you release the lever. If the water just dribbles out or continues to leak afterward, the valve is bad and needs replacement.
“Adjust” the Discharge Pipe Setup
The real “adjustment” is making sure the discharge pipe (the pipe that carries released water to the floor) is correct. A bad pipe can render a good valve useless.
- The pipe must be rigid: use copper, CPVC, or galvanized steel. No braided hose or PEX.
- It must slope downward from the valve so water drains completely.
- It must end no more than 6 inches above the floor where you can see water discharge.
- It cannot be plugged, capped, or have a valve installed on it.
Will a New Pressure Relief Valve Increase Water Pressure?
No. It will not. A pressure relief valve is a one-way safety device. It only opens to release water if the internal tank pressure gets dangerously high. It has zero effect on your home’s normal operating water pressure. If your pressure is low, check for other issues like a clogged inlet screen or a failing pressure regulator.
Keeping It Safe: Your Pressure Valve Maintenance Roadmap
Think of your pressure relief valve (TPR valve) as a silent guard. It sits there for years, waiting for one bad day to do its job. You need to know that guard is still on duty.
Your Simple 6-Month Checkup
Testing is a two-minute job. Do it when you check your smoke detector batteries. Here is how.
- Place a bucket under the discharge pipe that runs from the valve down the side of your heater.
- Lift the valve’s test lever straight up until you hear a “whoosh” of air, then water should spray into the bucket.
- Release the lever. It should snap back down and the water flow must stop completely.
If you get a solid spray of water that stops when you let go, your valve is working correctly. That’s the whole test. If no water comes out, or if it keeps dripping afterward, you have a problem. This simple check prevents the dangerous pressure build-up that can lead to a tank rupture.
When to Replace the Valve, Not Just Test It
Do not replace this part on a calendar schedule. Replace it based on how it performs. I see valves fail after 3 years and others still ticking at 10. The 3-5 year average is just a guide from frequent thermal cycling and mineral buildup.
Valves get weak or stick shut from sediment; replacement is cheap insurance against a much more expensive disaster. If it fails the manual test, replace it immediately. Do not try to clean or repair a TPR valve. It is a sealed, calibrated safety device—unlike other valves on a hot water heater that might be cleaned or serviced.
Red Flag Troubleshooting Guide
Watch for these signs. They mean your valve is calling for help.
- Constant Drip from the Discharge Pipe: A slow, steady leak means the valve seat is fouled or the spring is weak. It can’t fully reseal after pressure changes.
- Leak Won’t Stop After Testing: You lift and release the lever, but water keeps flowing. The valve is stuck open and must be replaced right away to prevent draining your tank.
- No Water During Testing: You lift the lever but get only air or a tiny trickle. The valve is probably clogged with sediment and is stuck shut. This is the most dangerous failure mode.
- Rusted or Corroded Valve: If the valve body shows heavy scale or corrosion, its internal parts are likely worse. Do not trust it.
Your Pressure Valve FAQs
How long do pressure relief valves last?
There is no expiration date stamped on it. In practice, with typical home water conditions, expect 3 to 5 years of reliable service. Your biannual test is what tells you its true lifespan.
Do you open the pressure relief valve when draining the water heater?
Yes, always. Before you open the drain valve at the bottom, open the TPR valve. This breaks the vacuum inside the tank so water can flow out freely through the drain. If you do not, the drain will gurgle and stop, making the job take forever.
Recommended Products & Installation Tip
When you buy a replacement, stick with major plumbing brands like Watts, Sioux Chief, or A.O. Smith. They manufacture to consistent standards. For quick reference, the best water heater brands 2024 highlight top options in reliability and efficiency. This will help you compare models later. Get the correct pressure and temperature rating for your heater (usually 150 PSI and 210°F).
Use pipe-thread sealant made for water, not regular white Teflon tape. The paste sealant (like RectorSeal #5) won’t shred and clog the valve. Apply it only to the male threads of the new valve, hand-tighten, then give it another quarter to half turn with a wrench. Overtightening can crack the tank’s fitting.
Common Questions
1. I’ve turned off the water. Why is it so critical to also turn off the power?
An empty or low tank will cause the heating elements (electric) or burner (gas) to cycle on, damaging the unit or creating a fire hazard. For electric, flip the breaker. For gas, turn the control knob to “PILOT.” This is a non-negotiable safety step before any work.
2. How much water do I really need to drain before removing the valve?
Only drain a gallon or two-just enough to lower the pressure below the level of the hot water pipes in your home. Open a nearby hot water faucet to allow air in. You don’t need to empty the whole tank; this minimizes the wait and preserves your tank’s heat.
3. What if the old valve is completely stuck and won’t turn?
Apply a penetrating oil like Liquid Wrench to the base threads and let it soak for 15 minutes. Use steady, firm pressure with your wrench, but if it won’t budge, stop. Forcing it can crack the tank fitting. This is the point to call a professional plumber.
4. What’s the single most important tip for installing the new valve?
Do not overtighten. Hand-tighten the Teflon-taped valve, then use a wrench for only a final quarter to half turn. Cranking it down can crack the tank’s brass fitting or distort the new valve’s seal, causing an immediate leak you can’t fix.
5. I’ve turned everything back on. How do I know my new valve is working and not leaking?
After the tank is full, lift the test lever to get a solid burst of water, then let it snap closed. Visually inspect the valve’s threaded base and the discharge pipe connection. If they are bone dry, you’ve succeeded. Any drip from the base means the seal failed and it must be tightened or reinstalled.
Ensuring Your Water Heater’s Safety
Once your new pressure relief valve is installed, test it immediately by lifting the lever. A steady flow of water from the discharge pipe confirms it’s working, and a quick check for leaks at the fittings will give you peace of mind for the year ahead.
Bob is a an HVAC and plumbing industry veteran. He has professionally helped homeowners resolve issues around water softeners, heaters and all things related to water systems and plumbing around their homes. His trusted advice has helped countless of his clients save time, money and effort in home water systems maintenance and he now here to help you and give you first hand actionable advice. In his spare time, Bob also reviews home water systems such as tankless heaters, water softeners etc and helps home owners make the best choice for their dwelling. He lives around the Detroit area and occasionally consults on residential and commercial projects. Feel free to reach out to him via the contact us form.