Water Pressure Tank PSI: What to Set and How to Do It
Is your water pressure weak or surging? Your tank’s air pressure is likely off, and you can fix it yourself.
We will cover the right tank and bladder PSI, how to check it with a gauge, and the simple steps to adjust the air pressure.
I’ve fixed these systems for years. Get the pressure right, and you avoid most pump and plumbing headaches.
How Your Pressure Tank Works (And Why the Air Inside is Key)
Think of your pressure tank like a balloon inside a sealed water bottle. The air bladder or diaphragm is the balloon. Your well pump fills the tank with water, squeezing the air. When you open a faucet, that compressed air pushes the water out to your pipes. This gives your pump a rest between cycles.
If the air pressure is wrong, your entire water system suffers. You will notice three main problems.
- Short Cycling: The pump turns on and off every few seconds. This rapidly wears out the pump motor.
- Waterlogging: Water fills the tank completely, leaving no air cushion. Your water pressure will pulse and sputter.
- Pump Burnout: Constant cycling overheats the pump. This leads to a costly replacement.
There are a few tank types. Modern systems use pre-charged bladder or diaphragm tanks. The air is sealed inside a rubber bladder. Older systems might have plain steel or galvanized tanks where air and water mix directly. The rule for air pressure is the same for all, but how you maintain it changes.
The Simple Rule for Your Tank’s Air Pressure
The rule is universal. Set the air pressure in your tank to 2 PSI below your pump’s cut-in pressure.
First, find your pump’s pressure switch. It is a small gray box near the tank with electrical wires. The pressure settings are stamped on the switch. Common settings are 30/50 or 40/60 PSI. The first number is the cut-in pressure (when the pump turns on). The second is the cut-out pressure (when it turns off). If you’re looking to tailor performance, you may adjust the well pump pressure switch settings. In the next steps, we’ll show how to adjust well pump pressure switch settings safely.
For a standard 30/50 pump, your tank must have 28 PSI of air. That is 2 PSI below the 30 PSI cut-in. If your switch is set to 40/60, set the tank air to 38 PSI.
Tank size does not change this pressure rule. A small 20-gallon tank and a large 80-gallon tank, both connected to a 40/60 pump, need 38 PSI. The size only changes how much water is stored before the pump kicks on again. To size a well pump pressure tank correctly, consider your water needs and pump specifications. Correct sizing helps maintain stable pressure and extend pump life.
Bladder Tanks vs. Old-Style Galvanized Tanks
Bladder tanks are the modern standard. The air is sealed inside a rubber bladder during manufacturing. You check the pressure with a standard tire gauge on the tank’s air valve. You rarely add air unless the bladder fails, which you’ll need to maintain and recharge.
Old galvanized tanks have no bladder. Air and water share the same space inside the steel tank. These systems use an air volume control valve to automatically add air as water absorbs it. Maintenance means checking for rust and making sure the control valve is not clogged. Unlike other types of residential water tanks, galvanized tanks require regular inspection for corrosion.
The 2 PSI rule applies to both types of tank for correct pump operation. The big difference is maintenance. Bladder tanks are mostly set and forget. Galvanized tanks need regular checks to prevent waterlogging.
What About Pressure for a Hot Water Expansion Tank?
A hot water expansion tank is different. It handles pressure from heating water, not from a well pump. Its air charge must match your home’s static water pressure.
Here is a quick way to set it. Turn off the cold water supply to your water heater. Open a hot water faucet upstairs to drain pressure and let the system cool. Attach a water pressure gauge to an outdoor hose bib or a drain valve. Note the pressure reading with no water running. If the reading is off, the next step is to adjust water pressure at the heater. A quick guide on how to adjust water pressure on your water heater follows.
Set the expansion tank’s air pressure to match your home’s static water pressure. Use a tire gauge and a hand pump on the tank’s Schrader valve. If your house pressure reads 50 PSI, pump the expansion tank to 50 PSI of air. It’s crucial not to confuse this with low water pressure in the expansion tank itself, as they are different issues.
Tools and Steps to Set the Air Pressure Yourself
You do not need a professional for this basic maintenance. With a few common tools, you can check and adjust your tank’s air pressure in under 30 minutes.
Your Pressure Tank Tool Kit
Gather these items first. You likely own most of them already.
- A standard tire pressure gauge that reads from 0 to 100 PSI.
- An air compressor or a heavy duty bicycle pump with a fitting that matches your tank’s Schrader valve (the same as a car tire).
- An adjustable wrench to open the tank drain.
- A bucket or hose to catch the water you’ll be draining.
You do not need a special water tank psi calculator, just your tire gauge and the 2 PSI rule from the last section.
Now, follow these steps in order. Do not skip them.
- Shut off the pump’s electrical power at the breaker box. This is a critical safety step. You do not want the pump turning on while the tank is empty.
- Drain all water from the pressure tank. Open a faucet somewhere in the house to relieve system pressure. Then, use your wrench to open the drain valve on the bottom of the tank. Let every last drop of water run out into your bucket or through a hose. A wet tank gives a false reading.
- Check the air pressure. Find the air valve on the tank (it looks like a tire valve). Remove the cap and press your tire gauge firmly onto it. Note the reading.
- Add or release air to hit your target PSI. This target is typically 2 PSI below your pump’s cut in pressure. If your cut in is 30 PSI, set the tank to 28 PSI. Use your air compressor to add air in short bursts, checking with the gauge each time. To lower pressure, press the small pin in the center of the air valve with your gauge or a tool to bleed air out slowly.
Remember, the question ‘how much air in a water pressure tank’ is answered in PSI, not gallons. You are setting a pressure level, not filling a specific volume. Once your gauge reads the correct PSI, close the tank drain, restore power to the pump, and let the system refill with water. Your work is done.
Red Flags: Is Your Pressure Tank Failing?
A failing tank has clear symptoms. Ignoring them will burn out your pump. Watch for these five signs.
- The pump short cycles, turning on and off every 20 to 60 seconds. This is the most common and urgent warning sign.
- A dull thud when you tap the tank, instead of a hollow ring. This means the bladder is waterlogged.
- Water pressure at your faucets surges, then drops, or sputters.
- The system’s pressure gauge does not move when the pump is running.
- Visible rust, corrosion, or moisture around the tank’s air valve.
These symptoms directly answer a question like ‘how far can a pressure tank push water.’ A tank with low or no air charge cannot push water effectively. You get weak, inconsistent flow because the pump is doing all the work instantly.
The tap test is your best diagnostic tool. With the system pressurized, tap the bottom of the tank with your knuckle or a wrench. It should sound hollow. Tap the top half. It should also sound hollow. If you hear a solid ‘thud’ on the bottom half, the bladder is likely waterlogged and sitting in water. If the entire tank sounds solid, the bladder may be completely failed and the tank is full of water.
Fixing a Waterlogged or Low-Pressure Tank
Often, a waterlogged tank just needs its air charge restored. Follow the exact ‘Tools and Steps’ procedure above to drain the tank and set the correct air pressure. After you repressurize it and the system refills, the short cycling should stop. Check the air pressure again in 24 hours to ensure it holds.
If the tank will not hold the air pressure you set, the internal bladder is ruptured. Air will escape into the water (you might see bubbles at your faucets), or water will clog the air valve. There is no repair for this. The entire pressure tank must be replaced.
Can You Over-Pressurize the Tank?
Yes, you can. This is just as bad as too little pressure. If your tank air pressure is set higher than the pump’s cut in pressure, the bladder takes up all the space. There is no room left for the pump to push in water. Your pump will run constantly, trying and failing to reach its cut off pressure, and will burn out quickly.
The fix is simple. Go back to the adjustment steps. Shut off the pump, drain the tank completely, and use your gauge to bleed air from the valve until you reach the correct PSI, which is 2 PSI below your pump’s cut in setting.
The DIY Verdict: What You Can Handle and When to Call a Pro
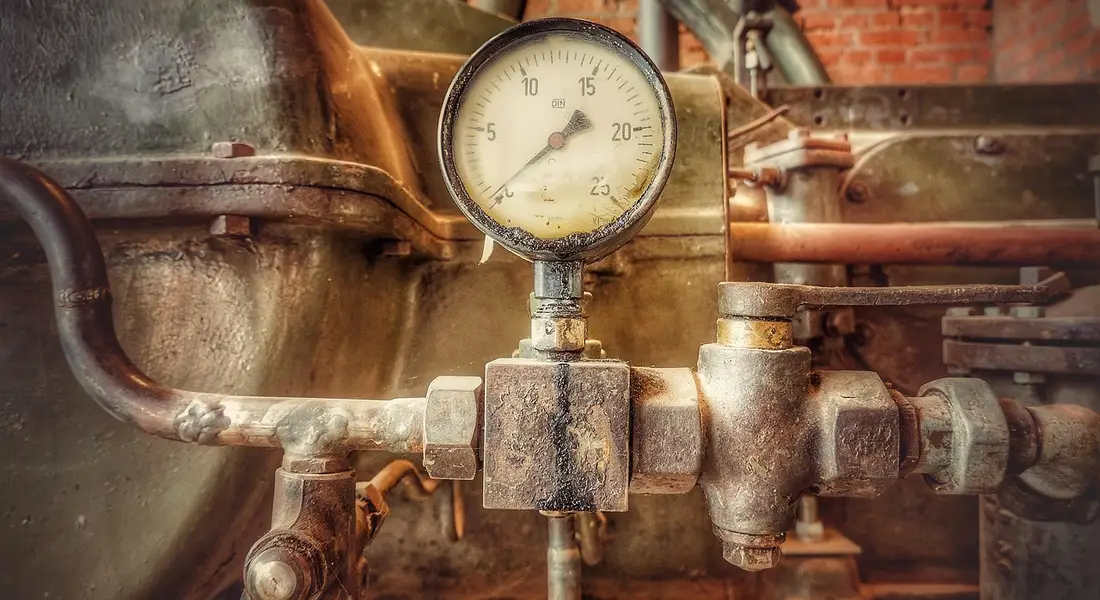
Let’s break down the jobs by difficulty. This tells you exactly where your skills are needed and where your wallet is better off.
Difficulty Rating: Checking and Adjusting Air Pressure (3/10 – Easy)
This is basic maintenance, like checking your tire pressure. Every homeowner should know how to do this.
- Tools You Need: A standard tire pressure gauge and a bicycle pump or small air compressor.
- The Simple Process:
- Turn off the pump’s power at the breaker.
- Open a faucet to drain all water pressure from the system. Let it run until it stops.
- Find the air valve on your tank (it looks like a tire valve).
- Check the air pressure with your gauge.
- Add or release air to match the correct PSI, which is typically 2 PSI below your pump’s cut-in pressure.
If your pressure is off by just a few PSI, you will notice a major improvement in how your pump runs. This five minute job can stop short cycling and make your water flow consistent.
Difficulty Rating: Replacing a Pressure Tank Bladder (8/10 – Hard & Messy)
I’ve done one bladder replacement in my own basement. I won’t do another. It’s a wrestling match with a wet, heavy steel tank.
- You must completely drain and disconnect the tank.
- You need large pipe wrenches and a way to safely handle a 60+ pound unit.
- The internal bladder must be seated perfectly or it will fail immediately.
- The job creates a lot of spilled water and sediment.
For all but the most experienced DIYers, bladder replacement is a professional’s job. The risk of error is high, and the labor is intense.
What You Can Safely Do vs. When to Dial the Pro
Here is the clear line. Do not cross it without the right tools and confidence.
Homeowners can and should safely do this: Check the tank’s air PSI, add air with a pump, and drain the tank for maintenance. These are non invasive procedures that keep your system healthy.
You must call a licensed plumber or well specialist for this:
- The tank shell is leaking water or rusting badly.
- The air valve won’t hold pressure (you add air and it’s gone in minutes).
- You’ve corrected the air pressure, but the pump still short cycles constantly.
These symptoms point to internal failure. A pro can diagnose if it’s a bad bladder, a failed air volume control, or a tank that’s simply waterlogged beyond repair.
The Cost Factor: New Tank vs. Bladder Replacement
People often search for “water tank price” when trouble starts. Here is the real world math I use.
For a newer tank (under 5 years old), a bladder replacement by a pro might make sense. For most older tanks, replacement is the smarter path. Especially if you can’t find any leaks in the tank.
- A brand new, guaranteed pressure tank costs a few hundred dollars.
- The labor to replace an entire tank is often similar to the labor to rebuild an old one.
Installing a new tank gives you a fresh warranty and decades of new service, while rebuilding an old one leaves you with old, rusty plumbing. The cost effectiveness is usually clear.
Getting your tank’s air pressure right is simple, preventive maintenance. It costs you nothing but ten minutes of time. It saves you money on your electric bill and spares your pump from an early death. Check it once a year. Properly pressurizing your water storage tanks will ensure your whole water system runs better for it.
Common Questions
Do I need a special water tank PSI calculator to figure this out?
No, you don’t. The rule is beautifully simple: your tank’s air pressure should be 2 PSI below your pump’s cut-in pressure (that’s the lower number on your pressure switch, like 30 or 40). A standard tire gauge and this rule are all you need.
How does tank size affect my system, and is there a chart?
Tank size determines how much water is stored and how long your pump rests between cycles. While you can find general sizing charts online, the critical factor is your pump’s flow rate and your household’s demand. A bigger tank reduces pump cycles, which extends its life.
What’s a ballpark price for a new pressure tank?
For a typical residential well system, a new pressure tank generally ranges from $200 to $600, not including installation. The price varies by size, brand, and material. Remember, replacing a failing tank is almost always more cost-effective than trying to repair it.
What is a sight glass level indicator, and do I need one?
A sight glass is a clear tube that shows the water level inside old-style galvanized tanks. If you have a modern bladder tank, you do not need or want one. For bladder tanks, the proper diagnostic tool is your ears-the hollow sound when you tap it means it’s working correctly.
I fixed the air pressure, but my pump is still short-cycling. What now?
This is your signal to call a professional. It likely means the internal bladder has ruptured and the tank can no longer hold an air charge. Continuing to run the system in this state will quickly burn out your pump motor.
Setting and Maintaining Your Tank Pressure
Set your tank’s air pressure 2 psi below your pump’s cut-in pressure for smooth operation. Check this pressure every few months with a tire gauge to avoid pump damage and water issues.
Related Guides and Information
- How Much Air Does My Pressure Tank Need? – Irrigear Goulburn
- How to Size a Well Pressure Tank – Fresh Water Systems
- How to Know if You Need a New Pressure Tank – Independent Water Service, Inc.
Bob is a an HVAC and plumbing industry veteran. He has professionally helped homeowners resolve issues around water softeners, heaters and all things related to water systems and plumbing around their homes. His trusted advice has helped countless of his clients save time, money and effort in home water systems maintenance and he now here to help you and give you first hand actionable advice. In his spare time, Bob also reviews home water systems such as tankless heaters, water softeners etc and helps home owners make the best choice for their dwelling. He lives around the Detroit area and occasionally consults on residential and commercial projects. Feel free to reach out to him via the contact us form.