Replacing Your Well Pump or Sump Pump: A Straight-Up DIY Guide
Wondering if you can tackle a pump replacement yourself to avoid a hefty service bill? The answer isn’t a simple yes or no.
In this article, I’ll walk you through the real difficulty level, the absolute must-have tools, a step-by-step breakdown of the job, and the critical safety points that separate a success from a flood.
I’ve pulled and installed more pumps than I can count, both in my own home and on service calls. Here’s the takeaway: respect the depth and the wiring, or call a pro.
The Straight Talk on DIY Difficulty: A Pro’s Verdict
Let’s get right to it. Here is my honest difficulty rating from one to ten, based on pulling and installing hundreds of these units.
- Sump Pump: 5/10. This is a manageable project for a careful DIYer with basic tools.
- Submersible Well Pump: 9/10. This is a major job that I rarely recommend homeowners attempt.
- Jet Pump: 7/10. It’s less intense than a deep well pump but still involves critical plumbing and electrical work.
Replacing a sump pump is like swapping out a garbage disposal you’re familiar with everything is right there in the basement pit. Pulling a deep submersible pump, however, is like a major engine repair. You are working blind in a narrow hole hundreds of feet deep, wrestling with heavy, waterlogged pipe and specialized cable. Needless to say, repairing or installing a deep submersible pump is far more complex than a sump pump replacement.
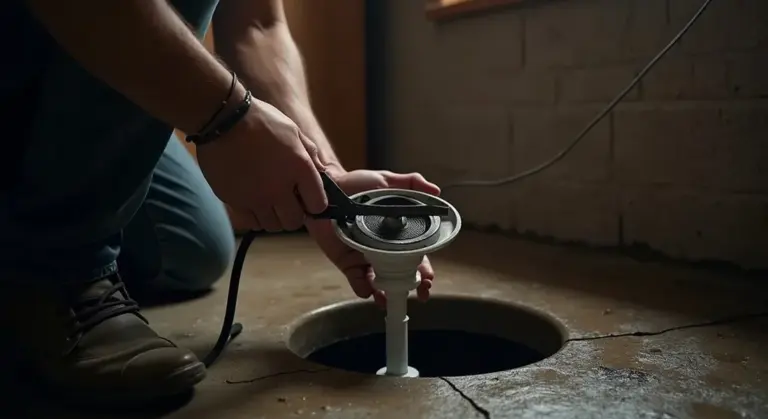
For a sump pump, the core DIY tasks are straightforward. You can disconnect the old pump, clean the pit, set the new pump on its base, connect the discharge pipe, and wire it into the existing plug. The pro is required if you need to run a new dedicated circuit from your electrical panel. That’s licensed electrician territory. Consider the sump pump components installation steps to plan your setup. Following them shows how each piece fits together.
For well pumps, the line is crystal clear. Any work inside the well casing, especially for depths over 100 feet, should be left to a licensed well professional. They have the heavy pullers, safety equipment, and knowledge of local codes. The legal and safety risks of dropping the pump or contaminating your water supply are too high. Your DIY role stops at the pressure tank and control box.
So, to answer the search directly: installing a sump pump is moderately easy if you are comfortable with plumbing and simple wiring. Installing a water well pump is very hard, bordering on impractical, for anyone without professional well service experience.
Spotting a Pump on Its Last Legs: The Red Flag Guide
Pumps don’t usually die quietly. They send clear signals first. Here is what to listen and look for.
Well Pump Failure Signs
- No water at all from your taps is the most obvious sign. Check your breaker first. If power is good, the pump or its control is likely dead.
- Cycling on and off constantly every minute or two. This usually means a failed pressure tank bladder, but it can also point to a pump losing its prime or power.
- Air spitting from your faucets. This often means the pump is drawing in air from a crack in the drop pipe or a failing seal.
- Loud grinding or screeching noises from the well area. The motor bearings are shot.
A sudden surge of sediment or sand in your water can mean the pump is sitting on the bottom of the well, stirring up the aquifer because the foot valve failed. That’s a replacement job. Hearing water hammer a loud banging in your pipes when the pump shuts off points to a failed pressure switch or a waterlogged pressure tank, which are simpler fixes.
Sump Pump Failure Signs
- The pump does not run during a heavy rain or test. Check the plug and float switch first. A stuck float is an easy fix.
- The pump runs non stop, even when water is low. The float switch is likely jammed or faulty.
- Strange vibrations or a loud humming noise. The impeller could be jammed with debris, or the motor is failing.
Always rule out the simple repair before assuming the worst. For a well pump, check the pressure switch and tank air charge. For a sump pump, clean the intake screen and ensure the float moves freely. If those checks don’t solve it, you are likely looking at a full replacement.
Gearing Up: The Tools, The Pump, and The Rules

Finding the Right Pump for Your Pit or Well
You need the right pump. Buying the wrong one is a waste of money and a guaranteed headache. First, figure out what you have. If the old pump did its job, your best move is to match its specifications exactly. Look for a label on the pump motor or check your home’s paperwork.
For sump pumps, size the pump to your basin. A standard 18-inch diameter pit works with a 1/3 or 1/2 horsepower pump. Measure your vertical lift from the pump to where the water exits outside. This is your “head” pressure. A higher lift needs a pump with more power.
Compare the two main types.
- Submersible Sump Pump: Sits underwater in the pit. It’s quieter, lasts longer, and handles solids better. It’s my go-to choice for a primary pump.
- Pedestal Sump Pump: The motor sits above the pit on a long column. It’s cheaper and easier to service, but it’s louder and less powerful. I use these as a budget backup.
For well pumps, the stakes are higher. You must know your well’s depth and the required gallons per minute (GPM).
- Submersible Well Pump: Used for deep wells (over 25 feet). The entire unit is lowered into the well casing. It’s efficient and reliable but a complex DIY job.
- Jet Pump (Shallow or Deep): Sits above ground. A shallow well jet pump pulls water from up to 25 feet. A convertible jet pump with two pipes can pull from deeper. These are more DIY-friendly to replace.
Your old pump’s specs are the best shopping list you have, so write them down before you head to the store.
The Toolbox and The Law
You can’t wing this job. You need the right gear and you need to follow the rules. Local plumbing codes exist for safety and function. Ignoring them can cause a flood or fail an inspection.
Gather these tools first.
- Two pipe wrenches (one to hold, one to turn)
- Adjustable wrench and screwdrivers
- Multimeter to confirm power is OFF
- PVC primer and cement for discharge pipes
- Hacksaw or PVC cutter
- For well pumps: a torque arrestor, safety rope, and stainless steel couplings
- A new check valve (this one-use part should always be replaced)
Now, know the law. Most areas follow the International Plumbing Code (IPC) or Uniform Plumbing Code (UPC).
- The discharge line must drain away from your foundation. It should have a continuous downward slope.
- A check valve must be installed on the pump discharge to prevent backflow. It’s a simple part that causes big problems if missing.
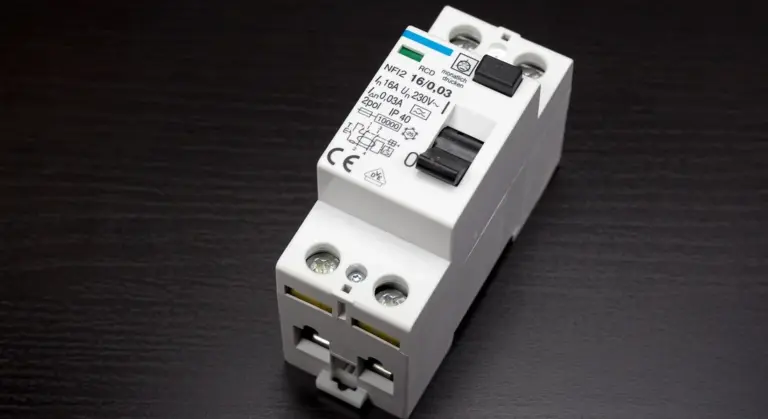
- The electrical outlet for a sump pump must be GFCI protected. The circuit for a well pump at the panel often needs to be on a dedicated breaker.
You will likely need a permit to replace a well pump, as it involves potable water and electrical work. Replacing a sump pump with a similar model usually doesn’t require one, but always check with your local building department. When buying, look for pumps with UL (Underwriters Laboratories) listing for electrical safety and NSF/ANSI 50 certification for sump pumps. These stamps mean the product meets basic safety and performance standards.
The Replacement Playbook: Step-by-Step for Homeowners
How to Replace a Sump Pump Yourself
Set aside a Saturday morning. If it’s your first time, plan for 2 to 4 hours. Work methodically and safely.
- Kill the Power. Unplug the pump. For hardwired models, flip the correct breaker at the main panel and use your multimeter to confirm no voltage at the wires.
- Drain the Pit. Use a utility pump or a wet/dry shop vac to remove as much water as possible. You’ll be working in muck, so wear gloves.
- Disconnect and Remove. Unscrew the discharge pipe from the old pump’s check valve. Disconnect the power cord. Lift the old pump out. Clean out the pit debris while you have access.
- Install the New Pump. Place the new pump on a flat brick or paver to keep it off the very bottom. Connect the discharge pipe to the new pump using the new check valve. Hand-tighten, then use a wrench for a final quarter-turn.
- Set the Float Switch. This is critical. The float must move freely without hitting the pit walls or the discharge pipe. Test its range by manually lifting it to trigger the pump.
- Final Connections and Test. Plug it in. Pour a 5-gallon bucket of water into the pit. Watch the float rise and trigger the pump. The pump should turn on, move water up the pipe, and shut off cleanly when the pit empties. Listen for any strange noises.
A failed test is usually a misaligned float switch, a stuck check valve, or an airlocked discharge line.
How to Replace a Well Pump: What You Need to Know
This is where the job splits. A shallow well jet pump replacement is a serious but manageable DIY project. A deep well submersible replacement is a professional job. Be honest with yourself about which one you have.
For a Shallow Well Jet Pump (Above Ground):
- Turn off power at the breaker and lock out the panel if possible.
- Close the main water valve and drain pressure from the system by opening a faucet.
- Disconnect the wiring at the pressure switch and pump motor, labeling wires.
- Use pipe wrenches to disconnect the suction and discharge pipes.
- Unbolt the old pump from its base, install the new one, and reverse the process.
- Prime the pump with water as per the manual, restore power, and check for leaks and proper pressure build-up.
A handy homeowner can do this in half a day. For a Deep Well Submersible Pump (In the Well):
This is not a simple swap. You must pull up hundreds of pounds of pump, pipe, and wire from a narrow casing. You need a well cap puller, a pipe tripod or hoist, and at least one strong helper. The pipe connections are under constant tension. One mistake can drop the assembly back down the well, costing thousands to fish out.
Pulling a deep well pump is a pro job because the cost of a mistake far outweighs the installation fee. If you insist on trying, your steps involve securing the well head, carefully pulling and supporting each 20-foot section of pipe, disconnecting the wire, and then doing it all in reverse with the new pump. It is a full, exhausting day of heavy, precise labor with high stakes. When the effort isn’t yielding reliable water pressure, replacing the well pump becomes the practical option. If you’re weighing your next move, the next steps will cover how to replace the well pump and select a suitable replacement.
Money Talks: Cost of DIY vs. Professional Installation
Let’s talk numbers. Doing it yourself saves on labor, but you pay with your time and assume all risk.
DIY Sump Pump Replacement Cost:
- New Pump: $150 – $400
- PVC Pipe, Check Valve, Cement: $30 – $50
- Total DIY Range: $180 – $450
Pro Sump Pump Installation: Typically $450 – $800, including the pump and labor.
Your potential savings: $300 to $350. For a straightforward swap, this is a fair DIY payoff for a few hours of work.
DIY Shallow Well Jet Pump Cost:
- New Pump: $200 – $600
- Pipe, Fittings, Wire: $50 – $100
- Potential Permit Fee: $50 – $150
- Total DIY Range: $300 – $850
Pro Shallow Well Pump Installation: $800 – $1,500.
Pro Deep Well Submersible Pump Installation: $1,200 – $3,000+, depending on depth and complexity. The DIY “cost” here is largely irrelevant. The specialized tools rental and the immense risk make the professional quote a value. When comparing DIY vs pro pump install costs, focus on total ownership, not just upfront price. Professional installation often saves money by avoiding costly mistakes.
Weigh the labor and risk against the quoted savings. For a sump pump, DIY makes sense. For a deep well pump, writing the check to a licensed pro is the smartest money you’ll spend.
Keeping It Running: Maintenance and Quick Fixes
The Pump Maintenance Roadmap
Your pump is not a set-it-and-forget-it appliance. A little regular attention prevents big, wet, expensive disasters. Think of it like changing the oil in your car.
Follow this simple schedule to keep things flowing.
- Every Spring (Sump Pump): This is non-negotiable. Pour a 5-gallon bucket of water into the sump pit. The pump should kick on, lift the float, and move all the water out quickly. Listen for any grinding or straining. I do this the first nice weekend in April at my house, right after checking the gutters.
- Seasonally (Well Pump): You can’t see it, so you have to listen. Pay attention to its cycle. Does it turn on for 30 seconds every time someone flushes a toilet? That’s short-cycling and means a problem with the pressure tank or switch. A cycle that runs longer than 2-3 minutes can mean a failing pump or a water leak.
- Annually (Both): Shut off power and do a visual inspection. Look for any green or white crusty corrosion on wire connections, especially at the pressure switch for a well pump. Check the sump pump discharge line outside to make sure it’s clear of leaves and debris and drains at least 10 feet from your foundation.
Well water is a living system, and its quality directly dictates your pump’s lifespan. Think of a water test as a blood test for your home.
High levels of sediment or total dissolved solids (TDS) act like sandpaper inside the pump, grinding down the impeller and seals. Low pH (acidic water) will literally eat through brass fittings and the pump casing itself, leading to pinhole leaks and failure. If you see a lot of orange sediment in your toilet tanks or blue-green stains on fixtures, get your water tested. The results tell you if you need a sediment filter or a neutralizer before your pump is destroyed.
What to Do When Your New Pump Won’t Start
You just finished the install, flip the switch, and hear nothing. Don’t panic. Work through this checklist in order. You will find the problem 9 times out of 10.
- Power Source: Is it plugged in? Is the outlet live? Test it with a lamp or voltage tester.
- Tripped Breaker or GFCI: Check your electrical panel. For sump pumps, the outlet is often on a GFCI circuit. Find and reset any tripped GFCI outlets in the garage, basement, or bathroom.
- Faulty Float or Pressure Switch: For a sump pump, gently lift the float arm by hand. Does the pump start? For a well pump, the pressure switch is the gray box on the pipe near the tank. Listen for a faint click when water pressure drops. No click often means a bad switch.
- Incorrect Wiring: Did you match the wire colors? Black to black, white to white, green or bare copper to ground. A mis-wired pump is a dead pump.
- Stuck Impeller: With power OFF, see if you can manually spin the pump shaft. For a submersible pump, you usually can’t. For a vertical sump pump, there’s often a shaft on the top you can turn with a screwdriver. If it’s seized, the pump is defective.
Know when to put the tools down and make the call.
For a well pump: if you’ve confirmed power to the pressure switch and it still won’t activate, the issue is likely deep in the well wiring or with the pump itself. This is the “call a pro” signal. Pulling a deep well pump is not a solo DIY job, especially if troubleshooting steps like these didn’t help.
For a sump pump: if the motor hums loudly but the impeller doesn’t spin, it’s jammed or the capacitor is blown. You can try to clear it, but if a second attempt fails, replace the pump. A humming pump will burn itself out in minutes.
Most new pump problems trace back to installation errors. Here are the big three I see on service calls.
- Forgetting the Check Valve (Sump Pump): This one-way valve goes on the discharge pipe just above the pump. Without it, all the water in the vertical pipe flows back into the pit after each cycle, forcing the pump to re-pump the same water endlessly. It will burn out fast.
- Kinked or Sagging Discharge Line: The hose or pipe from the pump to the outside must have a steady, downward slope. Any low spots will trap water, which can freeze in winter and block the line or cause the pump to overwork.
- Wrong Voltage: This is critical and dangerous. Most residential submersible well pumps are 230V, while most sump pumps are 120V. Plugging a 230V pump into a 120V circuit will kill it. Always, always verify the pump’s voltage requirement matches your circuit before you buy or wire it.
Common Questions
1. What safety precautions are absolutely essential before I start?
Always confirm the power is off at the breaker and use a multimeter to test wires. For sump pumps, ensure the outlet is GFCI-protected. For any well work, never work alone or without proper equipment to secure the heavy drop pipe.
2. Do I need a permit or to follow specific codes?
Replacing a sump pump with a similar model rarely needs a permit, but you must follow plumbing code for discharge and check valves. Well pump replacement almost always requires a permit due to potable water and electrical work—check with your local building department first, especially for sump pump installations.
3. How do I decide if I should repair or replace the pump?
For sump pumps, if cleaning the intake and freeing the float doesn’t fix it, replacement is likely. For well pumps, major issues like a cracked housing, burned motor, or pumping sand usually mean replacement; simple pressure switch or tank problems can be repaired separately. Cleaning or repairing the float switch is one of the first steps before considering replacement.
4. How long should a full DIY replacement take?
A straightforward sump pump swap typically takes 2-4 hours for a prepared DIYer. Replacing a shallow well jet pump is a half-day project. Pulling a deep submersible well pump is a full, strenuous day for a professional crew, not a DIY timeline.
5. What’s the first thing I check if my new pump doesn’t work?
Follow this order: verify power at the outlet/breaker, check for a tripped GFCI, and manually trigger the float or pressure switch. If it’s a well pump and you have power to the switch but no activity, stop and call a pro-the issue is likely in the well.
Final Thoughts on Pump Replacement
Your decision to DIY a pump replacement should rest on the complexity of the access and the precision of the electrical work. Always start by checking your pump’s exact model and your well or pit’s configuration before buying a single part. If anything about the depth, wiring, or plumbing gives you pause, getting a quote from a licensed professional is a smart first move.