Water Heater Maintenance: The Real Service Schedule for Homeowners
Your water heater is out of sight, but letting it go without service is a sure way to get burned by a cold shower or a flooded basement.
We’ll break down how often to service gas, electric, and tankless water heaters, the specific maintenance tasks each one needs, and the simple checks that prevent big bills.
I’ve pulled and replaced more anodes and flushed more tanks than most plumbers. The single best thing you can do? Know your heater’s type and stick to a basic calendar.
Does a Hot Water Heater Need Maintenance? The Straight Answer
Yes. Every water heater needs maintenance. The type of work and how often you do it depends entirely on the model you own. A simple water heater maintenance schedule can guide what to check and when. Sticking to it helps prevent leaks and extend the unit’s life.
Ignore maintenance, and problems start small. Sediment from your water settles at the bottom of the tank. This is like having a layer of sand in a pot. Your heater must work harder to heat through that layer, wasting energy. Over years, that sediment can harden, trap heat, and damage the tank’s steel lining. The core consequence of neglect is a steady loss of efficiency followed by a much shorter lifespan, ending in a leak or complete failure.
Compare the cost. A DIY annual flush costs your time and maybe a garden hose. A professional tune-up might run a few hundred dollars. A full system replacement with installation costs thousands. A little routine care protects that major investment.
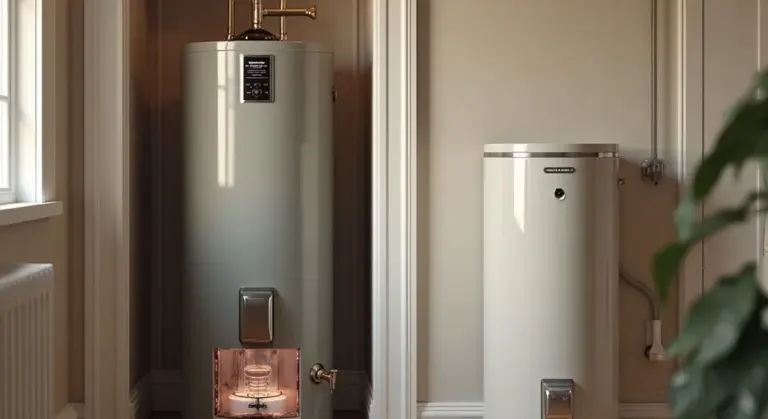
Your Water Heater Maintenance Roadmap: A Schedule for Every Type
This table breaks down the key tasks for the three main types of residential water heaters. The DIY Difficulty is on a 1 to 5 scale, where 1 is easy for anyone and 5 requires significant plumbing/electrical skill.
| Heater Type | Task | Frequency | DIY Difficulty |
| Conventional Tank (Gas/Electric) | Drain & Flush Tank | Annual | 2 |
| Test T&P Relief Valve | Annual | 2 | |
| Inspect/Replace Anode Rod | Every 3-5 Years | 3 | |
| Tankless (Gas/Electric) | Descale Heat Exchanger | Annual | 4 |
| Clean Inlet Filter Screen | Annual | 2 | |
| Heat Pump Hybrid | Clean/Replace Air Filter | Every 1-3 Months | 1 |
| Clear Area Around Unit | As Needed | 1 | |
| Drain & Flush Tank | Every 2-3 Years | 2 |
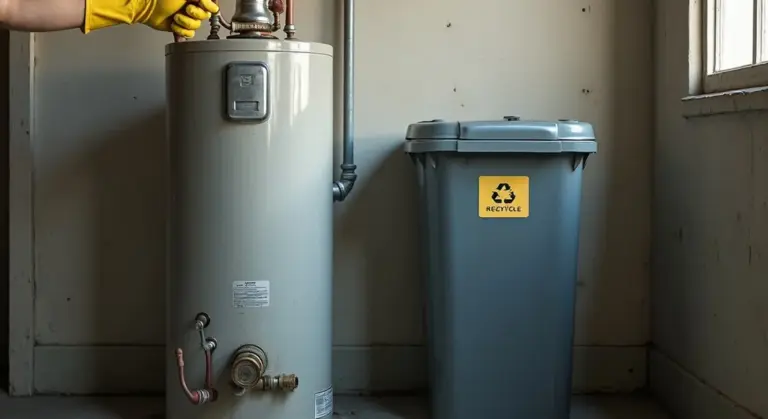
Conventional Storage Tank Water Heater Maintenance
Your main job every year is to drain and flush the tank. Turn off the power (for electric) or gas (for gas). Connect a garden hose to the drain valve at the bottom and run it to a floor drain or outside. Open the valve and let it run until the water looks clear. This removes the sediment that robs efficiency and corrodes your tank from the inside.
While you’re there, test the temperature-pressure relief (TPR) valve. Lift its test lever for a few seconds. You should hear a rush of water or air into the drain pipe. If nothing happens, or it drips afterward, the valve is bad and must be replaced immediately. This valve is a critical safety device.
Every few years, check the anode rod. This is a metal rod screwed into the top of the tank that sacrifices itself to protect the tank’s steel from corrosion. If it’s more than 50% corroded away, replace it. A new rod is cheap insurance for your expensive tank.
Tankless Water Heater Maintenance
Do you need to service a tankless water heater? Absolutely. Mineral scale is its main enemy. Hard water causes lime scale to build up inside the small waterways of the heat exchanger, just like in a kettle.
The annual descaling process requires a submersible pump, hoses, and a bucket. You circulate a descaling solution (like vinegar or a commercial product) through the unit for about an hour to dissolve the scale. It’s not complex, but you must follow your manufacturer’s instructions precisely to avoid damaging sensitive components. Neglecting this will strangle your unit’s efficiency and can lead to expensive failure.
Also, find and clean the small inlet water filter screen. It’s usually where the cold water pipe connects. Shut off the water, remove the screen, rinse it clean, and put it back. This catches debris before it enters the unit.
Heat Pump (Hybrid) Water Heater Maintenance
These units are efficient because they move heat from the air. That air intake has a filter. Clean or replace that air filter every 1 to 3 months, just like a furnace filter. A clogged filter makes the unit work harder.
Keep at least two feet of clear space around the unit so it can pull in enough air. The heat pump portion is low maintenance, but don’t forget it still has a water storage tank. You still need to drain and flush that tank every couple of years to control sediment, just like a conventional model.
These hybrids are not “no maintenance.” They combine the air system care of an appliance with the basic water tank care of a traditional heater. Stick to the filter and keep it clear, and it will run well for years.
The DIY vs. Pro Verdict for Water Heater Service
For basic water heater upkeep, I give it a solid DIY Difficulty Rating of 4 out of 10. You need a few common tools, a willingness to get a little wet, and a sharp eye for safety. Most tasks are about inspection and simple cleaning.
Tasks Safely in the Homeowner’s Wheelhouse
These are the jobs you should be doing. They prevent most common failures.
- Flushing a Storage Tank
Do this once a year. Sediment builds up like sand in the bottom of the tank, making the heater work harder and rust faster. Hook a standard garden hose to the drain valve, run it to a floor drain or outside, and open the valve. Let it run until the water runs clear. If the valve hasn’t been used in years, it might leak afterward, be ready to replace the drain valve which is a separate, simple repair.
- Testing the Temperature and Pressure Relief (TPR) Valve
This is your heater’s emergency shutoff. Test it every six months. Lift the valve’s lever halfway until you hear a gush of water into the discharge pipe, then let it snap back. Water should flow freely and then stop completely when you release the lever; if it drips afterward or doesn’t flow at all, the valve is bad and must be replaced immediately for safety.
- Cleaning the Air Filter (Tankless Units)
If you have a tankless heater with an external air intake, this is crucial. A clogged filter makes the unit shut down. It’s usually as simple as unclipping a plastic cover, pulling out the foam or mesh filter, rinsing it under tap water, letting it dry, and reinstalling it. Check your manual, but do this every few months if you have pets or dust.
Tasks That Require a Licensed Professional
Know your limits. These jobs involve high risk or complex diagnostics.
- Any Gas Line Work
This is non negotiable. If you smell gas, suspect a leak at the connection, or need to move the gas supply line, call a licensed plumber or gas fitter immediately. A gas leak is a fire or explosion hazard, and improper connections can lead to carbon monoxide poisoning.
- Complex Electrical Component Replacement
While resetting a high limit switch is simple, diagnosing and replacing a failed upper or lower heating element, thermostat, or control board on an electric unit often requires multimeter testing and precise wiring. One wrong connection can ruin new parts or create a shock hazard.
- Internal Heat Exchanger Descaling on Tankless Units
While some brands offer homeowner descaling kits, the process is involved. It requires isolating the unit, connecting a submersible pump and hoses, and circulating a specific descaling solution (like white vinegar) for an hour. If not done correctly, you can damage the internal sensors or leave scale behind, and you are always responsible if you cause a leak during the process. For peace of mind, I hire this out every 1-2 years.
Tools & Materials Checklist for DIY Water Heater Maintenance
Getting your gear ready before you start is half the battle. Here’s what you’ll actually need on hand, broken down by task.
Specific Tools You’ll Need
You don’t need a truck full of specialty gear. Most of this is in your garage already.
- Garden Hose: This is for draining the tank. Make sure it’s long enough to reach from the heater’s drain valve to a floor drain or outside.
- 5-Gallon Bucket: Use it to catch residual water when you disconnect lines or to mix descaling solution. I keep one dedicated to plumbing jobs.
- Channel-Lock Pliers: The jaw adjustment is perfect for gripping the hex head of an anode rod or loosening stubborn drain valves. A must-have.
- Set of Screwdrivers: You’ll need both flathead and Phillips to remove access panels and thermostat covers.
- Voltmeter: Before touching any electrical connections on an electric heater, use a voltmeter to confirm the power is completely off. This isn’t optional. Test at the terminals.
- Descaling Pump Kit (for Tankless Units): This is a small submersible pump and hoses. You’ll use it to circulate vinegar through the heat exchanger. You can rent these or buy a basic kit online.
Common Materials & Parts
Having the right consumables means you can finish the job in one go, not make a second trip to the hardware store.
- Replacement Anode Rod (Magnesium or Aluminum): Magnesium rods protect better but corrode faster, especially in soft water. Aluminum rods last longer but are slightly less effective. For most homes, magnesium is the standard choice.
- High-Quality Teflon Tape: Use this on the threads of the new anode rod and any drain valves you reinstall. Wrap it clockwise three times for a good seal.
- White Distilled Vinegar or Manufacturer-Approved Descaler: For tankless heaters, vinegar is a great mild acid for descaling. For traditional tanks, a gallon of vinegar can help dissolve sediment if soaked. Check your manual, as some units require a specific solution.
Mandatory Safety Gear
This isn’t the fun part, but it’s the most important. Don’t skip it.
- Safety Glasses: Water, sediment, and loosening parts can spray unexpectedly. I’ve gotten tank sludge in my eye before. It’s not pleasant.
- Heavy-Duty Work Gloves: Hot water pipes and sharp metal edges are real hazards. Gloves protect your hands from burns and cuts during the entire process.
The “Red Flag” Troubleshooting Guide: Signs Your Heater Needs Service Now
Your water heater talks to you. It makes noises, it shows you its water, it sits quietly in a corner. You just need to know what to listen and look for. Ignore these signs and you’re inviting a bigger repair bill, or worse, a flooded basement.
Clear, Immediate Warning Signs
These are the symptoms that mean something is actively wrong right now. Don’t put off checking these.
- Discolored or Rusty Water: Brown or reddish water from your hot taps only is a classic sign. This usually means your tank is corroding from the inside. The anode rod, which sacrifices itself to protect the steel tank, is likely gone. If you see this, your tank’s lifespan is actively shortening.
- Rumbling or Popping Noises: That sound isn’t a friendly kettle. It’s sediment-hard minerals from your water-that has baked solid at the bottom of the tank. The heater struggles to heat through this layer, causing inefficiency and overheating that damages the tank. My own heater started rumbling last fall; I drained it and a half-bucket of sand-like sediment came out.
- Water Around the Base of the Unit: Any moisture, puddle, or drip is a major red flag. Trace it. It could be a leak from a valve (often fixable) or a crack in the tank itself (usually a death sentence for the heater). A small leak today is almost always a big leak tomorrow.
Performance Issues That Creep Up
These problems start small and get worse. People often blame “just how it is” until they’re taking cold showers.
- Not Enough Hot Water: If your family suddenly starts running out of hot water faster than before, the issue is often a failing lower heating element (in electric heaters) or sediment buildup insulating the water from the heat. For gas, it could be a dirty burner or a failing thermocouple.
- Water Taking Too Long to Reheat: A standard 50-gallon tank should recover in about an hour. If it’s taking two or three, it’s working too hard. This points directly to massive sediment buildup or a heating element on its last legs.
- Pilot Light Frequently Going Out (Gas): A healthy pilot should stay lit. If it keeps dying, the most common culprit is a bad thermocouple-a small safety sensor that shuts off gas if it doesn’t detect the pilot flame. It’s a $20 part, but working with gas requires care.
Stop Use and Call a Professional Immediately
For these signs, shut the system down and get help. Do not troubleshoot these yourself.
- The Smell of Gas (Rotten Eggs): If you smell natural gas (mercaptan odor) or the distinct rotten-egg smell of hydrogen sulfide around a gas water heater, turn off the gas supply valve at the unit, leave the area, and call your gas company or a licensed plumber from outside the house. This is a potential leak.
- Major Leaks or Spraying Water: If water is flowing steadily from the tank body or spraying from a fitting, turn off the power (circuit breaker for electric, gas valve for gas) AND turn off the cold water supply valve feeding the heater. Then call for service. Water and electricity or a gas burner do not mix safely.
- Hot Water is Excessively Hot or Steam is Present: This indicates a failed pressure relief valve or a stuck thermostat. This is a dangerous pressure buildup situation. Turn off the power/gas to the unit and call a technician.
Water Science Snippet: How Hard Water and pH Wreck Your Heater
Think of your water heater as a big tea kettle. Just like a kettle collects limescale, your heater collects mineral deposits. The hardness of your water, measured in grains per gallon (GPG), dictates how fast that happens.
Water with a high GPG is packed with dissolved calcium and magnesium. When you heat this water, those minerals solidify and drop out of solution. They form a gritty sediment at the bottom of your tank and a rock-like scale on the heating elements and tank walls.
This sediment layer acts like a blanket between the burner or element and the water, forcing your heater to work harder, run longer, and waste energy to heat your shower.
How Low pH (Acidic Water) Attacks the Tank
While hard water builds up, acidic water breaks down. Water with a low pH wants to balance itself, and it does that by eating away at metal. The inside of your water heater tank is its first target. Over time, that buildup hurts your heater’s efficiency, causing it to run longer and use more energy. This can also reduce heat transfer and raise energy costs.
To protect the steel tank, every heater has a sacrificial anode rod, usually made of magnesium or aluminum. This rod is designed to be corroded instead of your tank. Acidic water dramatically speeds up this process, consuming the anode rod in just a few years.
Once that anode rod is gone, the corrosive water starts eating the tank liner itself, leading to pinhole leaks and a flooded basement.
What This Means for Your Maintenance Schedule
Your local water quality isn’t just a trivia fact. It’s your maintenance calendar. If you have hard water, sediment is your primary enemy.
- In areas with moderate to hard water (over 7 GPG), you should flush the sediment from your tank every 6 to 12 months.
- With very hard water (over 10 GPG), consider flushing every 6 months without fail.
If you have acidic water (pH below 7.0), protecting the anode rod is your main job.
- Check the anode rod every 2 years, not the standard 3-5.
- You may need to replace it more often or switch to a powered anode rod designed for corrosive water.
The bottom line is simple. Your water heater’s maintenance needs are directly set by the chemistry of your water. Ignoring that chemistry is the fastest way to an early, expensive replacement. If problems arise, weigh repair versus replacement to save money and downtime. A quick diagnostic can show whether a repair is feasible or a replacement is wiser.
Code & Compliance Check: What You Need to Know
Working on a water heater isn’t just about turning wrenches. You have to play by the rules. These codes exist for one big reason: safety. Ignoring them can lead to dangerous failures or cause major headaches when you try to sell your home.
TPR Valve Replacement Standards
The Temperature and Pressure Relief (TPR) valve is your water heater’s most important safety device. If it fails, the tank could explode. That’s not an exaggeration. You must replace a TPR valve with a new one that meets the current ASME (American Society of Mechanical Engineers) standard and is rated for the correct pressure and BTU input of your heater. The standard is usually stamped right on the valve body. Don’t just grab any valve off the shelf. The wrong valve won’t open at the right pressure, rendering it useless in an emergency. In my own basement, I keep a spare, correct ASME valve for my 50-gallon gas heater so I’m never tempted to use the wrong part in a pinch.
Permits for Electrical and Gas Work
Any time you disconnect and reconnect gas lines or electrical wiring, you’re likely entering permit territory. This work must be done to the National Electrical Code (NEC) or your local fuel gas code. Most municipalities require a permit for this work because a mistake can lead to fire, carbon monoxide poisoning, or electrocution. I’ve been on service calls where a DIY gas line connection was leaking. That’s a situation you never want to smell. If you’re not 100% confident in making these connections safely and to code, this is the point where you call a licensed professional. The permit fee is cheap insurance.
Plumbing Permits for New Installations
If you hire a pro to install a brand-new water heater, they should be pulling a plumbing permit. A permit is often required for a water heater install, and requirements vary by locality. This isn’t a suggestion; it’s often a legal requirement. Always ask your contractor for the permit number and verify it’s been filed with your local building department. This ensures the installation will be inspected for code compliance. A final inspection gives you a record that the work was done right. If a contractor says a permit isn’t needed, that’s a major red flag. It usually means they’re cutting corners, and you’ll be left holding the bag if something goes wrong or when the municipal inspector comes knocking.
What Helped Me: A Pro-Tip from My Own Basement
My own water heater taught me the importance of a schedule. I was terrible at remembering to service it. Now, I flush my tank every year on the same Saturday I change my smoke detector batteries. It’s a hard-to-forget fall ritual. Linking this simple task to another critical home maintenance chore guarantees it gets done, especially in vacation homes.
A Practical Tip for Tracking Service
Memory is unreliable. The moment you finish any maintenance, take a piece of masking tape and a permanent marker. Write the date and the service performed. Stick that tape right on the side of the unit.
Your future self, or any technician who comes to look at it, will thank you. This five-second habit creates a permanent service record you can’t lose.
A Common Mistake to Avoid
People often overtighten the plastic drain valve on the tank. They think tighter is safer. It’s not. That valve only needs to be snug, about as tight as you’d close a garden faucet for the winter.
Cranking down on it with a wrench can crack the valve body or strip the threads. A cracked valve means water all over your floor. Hand-tight is almost always tight enough for plastic plumbing connections. If it drips, give it one more quarter-turn with your hand, not a tool.
My Annual Anode Rod Check
Once a year, I also check the anode rod. This is the part that sacrifices itself to protect your tank from rust. Here is my simple process:
- Turn off the power to the heater (breaker for electric, gas valve for gas).
- Shut off the cold water supply valve above the unit.
- Connect a garden hose to the drain valve and run it to a floor drain or bucket.
- Open a hot water faucet somewhere in the house (like a nearby sink) to break the vacuum.
- Drain about 5 gallons of water from the tank. This relieves pressure.
- Use a 1-1/16″ socket and a long breaker bar to loosen the anode rod nut on top of the heater.
- Pull the rod out and inspect it. If it’s less than 1/2 inch thick or heavily coated, replace it.
This check can extend your tank’s life by years. If the rod is completely gone, your tank is rusting from the inside. A spent anode rod is the number one cause of premature tank failure I see on service calls.
Recommended Products for Water Heater Care

Having the right gear makes maintenance easier and more effective. These aren’t fancy gadgets, they’re practical tools that solve common problems.
A High-Quality 3/4-Inch Garden Hose for Flushing
You need a dedicated hose just for draining your water heater. Never use your good lawn or drinking water hose for this job.
The water and sediment that comes out during a flush is gritty, often smelly, and can stain or clog a nice hose. I keep a bright red hose in my basement that only gets used for heater and softener maintenance. It’s a simple system that works.
Get a standard 3/4-inch diameter, 5/8-inch interior hose that’s at least 6 feet long to reach a drain or floor sink. The hose needs to handle hot water, so check the temperature rating on the packaging. A standard brass coupling is durable and won’t strip easily.
When you connect it to the drain valve, hand-tighten it firmly, then give it a small extra turn with channel-lock pliers. A loose connection here is a guaranteed messy leak.
A Powered Anode Rod for Challenging Water
The standard magnesium or aluminum rod inside your tank is a sacrificial part. It corrodes instead of your tank’s steel walls. In water with high conductivity (like with lots of chlorides or sulfates), this rod can get eaten up in just a year or two.
A powered anode rod uses a tiny electrical charge to protect the tank, so it doesn’t corrode itself away. Think of it like replacing a fuse that blows every year with a circuit breaker you can reset.
Consider one if your water is very soft, smells like rotten eggs (hydrogen sulfide), or if you’ve pulled out a traditional rod that was completely gone. They cost more upfront but can last for the life of the heater. Often the fix is one of the most common water heater repair options: replacing an exhausted anode rod and flushing the tank. If those steps don’t solve the issue, replacing worn heating elements or thermostats is another common remedy.
Installation is straightforward. You turn off power and water to the heater, drain a few gallons, and swap the old rod for the powered unit in the same opening at the top of the tank. The power unit plugs into a standard outlet.
A Basic Water Alarm for Early Leak Detection
This is the cheapest insurance policy you can buy for your basement or utility closet. Water heaters can fail slowly with a small drip or catastrophically with a burst tank.
A simple water alarm placed on the floor directly under the tank will scream at the first sign of moisture. It gives you a head start to shut off the water and power, potentially saving thousands in floor, drywall, and furniture damage.
The goal is to know about a leak the moment it starts, not when you step in a puddle days later. I have one under my heater and another under the washing machine.
Look for an alarm with a loud, piercing sound and simple battery operation. Test the alarm button monthly when you check your smoke detectors. If it goes off, check the drain valve, pressure relief valve pipe, and tank seams for the source immediately.
When NOT to Try This: Limitations and Safety First
Maintenance saves money and prevents disasters. But sometimes, trying to fix it yourself is the disaster. Knowing your limits is just as important as knowing the steps.
Do Not Attempt Flushing or Any Service on a Very Old, Leaking, or Severely Corroded Unit
You see water on the floor. You notice heavy rust on the tank seams or valves. The unit is 15, maybe 20 years old. Your first thought might be to flush it to buy time. Don’t.
Attempting service on a compromised unit can turn a slow leak into a catastrophic flood in your basement.
Disturbing a severely corroded drain valve or internal components can cause them to fail completely. The sediment inside might be the only thing plugging a small leak. Flushing it out removes that plug. If the tank is actively leaking from the body, it has already failed. No amount of flushing or anode rod replacement will fix a ruptured tank. At that point, you’re managing a failure, not performing maintenance. Plan for a replacement.
Warn Against Touching Gas Control Valves or Complex Electrical Components if You Are Not Trained
For gas water heaters, the gas control valve and thermocouple are not DIY playgrounds. This isn’t like changing a faucet washer. Knowing the thermocouple’s function and its common location on gas water heaters helps connect this warning to the practical reason behind it. Located near the burner, the thermocouple detects heat and signals the gas valve to shut off if the flame goes out, a task best left to a professional.
Tampering with gas connections or safety devices can create a fire hazard or risk of carbon monoxide poisoning.
If your pilot light won’t stay lit or you suspect a gas valve issue, your job is to turn off the gas supply at the shutoff valve and call a licensed professional. For electric units, the same rule applies to the upper and lower thermostats and heating elements. Working on 240-volt components without proper training and verification the power is off is extremely dangerous. Think of it this way: messing with the drain valve might flood your floor. Messing with gas or high-voltage electricity can damage a lot more than your floor.
Advise That if the Drain Valve Is Completely Seized or Breaks During Attempted Service, It’s Time to Call for Help
You’ve followed the steps. You’ve hooked up the hose, turned off the power and water. You try to open the plastic or brass drain valve, and it won’t budge. You apply careful pressure with a wrench, and you hear a crack. Stop.
A broken drain valve with a full tank of hot water behind it is an emergency you cannot easily fix yourself.
You now have no controlled way to drain the tank. Trying to replace the valve while the tank is under pressure and full is a scalding, flooding mess waiting to happen. I had this happen on an old heater at my own place. The valve stem snapped. I had to immediately shut off the cold water inlet and call for a pro to replace the valve under controlled conditions. Know when to hold ’em and know when to fold ’em. This is a folding moment. Shut everything down and get a technician on the phone.
When to Seek Professional Water Heater Help
Knowing when to call a pro is as important as doing the maintenance yourself. Some jobs are just not safe or practical for a homeowner.
Scenarios Requiring Immediate Professional Service
If you encounter any of these situations, stop what you’re doing and call a licensed technician.
- Any suspected gas leak. If you smell rotten eggs (the odorant added to natural gas) or hear a hissing near the water heater, get out. Do not turn lights on or off. Call your gas company or a plumber from outside the house. This is not a DIY moment.
- Any major leak from the tank itself. A small drip from a valve connection might be a simple fix. A steady stream or pool of water coming from the tank body means it’s failed. The tank is done and needs full replacement, a job for a pro who can handle water, gas, and electrical disconnections safely.
- No hot water after basic troubleshooting. You’ve checked that the pilot is lit (for gas) or that the circuit breaker isn’t tripped (for electric), and you’re still cold. The issue could be a failed heating element, gas valve, or thermostat. Diagnosing and replacing these components requires specific tools and know-how.
Complex Issues with Advanced Systems
Modern tankless and hybrid heat pump units are fantastic, but their computerized controls add a layer of complexity.
- Error codes you cannot clear. These units flash codes for a reason. A code for “ignition failure” or “flame loss” on a gas tankless model points to the gas valve or venting. A “flow sensor error” means internal parts. Resetting the unit might temporarily hide the problem, but the root cause remains and will come back. A technician has the diagnostic tools to read these codes properly.
- Any work requiring a plumbing or gas permit. This is the legal line. If you need to run a new gas line, relocate the unit, or install a new vent, your local building code likely requires a permit and inspection. A licensed professional will pull the permit, ensuring the work is done to code for your safety and for home resale.
The Value of an Annual Professional Inspection
For basic tank heaters, your own flushing and anode rod checks might be enough. For peace of mind or complex systems, a yearly pro visit is smart money.
A technician does more than just look. They perform combustion analysis on gas units to ensure safe, efficient operation and proper venting. They check for proper gas pressure and can clean internal components on a tankless heater that you cannot access. On a heat pump water heater, they can check refrigerant levels and the compressor.
Think of it like an annual physical for your car’s engine. You change the oil yourself, but a mechanic puts it on a computer to find hidden issues. I get my own high-efficiency tankless unit serviced every other year because the vinegar flush I do only handles part of the maintenance.
Quick Answers
What’s the biggest risk if I just ignore my water heater?
The twin dangers are a sudden, catastrophic leak and a dangerous pressure buildup. While losing efficiency and hot water is costly, a failed tank can flood your home, and a stuck safety valve can create a bomb. Consistent, simple maintenance prevents these extreme failures.
Can I put off maintenance if my water seems hot and clear?
No. The most damaging process-sediment buildup and anode rod corrosion-happens out of sight. By the time you notice rusty water or rumbling noises, internal damage is already advanced. Stick to the schedule based on your heater’s type, not your water’s appearance.
What’s the single most important task for each type of heater?
For tank-style units, it’s the annual flush to remove sediment. For tankless, it’s the annual descaling to prevent mineral blockages. For heat pump hybrids, it’s the quarterly air filter cleanings to maintain efficiency. Master this one core task for your system first.
Is there one safety check I should never skip?
Yes. Testing the Temperature & Pressure (TPR) Relief Valve every six months is non-negotiable. Lift the lever to ensure it discharges water freely and snaps closed. If it’s stuck or drips afterwards, replace it immediately-this valve prevents a dangerous explosion.
When should I definitely call a professional instead of DIY-ing?
Call a pro for any gas smell, major tank leak, or work involving gas lines and complex electrical components. Also, if a simple task (like opening the drain valve) goes wrong and creates a bigger problem, stop and get help. Knowing your limits is key to safe maintenance.
Your Water Heater Maintenance Blueprint
Set a yearly reminder to service your water heater, no matter what type you own. Start by flushing the tank if it’s a standard model or cleaning the inlet screen on a tankless unit to prevent the most common failures. For tankless systems, following tankless water heater brand maintenance guidelines can help you tailor care for your model. This brand-specific approach can support efficiency and protect your warranty.
Bob McArthur
Bob is a an HVAC and plumbing industry veteran. He has professionally helped homeowners resolve issues around water softeners, heaters and all things related to water systems and plumbing around their homes. His trusted advice has helped countless of his clients save time, money and effort in home water systems maintenance and he now here to help you and give you first hand actionable advice. In his spare time, Bob also reviews home water systems such as tankless heaters, water softeners etc and helps home owners make the best choice for their dwelling. He lives around the Detroit area and occasionally consults on residential and commercial projects. Feel free to reach out to him via the contact us form.