Where to Install a Backflow Preventer: A Homeowner’s Guide to Location and Direction
You bought the right backflow preventer, but putting it in the wrong spot makes it useless. A bad install can leave your drinking water at risk.
We will cover the proper height off the ground, the critical orientation it must face, and the legal codes you can’t ignore.
I’ve installed and inspected hundreds of these on boilers and irrigation lines. The single biggest mistake is getting the arrow pointed the wrong way. Get its position right, or it won’t work.
Backflow Preventers Explained: Your Home’s One-Way Street
Think of your home’s water lines like a busy one-way street. Backflow is what happens when traffic suddenly reverses direction. It’s when water flows backwards into your clean supply pipes from a contaminated source.
This usually happens because of a change in pressure. A common example is a garden hose left submerged in a dirty bucket or a swimming pool. If the city water main pressure drops suddenly (like during a break or high demand), the higher pressure in your hose can force that dirty water back into your home’s pipes, and even into the public water system.
The sole job of a backflow preventer is to act as a fail-safe mechanical gatekeeper, physically blocking contaminated water from reversing course into your potable supply. Any point where your clean water could connect with non-potable water is called a cross-connection. Your backflow preventer must be installed to protect that connection, especially in critical areas such as sinks where backflow prevention is crucial.
Water Science Snippet: Pressure is Everything
Backflow occurs due to two pressure conditions: backsiphonage and backpressure. Backsiphonage is like sucking on a straw. It happens when there’s a negative pressure in the supply line (the main pressure drops). Backpressure is when the downstream pressure becomes higher than the supply pressure, forcing water the wrong way. Your irrigation system pump or a boiler can create this.
The Three Common Types and Their Jobs
Not all backflow preventers are the same. The type you need depends on the level of hazard.
- Reduced Pressure Zone (RPZ or RPBA): This is the heavy-duty unit. It has two independent check valves and a relief valve that dumps water if either check fails. You’ll see RPZs protecting high-hazard connections like commercial boilers, fire sprinkler systems with chemical additives, or irrigation systems with fertilizer injectors.
- Pressure Vacuum Breaker (PVB): This type guards against backsiphonage. It has a spring-loaded check valve and an air inlet valve that opens if pressure drops, breaking the siphon. PVBs are common for residential lawn sprinkler systems and must be installed at least 12 inches above the highest sprinkler head.
- Double Check Valve Assembly (DCVA): This is a simpler assembly of two check valves. It protects against low-hazard connections where the contaminant is a nuisance, not a health threat (like a purely aesthetic water feature). They are not suitable for high-hazard situations.
The Golden Rules for Backflow Preventer Placement
Where should it go? The correct location isn’t just one spot. It depends on your specific hazard and must follow code, but these universal rules apply.
Rule 1: It Must Be Installed Above Ground
Never install a backflow preventer underground, in a pit, or submerged. An underground preventer is a guaranteed failure waiting to happen; you can’t test it, maintain it, or see if it’s leaking, and it will freeze and crack. I’ve seen this on service calls where a homeowner buried an irrigation backflow device to hide it. When it failed, it flooded the pit and they had no idea until their water bill skyrocketed.
Rule 2: Provide Proper Clearance for Access
You need clear space all around the device. Most codes require it to be installed 12 to 30 inches above the final grade (ground level) and have at least 12 inches of clearance from any wall or obstruction. This clearance isn’t a suggestion; it’s the minimum space a certified tester needs to connect hoses, use test kits, and operate the valves during the annual inspection required by most municipalities.
Rule 3: Install BEFORE the Hazard, Not After
This is the most critical placement rule. The backflow preventer must be on the main supply line upstream of the cross-connection it is protecting. For a whole-house irrigation system, it goes on the line that feeds the sprinklers, right after the main shut-off valve. Understanding the functions and types of sprinkler backflow preventers helps you choose the right device for your system. Different types—such as reduced pressure, double check, and atmospheric vacuum breakers—have different installation needs and protections. If you put it after the hazard, it’s useless; contaminated water has already entered the line it’s supposed to protect.
Rule 4: Maintain Distance from the Water Meter
Local plumbing codes often specify a minimum distance between the backflow preventer and the water meter, typically 12 inches. This allows room for future meter changes and prevents the devices from interfering with each other. Always check your local amendment to the model code.
Code & Compliance Check
The model plumbing codes (IPC and UPC) and the ASSE (American Society of Sanitary Engineering) standards dictate proper installation. For example, UPC 603.3.2 mandates that backflow preventers be accessible. ASSE Standard 1060 covers test requirements for RPZ devices. Your local building or water department’s specific code always overrides the general model code, so a call to them is your first step before any installation. Failing an inspection because you placed it 10 inches off the ground instead of 12 means doing the job twice.
Where to Put It: Common Home System Setups
Where you install a backflow preventer is just as important as installing one at all. Get it wrong, and it might not protect your water, or worse, it could fail when an inspector checks it. For sprinkler systems, proper installation and regular maintenance of the sprinkler backflow preventer are essential. This protects your water supply and helps you pass inspections. Let’s look at the most common spots in your home.
Before the Meter vs. After the Meter
This is the big one. The location is determined by who you’re protecting.
Irrigation Systems: Are Sprinkler Backflow Preventers Always Above Ground?
Yes, they are always above ground. Always.
I see this mistake all the time. Someone buries a backflow assembly to make their yard look neat. That’s a major code violation and a fast track to a failed inspection. The device needs to be accessible for testing and maintenance. It also must be installed at least 12 inches above the highest point in your irrigation system, like the tallest sprinkler head.
Burying it risks freezing and makes it impossible for a certified tester to service, which is required by law every year in most places.
Outdoor Spigots (Hose Bibs)
For a simple garden hose, you usually don’t need a heavy-duty backflow preventer. Instead, you use a hose bib vacuum breaker. It’s a small, inexpensive device that screws onto the spigot thread before you attach your hose.
As for who installs it, the city doesn’t touch your hose bibs. This is 100% a homeowner responsibility. I keep one on every outdoor spigot at my house. They wear out every few years, so just unscrew the old one and screw on a new one. If your spigot is frost-free, you still need this vacuum breaker.
Before a Water Softener or Whole-House Filter
This is a critical location. Your water softener or filter contains resin beads, carbon media, and other additives. If a sudden pressure drop occurs in your main line (like a fire truck pumping from a hydrant), the pressure in your softener tank could be higher than the street pressure. This is why water pressure loss matters for filtration and softener setups. Well-designed water pressure loss filtration softener systems help keep flow steady.
Installing a backflow preventer on the main line, before the softener, stops any concentrated brine or filter media from being sucked back into your home’s drinking water and the public supply. It’s a non-negotiable safety step for any treated water system.
Boilers and In-Ground Pool Fill Lines
These are high-hazard connections. Boiler water has corrosion inhibitors and chemicals you absolutely cannot drink. Pool water is basically a chemical soup. For these, a simple double-check valve isn’t enough.
You need a specific, more robust device called a Reduced Pressure Zone (RPZ) Assembly. An RPZ valve has a built-in relief valve that dumps water out if backpressure is detected, creating a failsafe air gap. Your local plumbing code will mandate an RPZ for these applications.
Can a Backflow Preventer Be Installed Indoors or in a Basement?
It can, but it’s rare for the main household device. The most common indoor spot is on a dedicated line, like for a commercial-style boiler or an industrial sink. The main device for your irrigation or whole-house system is almost always outside.
If it is indoors, it must be in a place that will never freeze and must have a drain nearby for the RPZ relief valve to discharge. In a basement, this usually means near a floor drain. Standard practice keeps it outside, above ground, and away from building walls for easy access and testing.
Installation Orientation and How-To Steps
Putting it in the right spot is half the battle. Now you have to install it correctly. The internal mechanics are precise and gravity-dependent.
Orientation Guidelines: Can It Be Installed Upside Down?
No. You can never install a standard backflow preventer upside down. The internal check valves and relief valves rely on gravity to close properly. Installing it upside down guarantees it will fail.
Most residential devices can be installed either horizontally or vertically, but you must follow the manufacturer’s arrow for flow direction. The unit must be perfectly level for the internal seals and mechanisms to seat correctly. Even a slight tilt can cause a leak or a failed test.
Tools and Material Checklist
Gather everything before you start. Once you cut the main line, you have no water until you’re done.
- Two Pipe Wrenches or Channel Locks (one to hold, one to turn)
- Tubing Cutter for copper or PVC (hacksaw in a pinch, but a cutter is cleaner)
- Deburring Tool or File
- Thread Sealant (Teflon tape or pipe dope for threaded connections)
- Appropriate Pipe & Fittings (copper, PVC, or PEX based on your existing line)
- Torch & Solder (for copper sweated joints, if applicable)
- A 4-foot Level (this is critical)
Difficulty Rating & The DIY vs. Pro Verdict
Difficulty Rating: 7 out of 10.
Here’s the straight talk. If you are simply replacing an existing backflow preventer with an identical model, a confident DIYer can handle it. You’re just unthreading or unsweating the old unit and putting the new one in the same spot. If it’s a hose bib backflow preventer, the process is generally straightforward.
The DIY vs. Pro Verdict: Cutting into and repiping your main water service line is pro territory. If you need to move the location or install one for the first time, call a licensed professional. They have the insurance for this work. More importantly, after installation, the device must be tested by a certified backflow tester. A pro plumber can often do both the install and the initial certification test in one visit.
Keeping It Working: Testing and Maintenance Schedule
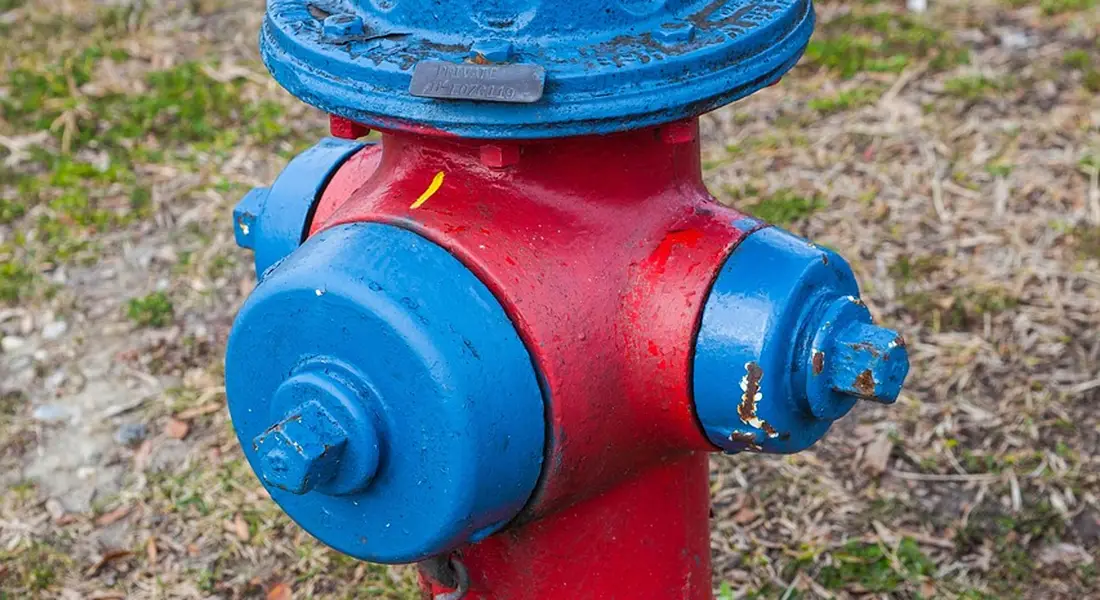
A backflow preventer is not a set-it-and-forget-it part. It’s a mechanical device with seals and springs that can fail. Keeping it working is a two-part job: professional certification and your own visual checks. For more on backflow prevention services and devices, see our device information guide. It covers common devices, maintenance intervals, and service options.
The Non-Negotiable Annual Test
You must have your backflow preventer tested every year by a certified backflow tester. This isn’t a suggestion. It’s a legal requirement in most municipalities for devices protecting public water lines, like those for irrigation or boiler systems. County requirements and specifications vary by jurisdiction. Check your local county codes for the exact requirements.
The certified tester uses special gauges to mechanically check each internal check valve and the relief valve, ensuring they open and close at the exact pressures required for safety. You cannot do this yourself. The test gauges are expensive, require annual calibration, and the tester is licensed to file the official report with your local water authority. Skipping this test can lead to fines and, worse, an unsafe device.
Your Monthly Visual Check-Up
Between professional tests, you are the first line of defense. Do a simple walk-around inspection each month. Look for these four things:
- Any signs of leaking water, especially from the relief valve outlet or between pipe connections.
- Visible cracks, dents, or heavy corrosion on the device body.
- That the device is not submerged in water or surrounded by dirt and debris.
- That all test cocks (the small brass plugs) are fully closed and not leaking.
Winterizing Outdoor Backflow Preventers
If your preventer is installed outside, freezing is its biggest enemy. Water trapped inside will expand and crack the brass body, destroying it.
You have two options. The best method is to shut off the water supply and use compressed air to blow out all water from the device and the downstream piping (like your irrigation lines). If you don’t have an air compressor, you must physically remove the device for winter storage. Simply shutting off the valve isn’t enough. Water remains inside and will freeze.
For a permanent outdoor installation in a cold climate, an insulated enclosure is not just helpful, it’s necessary to prevent freeze damage between seasons.
Recommended Products for Maintenance
You don’t buy a generic “backflow preventer.” You get the right type for the job. For homeowner maintenance, focus on protective accessories.
- Insulated Enclosures: These are foam-lined boxes that shield outdoor devices from freezing temperatures. Look for ones with a removable lid for easy tester access.
- Brass Hose Bibb Vacuum Breakers (HVBs): These are simple, inexpensive backflow preventers that screw onto your outside faucets. They protect your hose from things like fertilizer back-siphonage. Get brass, not plastic.
- Drain Pan Kits: For indoor installations (like in a basement), placing the device in a shallow drain pan can contain minor leaks and alert you to a problem before it causes water damage.
What Helped Me: A Story and Red Flag Troubleshooting
I got a frantic call from a homeowner whose basement had six inches of water. The culprit? An irrigation backflow preventer installed directly in the basement ceiling without a drain pan. The relief valve had failed in the open position. Because the device was above a finished room, the water ran for days along a beam and poured through a ceiling light fixture. The repair was a few hundred dollars for a new valve, but the water damage restoration cost tens of thousands. Always install with a drain route in mind.
The “Red Flag” Troubleshooting Guide
If you notice any of these four things, your backflow preventer needs attention.
- No water to irrigation zones or a downstream system. This usually means an internal check valve is stuck shut, blocking all flow. It’s a mechanical failure.
- Constant dripping or streaming from the relief valve outlet. This is a major sign the relief valve is stuck open or a check valve has failed. Your device is not preventing backflow.
- Visible cracks or heavy, crusty corrosion. The body integrity is compromised. It can burst under pressure.
- Noticeably reduced house water pressure immediately after the device was installed. A slight pressure drop (3-5 PSI) is normal. A big drop means it was incorrectly sized or is defective.
Will a Backflow Preventer Affect Water Pressure?
Yes, it will. Every valve and fitting in your pipes creates friction, which reduces pressure. A properly sized and functioning backflow preventer typically causes a small drop, about 3 to 8 PSI. If you lose more than 10 PSI, or your shower turns to a trickle after install, the device is likely undersized for your home’s demand or has a defective, restrictive part.
When to Shut Off Water and Call a Plumber
Don’t wait. Immediately shut off the main water supply to your house if you see:
- Water spraying (not just dripping) from the device.
- A visible crack or split in the brass body.
- Your relief valve is pouring out water non-stop and you cannot isolate the device with another valve.
Then call a licensed plumber. These are not “maybe later” problems. They are “right now” emergencies that can flood your home or contaminate your drinking water.
Common Questions
1. Can I install a backflow preventer myself, or do I need a professional?
Replacing an existing unit is a possible DIY project. However, cutting into your main water line for a new install is a job for a licensed plumber. They ensure correct placement, pass inspection, and often handle the mandatory initial certification test.
2. Is a basement or utility room an acceptable location?
It can be, but it’s less common and has strict rules. The device must be in a conditioned space that never freezes and must have a dedicated floor drain directly below it to handle any relief valve discharge. Most codes prefer an accessible, above-ground outdoor location.
3. What happens if the unit isn’t installed perfectly level?
It will likely fail its annual test. The internal check valves and relief valves rely on gravity to seal correctly. Even a slight tilt can prevent proper closure, allowing potential backflow and causing the device to leak.
4. Can the arrow point downward if the pipe runs that way?
No. The arrow on the body indicates the required direction of water flow, not gravity. You must follow the arrow according to the pipe’s flow path. The unit itself must be mounted in the orientation specified by the manufacturer-typically horizontal and level.
5. Does getting the location wrong just mean a failed inspection, or is it actually dangerous?
It’s genuinely unsafe. Installing it after a cross-connection (like after a boiler or sprinkler head) means contamination can reach your drinking water before the device can stop it. A bad location defeats its entire safety purpose, not just the code.
Putting It All Together
When installing a backflow preventer, focus first on placing it at least 12 inches above the ground and in a spot that is never submerged. Proper backflow preventer height sizing ensures the unit remains accessible for testing and maintenance. Getting the height and orientation right is your primary defense against contaminated water flowing backward into your home’s clean supply.
Always leave plenty of clear space around the device so a professional can easily test, service, or repair it later without having to cut pipes or tear out walls. An accessible installation protects your investment and ensures your water stays safe for years to come.
Written by Bob McArthur. Bob is a an HVAC and plumbing industry veteran. He has professionally helped homeowners resolve issues around water softeners, heaters and all things related to water systems and plumbing around their homes. His trusted advice has helped countless of his clients save time, money and effort in home water systems maintenance and he now here to help you and give you first hand actionable advice. In his spare time, Bob also reviews home water systems such as tankless heaters, water softeners etc and helps home owners make the best choice for their dwelling. He lives around the Detroit area and occasionally consults on residential and commercial projects. Feel free to reach out to him via the contact us form.