
Choosing the Best Whole House Water Filter: What Really Matters
Picking a whole house filter feels overwhelming. Get it wrong and you waste money on a system that doesn’t fix your water.
This article gives you the straight facts. We will cover what’s actually in your water, the main types of filters, how they get installed, and what they cost to run.
I’ve installed and serviced these systems for years. Test your water first-that report is your roadmap.
First, Diagnose Your Water Problem
You don’t guess with your health or your plumbing. Your first job is to know exactly what’s in your water. The single biggest factor in how to choose a whole house water filtration system is your water source, because city water and well water are two completely different beasts. That is where well water filtration considerations come into play, guiding you to the right system for your home. Different wells and contaminants call for different filtration systems.
City water is treated at a municipal plant. It’s disinfected, which is good, but that often means chlorine or chloramines. It may also contain low levels of regulated contaminants and minerals from miles of old pipe. Well water is all on you. It comes straight from the ground and can contain anything from harmless minerals to harmful bacteria, heavy metals, or gasses.
This is the core answer to the common question: “What is the water source (municipal, well, etc.)?” Your answer dictates your entire testing and treatment strategy. Whether you’re on a private well or a municipal supply, testing requirements and potential contaminants differ. Tailoring your plan to the source helps ensure you test for the right things and choose appropriate treatment.
For City Water Owners: Get Your CCR
Your water utility is required by law to send you an Annual Consumer Confidence Report (CCR). It lists what they detected in the water supply. Find it on your utility’s website or call them to get the latest copy. Don’t just glance at it. Look for the columns that list the “MCL” (Maximum Contaminant Level) and your local level. If your local level is close to or above the MCL, that’s your target.
For Well Water Owners: Get a Real Lab Test
Forget the free strips from the hardware store. They are wildly inaccurate. You need a comprehensive test from a certified laboratory. Look for a test that covers:
- Basic minerals (hardness, iron, manganese)
- Nitrates/Nitrites
- Bacteria (total coliform and E. coli)
- pH and Total Dissolved Solids (TDS)
- Optional but wise: arsenic, lead, uranium, and volatile organic compounds (VOCs)
This test is your roadmap. It costs about $150-$300 and is the best money you’ll spend on this project.
Water Science Snippet: What Your Test Results Really Mean
Lab reports can look scary. Let’s break down the big ones.
Hardness (measured in Grains Per Gallon – GPG): This is the amount of calcium and magnesium. Think of it as “scale potential.” 1 GPG is low. Over 7 GPG is hard water that will wreck appliances and leave spots.
Total Dissolved Solids (TDS): This is a measure of everything dissolved in the water-good and bad. A TDS meter gives you a number (in parts per million, or PPM), but it’s like a crowd counter. It tells you how many people are in the room, not who they are. High TDS alone doesn’t mean bad water, but it’s a clue you need the detailed lab report.
pH: This is how acidic or basic your water is. A pH of 7 is neutral. Below 7 is acidic and can corrode copper pipes and fixtures. Above 8.5 is very basic and can cause scale. Most systems work best with water between 6.5 and 8.5.
This directly addresses the question, “What specific contaminants are present in the water?” You must know the *what*, not just the *how much*.
The “Red Flag” Troubleshooting Guide for Your Test
Match your test results or symptoms to this list. It tells you what kind of fight you’re in.
- High Hardness (over 7 GPG): You see scale in pots, showerheads, and on fixtures. Soap doesn’t lather well. You need a water softener (ion exchange system).
- Iron & Manganese: Reddish-brown or black stains on sinks, toilets, and laundry. You might need a softener with special resin, an air injection oxidizer, or a dedicated iron filter.
- Rotten Egg Smell (Hydrogen Sulfide): Makes water smell like sulfur. It can tarnish silver and copper. This requires an oxidation filter (air injection or chemical) followed by a carbon filter.
- Chlorine Taste/Smell (City Water): Dries skin and hair, can affect taste. A simple activated carbon filter will remove it.
- Sediment or Cloudiness: Sand, silt, or rust particles. This will destroy any finer filter or softener downstream. You always start with a sediment pre-filter (like a 5 or 20-micron string wound filter).
How to Match a System to Your Water and Your House
Now you know the enemy. Think of your plumbing line as a security checkpoint. You need to stop the specific troublemakers trying to get through. Here is a simple chart to match the problem to the system.
| Problem to Solve | Type of System | How It Works (Simple Version) |
|---|---|---|
| Sand, silt, rust (sediment) | Sediment Filter | A physical mesh or wound string catches particles. |
| Chlorine, bad tastes, VOCs | Activated Carbon Filter | Carbon acts like a sponge, absorbing chemicals. |
| Hard Minerals (Calcium, Magnesium) | Water Softener (Ion Exchange) | Trades hardness ions for sodium or potassium ions. |
| Iron, Hydrogen Sulfide, Manganese | Air Injection Oxidizing Filter | Bubbles air into water, rusting iron and turning gas into solid filterable particles. |
| Combination of several issues | Multi-Stage System | Stages of different media in one tank (e.g., sediment, carbon, softener). |
You often need a team. For my own well with iron and hardness, I use a sediment pre-filter, then an air injection iron filter, then a softener. The sediment filter protects the more expensive systems.
Water Pressure and Flow: Don’t Strangle Your Pipes
A system that’s too small will kill your water pressure. Every filter and softener has a rated flow rate in Gallons Per Minute (GPM). You must match this to your home’s peak demand.
A good rule for an average 2-3 bathroom home is a system rated for at least 7-10 GPM. If you have multiple showers running and a washing machine going, you’ll hit that peak.
Next, check your home’s static water pressure. You need a pressure gauge (under $15). Screw it onto an outdoor hose bib or your washing machine’s cold water outlet. Turn on the water fully with nothing else running in the house. You want a reading between 40 and 60 PSI. Below 40, a system might not work right. Above 80, you likely need a pressure reducer to protect all your appliances.
This pressure check answers the vital question, “What is the water pressure and flow rate in the home?” before you buy anything.
Where Will This Thing Live? Space and Location Planning
These systems aren’t small. You need to plan its home. The best spot is on the main water line, right after it enters your house, before it branches to the water heater. Common locations are the basement, garage, or a utility room.
You need more space than just the tank’s footprint. Leave at least 6 inches of clearance on all sides, and more behind it for plumbing connections. You need room to kneel down and change filters, add salt, or perform maintenance. For a softener, remember you’ll also need a drain line and a power outlet nearby.
Tank size matters. For a softener, grain capacity is key. A 32,000-grain unit is typical for a family of four. For filters, a bigger tank with more media allows for longer “contact time,” which means better filtration. A 10″x54″ tank is more effective than a slim 4.5″x20″ model.
Always measure your available space and answer the question, “What is the available space for installation?” before you fall in love with a specific model online. I’ve had to send units back because they wouldn’t fit where the customer planned, and that’s a headache nobody needs.
Breaking Down the Real Costs: Upfront and Forever
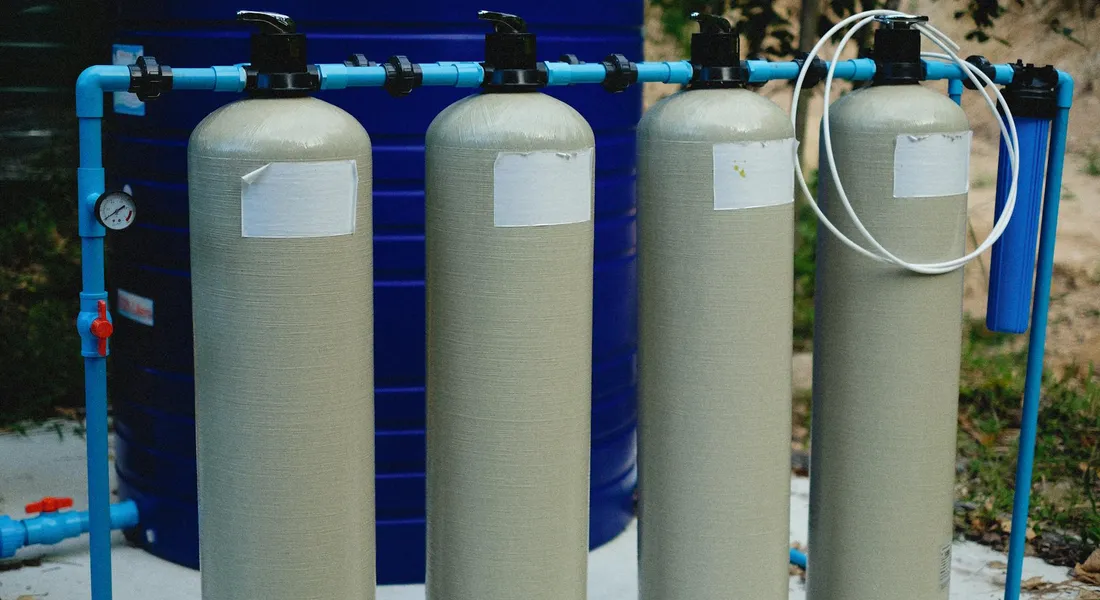
Think of the purchase price as just the ticket to get in the door. The real expense is what happens next. You need to separate the system’s cost from the labor to install it.
A basic single-stage sediment filter system might cost $400-$800 for the unit. A multi-stage filtration system tackling chlorine and odors can run $800-$1,500. A full water softener system is typically $1,200-$2,500 for the equipment alone.
The installation is a separate, significant line item, ranging from $500 for a simple DIY-friendly filter to over $1,500 for complex softeners requiring new plumbing runs. Your final price depends on your home’s plumbing layout and local labor rates. Beyond the initial install, ongoing costs include replacement filters and routine maintenance schedules that vary with water quality and usage. These factors influence when to replace filters and how you monitor maintenance, which can affect overall water filtration costs.
When you learn how to choose a water softener system, the biggest lesson is to look past the sticker price. That’s where cost effectiveness comes into play. Understanding the long-term costs can be more important than the upfront price. The forever costs are salt, replacement filters, and electricity. A softener might use $50-$100 in salt annually. Filter cartridges can cost $30-$100 each, changed every 6-12 months.
What is the budget for purchase and installation? Plan for a total outlay of $1,000 on the very low end for a simple filter to $4,000+ for a professionally installed, high-capacity water softener and filtration combo.
System Maintenance Roadmap: The Upkeep Schedule
Ignore maintenance, and your “best” system becomes the worst. Every system has a schedule. Stick to it.
| System Type | Regular Maintenance (3-12 Months) | Long-Term Replacement (5-10 Years) | Estimated Annual Upkeep Cost |
|---|---|---|---|
| Sediment/Carbon Filter | Replace filter cartridge | Housing or manifold (if it cracks) | $30 – $150 |
| Water Softener | Add salt to brine tank | Resin media replacement | $50 – $150 (salt + potential service) |
| Reverse Osmosis (Whole House) | Pre-filter changes, membrane check | Membrane replacement | $100 – $300 |
| Oxidation/Backwash Filter | Check air charge, backwash schedule | Filter media (BIRM, greensand, etc.) | $20 – $100 (power for valve) |
What are the maintenance requirements and costs? They are non-negotiable and predictable; budget for them like you budget for changing your furnace filter. Set calendar reminders for cartridge changes and check your softener salt level monthly.
What is the system’s filtration capacity and lifespan? Capacity is listed in gallons or grain. A 50,000-grain softener serves a different home than a 30,000-grain unit. The physical tank lasts 15-20 years, but the internal resin or media loses effectiveness and needs replacement long before that.
Certifications, Plumbing Codes, and What “Best” Really Means
“Best” is meaningless without proof. In water treatment, proof comes from independent certifications. Look for NSF/ANSI marks.
NSF/ANSI 42 covers taste and odor (chlorine). Standard 53 addresses health contaminants (lead, cysts). Standard 44 is for water softeners. Standard 58 is for reverse osmosis systems. A certification means the system was tested to do exactly what the manufacturer claims, with no material leaching into your water. It’s your primary trust signal.
Any professional installation must comply with your local plumbing code, either the International Plumbing Code (IPC) or Uniform Plumbing Code (UPC). This governs proper piping, venting, drain connections, and pressure safety. A legitimate installer knows this.
What certifications does the system have (e.g., NSF/ANSI)? This is the first question you should ask. If the seller hesitates or can’t provide the certification number, look at a different brand.
The Wastewater and Backwash Reality
Water softeners and some filters don’t just trap contaminants. They flush them down your drain. This process is called regeneration or backwash.
During a regeneration cycle, a softener can use 20 to 60 gallons of water to clean its resin bed. An iron filter might use over 100 gallons in a backwash. This water goes into your sewer or septic system and shows up on your water bill. It’s the trade-off for clean, soft water.
You need a dedicated drain line within a reasonable distance (check your system’s manual, often 10-20 feet). The drain needs an air gap to prevent contaminated water from siphoning back. No accessible drain? The installation complexity and cost spike.
What are the waste water or backwash requirements? Account for this extra water use, which can be 50-150 gallons per regeneration cycle, happening 1-3 times per week depending on your water usage. If you’re on a meter, you’ll see it. If you have a septic system, ensure it can handle the occasional extra load.
The DIY vs. Pro Installation Verdict
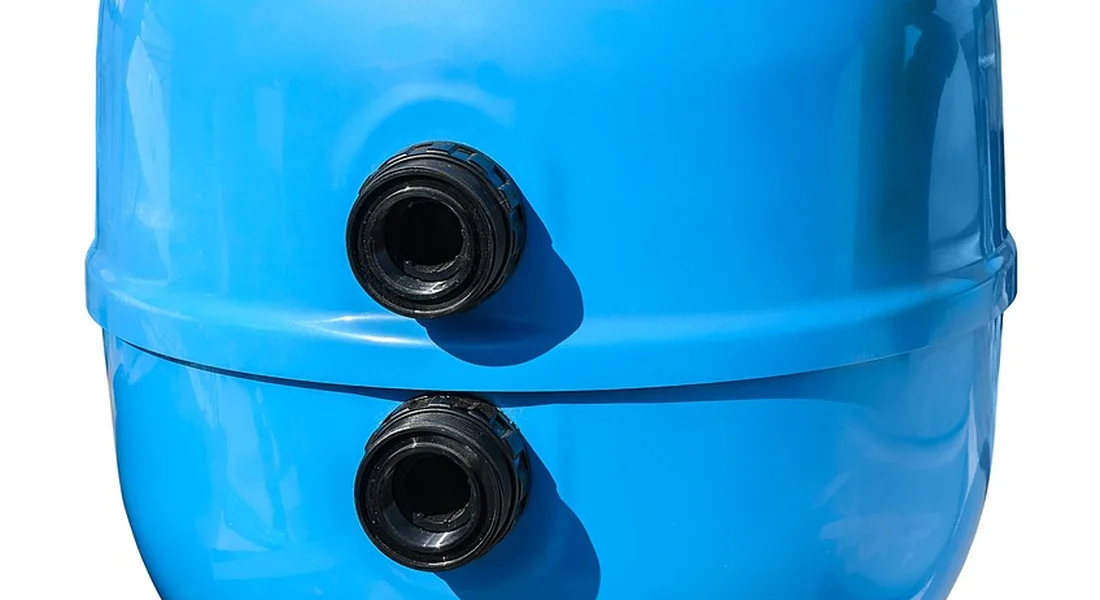
Let’s talk about getting this thing installed. The truth is, a standard whole-house filter install is a solid intermediate project. I’d rate the difficulty a 7 out of 10 for a homeowner who’s comfortable with basic plumbing.
This isn’t hanging a picture frame. You’re cutting into your main water line.
Skills and Tools You Absolutely Need
If you want to tackle this, your toolbox and skillset need these items:
- Pipe Cutting: You must make clean, square cuts on your copper, PEX, or CPVC main line. A tubing cutter is cheap and essential.
- Joining Method: You need to be proficient in one method. Sweat-soldering copper is classic but requires a torch and practice. Using a ProPress tool is easier but the tool is expensive. Push-fit fittings (like SharkBite) are the DIY-friendly choice, but you must install them perfectly clean and square.
- Understanding Bypass Valves: Most systems come with a bypass valve. You must know how it works. This valve lets you shut off water to the filter for maintenance or if it fails, without shutting off water to your entire house. Installing it backwards is a common mistake.
- Following Directions: The manufacturer’s manual is your bible for this job. Follow the sequence for inserting filter cartridges and tightening housings to the exact foot-pounds they specify.
A sloppy connection here doesn’t just drip, it can burst and flood your basement.
When You Need a Permit
Always check with your local building department. In many areas, any permanent modification to your home’s potable water supply requires a permit and inspection. This isn’t a suggestion. If you skip a permit and have a flood or contamination issue, your home insurance might not cover the damage.
When NOT to Try This Yourself (Professional Help Required)
Be honest with yourself. Call a licensed plumber or water systems pro if any of these are true:
- Your main water line is a confusing web of old galvanized steel or polybutylene pipe.
- You cannot find or do not have a reliable main water shut-off valve for your house.
- You’re on a well system and have recurring pressure tank or pump issues. Adding a filter to a unstable system causes more problems.
- The phrase “sweating a joint” or “PEX crimp ring” means nothing to you. Zero mechanical confidence is a valid reason to hire out.
Here’s the biggest reason to hire a pro: proper system sizing. This answers the common question, “What are the specific needs for different water uses?”
Your shower, washing machine, and garden hose all need water at the same time. A pro calculates your home’s peak flow rate (gallons per minute) to ensure the filter you choose won’t choke your water pressure. They match the system’s capacity to your actual household demand for drinking, bathing, and appliances. Guessing wrong means you’ll never get a good shower while the washing machine is running.
Making the Final Choice and Living With Your System
You’ve done the research. You know your water test results. Now, lay your top 2 or 3 system choices side-by-side. This checklist is how to choose the right whole house water filtration system for the long haul.
| Checklist Item | System A | System B |
|---|---|---|
| Certified Flow Rate (GPM) | Does it meet your home’s calculated peak demand? | Does it meet your home’s calculated peak demand? |
| Filter Media / Type | Carbon block, sediment, KDF? Does it target your contaminants? | Carbon block, sediment, KDF? Does it target your contaminants? |
| Filter Change Frequency & Cost | Every 6 months? Yearly? What’s the annual filter cost? | Every 6 months? Yearly? What’s the annual filter cost? |
| Warranty Length & Coverage | 5 years on tanks? 10 years? What voids it? | 5 years on tanks? 10 years? What voids it? |
| Customer Support Access | Phone support with live techs, or just email tickets? | Phone support with live techs, or just email tickets? |
Speaking of warranty and support, look for a company that stands behind their product. A long warranty on the filter tanks is good. A company with easy-to-reach, knowledgeable support technicians is even better. You don’t want to be stuck on hold for hours if you have a question about maintenance.
This entire process is also a key part of how to choose the best water tank system for your home. You’re not just buying a canister, you’re buying the media inside it, the company behind it, and the peace of mind that comes with it.
Once it’s installed and running, the result is simple. Your water tastes better straight from the tap. Your showers leave your skin feeling less dry. Your appliances-water heaters, washing machines, dishwashers-are protected from scale and sediment. They will last longer. That’s the real return on your investment.
Common Questions
1. How do I figure out which contaminants my filter should target?
Start with a proper water test—either your city’s CCR or a certified lab test for well water. That report is your shopping list; match the system’s capabilities to the specific problems (like iron, chlorine, or hardness) listed. Don’t buy a generic filter hoping it will fix everything.
2. What’s the real cost after purchase?
Budget for predictable, ongoing expenses. This includes replacement filter cartridges, salt for softeners, and a potential increase in your water bill from backwash cycles. Ignoring these forever costs is the fastest way to waste your initial investment.
3. Can I install this myself, or do I need a pro?
If you’re skilled with soldering or PEX and understand bypass valves, a simple filter can be a DIY project. For complex systems, unstable water pressure, or if your plumbing is old and confusing, hiring a licensed professional is a smart safety and investment protection move.
4. How do I know if a system’s certifications are legit?
Look for a clear NSF/ANSI standard number (like 42 or 53) on the product or in its specs. Then, verify it on the NSF’s online certification database. A reputable brand will have this information readily available for you to check.
5. What maintenance will it need, and can I handle it?
All systems require upkeep, like changing filters or adding salt. Review the maintenance schedule before you buy to ensure the tasks and costs are manageable for you. Setting calendar reminders is key to keeping your system-and your water-in good working order.
Making Your Final Decision
The best system for you finds the right balance between solving your specific water issues and fitting your home’s pressure, flow, and space. Start by matching the system’s capabilities directly to your lab test results and your household’s water use. Before you buy anything, grab a tape measure and check the clearance where you plan to install it.
Written by Bob McArthur. Bob is a an HVAC and plumbing industry veteran. He has professionally helped homeowners resolve issues around water softeners, heaters and all things related to water systems and plumbing around their homes. His trusted advice has helped countless of his clients save time, money and effort in home water systems maintenance and he now here to help you and give you first hand actionable advice. In his spare time, Bob also reviews home water systems such as tankless heaters, water softeners etc and helps home owners make the best choice for their dwelling. He lives around the Detroit area and occasionally consults on residential and commercial projects. Feel free to reach out to him via the contact us form.