The Homeowner’s Guide to Water Source Heat Pump Heating and Cooling
You’re looking at a water source heat pump and wondering if it’s just an overcomplicated, expensive box. It’s not. The core idea is simpler than you think.
We will cover the basic principle all heat pumps use, the science of moving heat with refrigerant, what makes the water source type unique, and the real pros and cons for your home.
I’ve installed these systems and serviced the water loops they tap into. Here’s the first thing you need to know: your well or pond water quality matters more than the pump itself.
The Simple Idea Behind a Water Source Heat Pump
Think of it like a heat mover, not a heat maker. A furnace burns fuel to create heat. A water source heat pump simply takes heat that already exists and moves it where you want it.
Here’s the simplest analogy. Imagine a cold, wet sponge. You dip it into a bucket of lukewarm water. The sponge soaks up that warmth. You then wring it out over your hands to warm them up. The system works the same way, using a special fluid called refrigerant as its “sponge.”
A water-source heat pump uses water as a heat-transfer medium, pulling thermal energy from it or dumping excess heat into it.
Do not confuse this with a heat pump water heater. A water source heat pump handles your entire home’s heating and cooling through your ductwork. A heat pump water heater is a completely different appliance that only heats the water for your showers and sinks. I’ve installed both in my own home, and they serve very separate purposes.
How It Works: Your Home’s Heating and Cooling Cycle
The magic happens inside a sealed loop of refrigerant. Four main parts work together: the compressor, condenser, expansion valve, and evaporator. The compressor is the pump. The expansion valve is like a precise nozzle. The condenser and evaporator are just coils where heat gets swapped.
Whether it’s heating or cooling, the refrigerant cycles through these four parts, changing from a liquid to a gas and back again. This phase change is what allows it to absorb and release large amounts of heat.
Heating Your House: Soaking Up Warmth from Water
This is the core of how a water source heat pump works in winter. Even well water at 50°F holds useful heat energy.
First, cold liquid refrigerant travels through the evaporator coil. A water loop (from a well, pond, or closed ground loop) flows past this coil. The refrigerant absorbs heat from the water, causing it to boil and turn into a low-pressure gas.
That cool gas is then sucked into the compressor. The compressor squeezes it tightly. This compression superheats the gas, just like a bike pump gets hot when you use it.
The now-hot, high-pressure gas shoots into the condenser coil. Your home’s blower fan moves room air over this hot coil. The refrigerant releases its heat into your home’s air, cools down, and turns back into a liquid. The warm air is distributed through your ducts. The cycle repeats.
Cooling Your House: Dumping Heat into Water
For cooling, a part called the reversing valve flips the system’s flow. Now the indoor coil becomes the evaporator, and the coil facing the water loop becomes the condenser.
The refrigerant now absorbs heat from the warm air inside your house at the indoor evaporator coil. This cools your home’s air.
The compressor then pumps the heated refrigerant gas to the condenser coil in the water loop. Here, the heat is dumped into the water, which carries it away. This process connects directly to how an air to water heat pump works in cooling mode. The water loop acts as a heat sink, which is often much more efficient than dumping heat into hot summer air like a standard air conditioner does.
You must ensure your water source can handle this rejected heat. A closed-loop system with antifreeze is common, as it won’t affect a pond or well’s temperature or chemistry.
The Main Parts of the System (And What They Do)
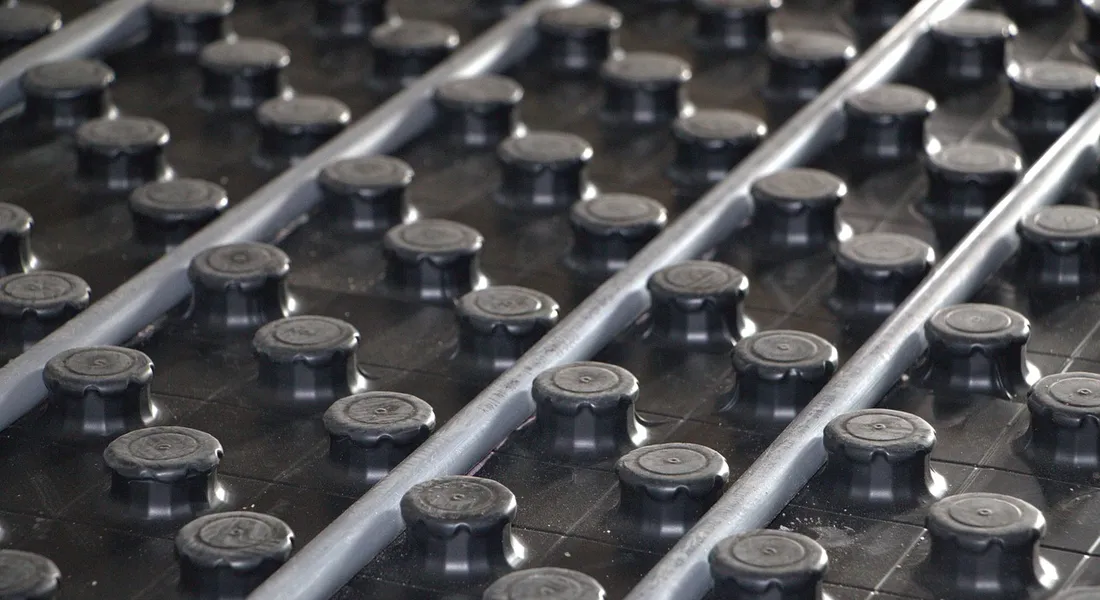
Think of the system in three main chunks. You have the outdoor heat pump unit, the buried or submerged water loop, and the indoor equipment that blows air through your house. Let’s open up the heat pump unit first.
The Heat Pump’s Guts: Compressor, Coils, Fan, and a Magic Valve
Inside that metal cabinet sits machinery you’d find in any fridge or air conditioner.
- Compressor: This is the heart. It’s a pump that squeezes the special refrigerant gas, raising its temperature and pressure dramatically.
- Coils: There are two sets. The refrigerant-to-water coil is where your water loop connects. The refrigerant-to-air coil is where your indoor fan blows across. They are where heat gets dumped or absorbed.
- Reversing Valve: This is the magic. It’s an electrically controlled valve that literally reverses the flow of refrigerant. In summer, it sends hot gas outside to the water loop. In winter, it flips and sends that heat inside your house. One system does both jobs.
- Fan: A simple blower that pulls air across the refrigerant-to-air coil to either grab heat from it (heating mode) or dump heat into it (cooling mode).
This sealed refrigerant loop is the core of the heat pump’s operation, moving heat from one place to another instead of creating it from scratch like a furnace.
The Closed Water Loop: Pipes, Pump, and Heat Exchanger
This is the “water source” part. It’s a continuous, sealed loop of plastic pipe filled with water (or a water-antifreeze mix). A circulation pump keeps this fluid moving.
The loop runs from the ground or pond, into your house, and connects directly to that refrigerant-to-water coil inside the heat pump. That coil is the heat exchanger. In heating mode, the cold water loop absorbs earth warmth and carries it to the heat pump. In cooling mode, the loop carries your house’s waste heat back to the earth to be dissipated.
Because it’s a closed loop, you aren’t constantly consuming well water or lake water; the same fluid circulates for years. The pump is a critical component, and if it fails, the whole system stops. In drought conditions, a failed well pump can trigger a shutdown and leave the system without water. That risk underscores the importance of proactive maintenance and contingency planning.
The Ground or Water Source: Where the Loop Lives
This loop needs to be buried or submerged to work. For a ground source system (geothermal), trenches are dug or deep vertical boreholes are drilled, and the pipe loop is installed there. The earth’s stable temperature does the rest.
For a pond or lake source system, coils of pipe are sunk to the bottom of a sufficiently large body of water. The water’s mass absorbs or gives up heat.
Delivering Comfort: The Air Handler or Ductwork
Finally, you need to move the conditioned air. An air handler cabinet contains a powerful blower fan and often auxiliary electric heat strips for the coldest days. It connects to your existing ductwork. The air handler blows home air across the indoor coil, heating or cooling it, and sends it through your vents. If you have a ductless setup, a wall-mounted indoor unit handles this job in each room.
Where Does the Water Come From? Your Source Options
You have three primary ways to source the water for the loop. Your property, budget, and local rules will decide.
1. Ground Loops (Geothermal)
This is the most common and reliable method. High-density polyethylene (HDPE) pipe is buried in your yard. Horizontal loops need wide, open land dug into trenches 4-6 feet deep. Vertical loops need less land but involve drilling boreholes 150-400 feet deep, which costs more.
A ground loop is a major upfront investment in excavation or drilling, but it offers the highest efficiency and longest lifespan with almost no maintenance.
2. Pond/Lake Loops
If you have a pond, lake, or even a large irrigation pond on your property, this can be a cost-saver. The pipe coils are assembled on shore, floated out, and sunk to the bottom. The key is having enough water volume. A small garden pond won’t cut it.
This option avoids expensive digging, but it requires a suitable, accessible body of water and may need permits from local or state authorities.
3. Open Well Systems
This is a less common “pump and dump” system. It requires a high-yield production well and a separate discharge point like a drainage ditch or second “return” well. It pumps groundwater up, runs it through the heat pump once to exchange heat, and then discharges it.
Open systems are simpler to install but can be restricted by water rights, environmental codes, and they risk scaling the heat exchanger with mineral-rich well water. They also constantly use water.
Hybrid Systems with a Cooling Tower
In some commercial setups or areas with poor soil, you might see a closed-loop system connected to a small cooling tower outside. The tower helps reject excess heat in summer. For most homes, this is overkill.
Water Science Snippet: Why Your Water’s Chemistry Matters
If your system uses an open well or a pond source, your water quality is a big deal. For closed loops, you control the fluid, but you must get the mix right.
Hard water is the enemy. The calcium and magnesium in it precipitate out as limescale when heated or cooled in the heat exchanger. Scaling acts like an insulating blanket on your heat exchanger, making the compressor work brutally hard and skyrocketing your electric bills. Efficiency can drop by 20% or more with heavy scale. This buildup directly harms heater efficiency by blocking heat transfer. The system then has to work harder, driving energy use higher.
pH matters too. Fluid that’s too acidic (low pH) will corrode copper coils and metal fittings from the inside. Fluid that’s too alkaline can also cause problems. For a closed loop, you don’t use plain tap water. You use a mix of distilled or softened water and a non-toxic propylene glycol antifreeze, which includes corrosion inhibitors.
You must test and maintain the fluid chemistry in a closed-loop system every few years, topping up inhibitors to prevent silent, expensive corrosion. Regular maintenance also helps keep the water softener running efficiently. For open systems, a whole-house water softener is often a mandatory protective investment.
The Good, The Bad, and The Cost: Is It Right for You?
Forget the sales brochures. Here is a straightforward comparison to see where this system fits.
| Feature | Water Source Heat Pump | Standard Gas Furnace + Central AC |
| Heating/Cooling | One unit does both | Requires two separate systems |
| Operating Cost | Very low | Moderate to high |
| Upfront Cost | Very high (mostly for loop) | Moderate |
| Best Climate Fit | All, but ideal in moderate zones | Furnace for cold, AC for hot |
| Installation Complexity | High (need land/water and specialist) | Standard |
Big Advantages: Efficiency and Lower Bills
How efficient is a water source heat pump compared to other systems? It wins. Instead of creating heat by burning fuel, it moves existing heat from the water into your home. This process uses much less electricity. Is a heat pump water heater worth it? For many households, the long-term energy savings and potential rebates can make the upfront cost worthwhile.
We measure this with a Coefficient of Performance (COP). Think of COP like miles per gallon for a heater. A good gas furnace might have a COP of 0.95. A high-efficiency water source heat pump can have a COP of 3.5 to 5.0. For every unit of electricity it uses, it moves over three to five units of heat into your house. This high efficiency directly translates to lower monthly utility bills, especially when replacing electric resistance heat or an old AC unit. Understanding how to calculate pump efficiency can help you estimate potential energy costs more accurately. This makes it easier to identify when upgrading to a higher-COP system will pay for itself.
You get year-round comfort from one quiet unit. It heats in winter and cools in summer by reversing the cycle. Since it moves heat instead of making it by combustion, your home’s carbon footprint is smaller. The indoor unit also has fewer mechanical parts than a furnace, which often means a longer lifespan with proper maintenance.
Real-World Considerations and Downsides
The big hurdle is the initial price tag. The heat pump unit itself costs about as much as a high-end furnace and AC combo. The real expense is the ground loop or well system. Excavating your yard for horizontal loops or drilling for vertical loops is a major construction project. Pond loops are cheaper if you have a suitable body of water. That’s where the DIY vs pro pump install costs come into play. Hiring a pro adds labor and permitting fees, but doing it yourself can save money up front while risking mistakes later.
That brings us to land and permits. Horizontal loops need a lot of open land. Vertical loops need drilling rig access. Many localities require permits for the excavation, drilling, and sometimes for the use of groundwater. You must check with your town before getting excited.
Is a water source heat pump suitable for all climates? Technically, yes. The ground or well water temperature is stable enough to work anywhere. It is most cost-effective in areas with moderate heating and cooling needs, where its super efficiency saves the most money compared to fuel costs. In extremely cold climates, a backup heat source may still be needed, which adds cost.
Finally, not every HVAC company can do this. You need an installer proficient in hydronics (water-based systems) and these specific units. A plumber or water well driller handles the loop, but the HVAC technician must properly connect and commission the system.
Getting One Installed: A Homeowner’s Roadmap
This is not a weekend project. Here is the typical process.
- Site Evaluation: A contractor assesses your home, yard, and access to decide on loop type (horizontal, vertical, pond).
- Load Calculation: The contractor performs a Manual J calculation. This determines your home’s precise heating and cooling needs. Sizing the unit and loop correctly is critical for efficiency and longevity.
- Loop Installation: Excavation, drilling, or pond work happens. Piping is laid, connected, and pressure-tested. This is the most disruptive and time-consuming phase.
- Unit Installation: The indoor heat pump unit and associated pumps are installed and connected to your ductwork and the loop piping.
- Commissioning: The system is filled, purged of air, and started. The technician checks pressures, temperatures, and flow rates to ensure optimal operation.
Costs break into two big pieces. The heat pump unit and indoor installation might range from $10,000 to $15,000. The ground loop or well system can easily add another $10,000 to $30,000+, depending on type and site conditions. Also, think about water heater supply lines in a heat pump setup, as proper routing can affect efficiency. Well-planned supply lines can make maintenance easier over time.
Never let a contractor skip the Manual J load calculation. An oversized or undersized system will waste energy and money from day one.
From signing a contract to a finished, working system, expect a timeline of two to four weeks. The loop installation is the wild card, as weather and permitting can cause delays.
Keeping It Running: Your System Maintenance Roadmap

Think of maintenance like this: your water source heat pump has fewer moving parts in the air handler than a furnace, but it adds a whole water loop system you need to babysit. A traditional split system needs furnace filter changes and annual AC checkups. Your heat pump needs that plus vigilant monitoring of its water side. Forget the loop, and you risk killing your system’s efficiency or the unit itself.
The Annual and Seasonal Checklist
Stick to this schedule and you’ll avoid most major headaches.
- Monthly: Check and replace the air filter. A clogged filter strangles airflow, making the unit work harder and freeze up.
- Annually (Before Heating Season): Hire a pro. They need to check the refrigerant charge, electrical components, and loop pressure. This isn’t a DIY gas recharge.
Your loop is the heart of the system. For a closed loop, you’re checking the pressure gauge on the manifold annually. A steady drop can mean a leak. Every 3-5 years, test the antifreeze solution’s pH and inhibitor strength. The pump should run quietly without vibration.
For an open loop system, water quality is your new part-time job. You’re pulling in well or surface water. Without treatment, scale and corrosion will wreck the heat exchanger. Install a good sediment filter and check it monthly. If you have hard water, a whole-house softener isn’t optional, it’s mandatory to prevent rapid scaling. You must also plan for proper discharge according to local codes.
Recommended Products for Care and Efficiency
Buying the right stuff upfront saves money and service calls later.
- Air Filters: Get a pleated filter in the MERV 8-11 range. It catches enough dust to protect the indoor coil without restricting airflow. I use MERV 11 filters in my own system and change them like clockwork.
- Thermostat: Use a programmable or smart thermostat designed for heat pumps. It understands how to manage auxiliary heat strips and defrost cycles efficiently. A basic thermostat can make it run poorly.
- Loop Fluid: This is critical. Use only the propylene glycol-based inhibitor specified by your unit’s manufacturer. Don’t just pour in automotive antifreeze. The wrong chemistry can gel up and destroy the loop.
- Water Pretreatment: For any open-loop system, and even for closed loops with problematic fill water, a quality sediment filter and water softener are the best insurance you can buy. They prevent the most common causes of failure.
Final Decision: How to Know if a Water Source Heat Pump Fits Your Home
This isn’t for everyone. The ideal candidate checks these boxes:
- You plan to stay in the home for 10+ years to reap the energy savings.
- Your current heating and cooling bills are high, making the payback period shorter.
- You have the land for trenching a horizontal ground loop, or the budget for drilling a vertical one.
- You have a willing water source for an open loop (a high-yield well or pond) and understand the permitting.
It’s likely a poor fit if:
- You live in a mild climate with cheap electricity. A standard air-source heat pump might be cheaper to install.
- You have a tiny urban lot with no room for a ground loop and no water source.
- You’re on a very tight upfront budget. The installation is a significant investment.
Your single most important step is getting multiple quotes from installers certified by the International Ground Source Heat Pump Association (IGSHPA) or with deep local experience. Ask for references and photos of past loop installations. A bad loop job is a nightmare to fix.
When sized and installed correctly on a proper loop, these systems are incredibly reliable. The indoor unit often lasts 20 years, and the buried loop can last 50+. It’s a long-term play for comfort and efficiency.
Quick Answers
How efficient is it really compared to a standard furnace and AC?
Dramatically more efficient. It moves heat instead of creating it, often delivering 3-5 units of heat for every 1 unit of electricity used. This high Coefficient of Performance (COP) directly translates to lower monthly bills, especially when replacing electric heat or an old system.
Will it work in my very cold/hot climate?
Yes, because the ground or water source temperature is stable year-round. It’s technically suitable for all climates, but it’s most cost-effective in areas with moderate to high heating and cooling needs where its efficiency saves the most money. In extreme cold, a small backup heat source may still be used.
Is the maintenance harder than my current system?
It’s different. You have fewer moving parts in the air handler, but you must monitor the water loop. For a closed loop, check the pressure gauge yearly and test the fluid’s antifreeze and corrosion inhibitors every 3-5 years. Neglecting the loop chemistry is the most common cause of silent, expensive damage.
What’s the realistic timeline and disruption for installation?
Plan on 2-4 weeks from start to finish. The most disruptive phase is the loop installation, which involves excavation, drilling, or pond work. The indoor unit installation is similar to a standard HVAC swap. Weather and permitting for the groundworks are the most common causes of delay.
What’s the main risk with using my well or pond directly?
Scaling and corrosion. An “open loop” pumping well water directly through the unit will deposit minerals (scale) on the heat exchanger, drastically cutting efficiency and lifespan. If using a well or pond, a closed loop with a heat exchanger is safer, or a whole-house water softener is absolutely mandatory for an open system.
Keeping Your Heat Pump System Running Smoothly
The best thing you can do is schedule annual maintenance with a qualified HVAC technician who knows water source systems. Change your air filters every one to three months without fail to protect the entire system’s efficiency and lifespan. Also follow a water system filter replacement frequency schedule to keep the water side of your system clean and efficient.