How to Fix a Submersible Well Pump: Straight Talk for Homeowners
Your well pump died and now you have no water. Let’s get it working again.
We will cover safety first, how to diagnose the real problem, pulling the pump the right way, swapping out bad parts, and getting your system running.
I’ve repaired hundreds of these pumps on the job and in my own well. Here’s the truth: if you skip testing the pressure tank and switch, you’ll waste a whole day.
Your First Question: Are Submersible Pumps Even Rebuildable?
Yes, a submersible well pump can be rebuilt, but that’s not always the right move. Think of it like rebuilding a car engine. If the block is cracked, you’re throwing good money after bad. If it’s just a worn-out set of pistons and seals, a rebuild makes perfect sense. Sometimes a quick disassembly for maintenance is all that’s needed. That approach can help catch issues before a full rebuild.
The decision comes down to the cost of the rebuild kit versus the price of a new pump and the age of the motor. If your pump is less than ten years old and the motor still runs, rebuilding just the hydraulic end is almost always worthwhile.
You need to understand the two main parts of your submersible pump. The bottom half is the motor. It’s an electric motor sealed in oil. The top half is the pump end or hydraulic section. This is the part with the impellers and diffusers that actually moves the water.
You can often successfully rebuild the pump end even if the motor is shot, as long as you can source a matching new motor. Most major failures-like lost pressure, sand wear, or a cracked housing-happen in the pump end. If the motor itself has failed, the cost to replace it plus rebuild the pump end sometimes gets too close to just buying a whole new unit.
Red Flags: Is Your Well Pump Failing Right Now?
Some problems are gradual. These signs mean you have an urgent issue. Stop using water and start diagnosing immediately. Being aware of water line problems symptoms can guide your next steps. Look for indicators like sudden pressure changes, discolored water, or unusual pipe noises.
- No water at all from any faucet. Check that the pump’s circuit breaker is on first. If power is confirmed, this points directly to a failed pump, a broken drop pipe, or a severely stuck control switch.
- Spitting, sputtering air from the taps. This usually means your well water level has dropped below the pump intake. The pump is pulling air. Continuous running in this state will destroy it.
- Dramatic, sudden drop in water pressure. This isn’t a slow decline over years. If your shower turns to a trickle overnight, a major component in the pump end has likely failed, like a broken impeller or shaft.
- Hearing the pump cycle on and off rapidly (short cycling). Listen at the wellhead. If the pump kicks on for 10 seconds, off for 20, and repeats, you have a problem. This can be a failed pressure tank bladder, but it also destroys pump motors from the constant starts.
- Tripped breaker or blown fuse at the well pump control. Do not simply reset it and hope. A direct short or a seized motor will trip a breaker. Resetting it repeatedly is a fire hazard and will cause more damage.
How to Diagnose the Real Problem Before You Pull the Pump
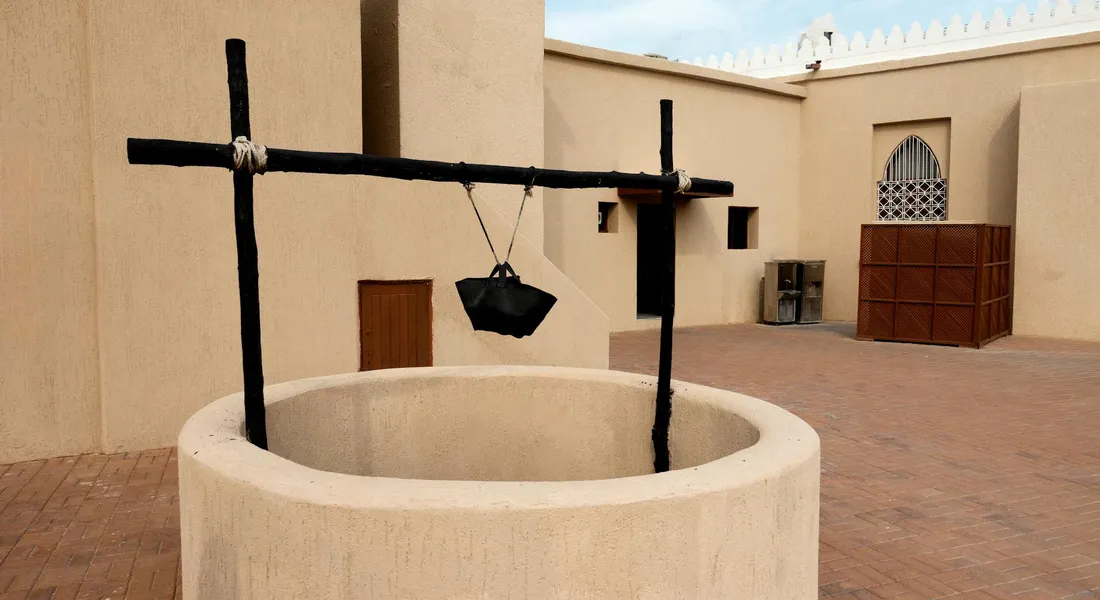
How do you diagnose a submersible well pump problem? You start by assuming it’s not the pump. Pulling a pump is a massive job. You need to rule out everything else first. Run through this simple checklist before you decide it’s dead. If a submersible pump isn’t working, check the basics first—power, switch, and pressure tank. Often the fault isn’t the pump itself, but wiring, controls, or the water supply.
- Is there power to the entire system?
- Is the pressure tank waterlogged or empty?
- What sound does the pump make when it tries to start?
- Is water reaching the house at all, or is the flow weak?
Answering these questions will point you to the real culprit 80% of the time, saving you from unnecessary, backbreaking work.
Check the Easy Stuff First (Power and Pressure)
Always start here. Your pump needs two things to work: electricity and a place to send the water. Check both.
First, verify power. Go to your pressure switch and control box (if you have one). With a multimeter, check for 240 volts across the two main line terminals. No power? Check your main breaker panel and any disconnect switches near the wellhead. If you have power at the switch but the pump doesn’t get it, the pressure switch contacts might be corroded. A quick tap on the switch body can sometimes free them, but plan on replacing it, especially if you suspect any breakers have tripped.
Next, check the pressure tank. A waterlogged tank will cause rapid, short cycling that can burn up a pump. Turn off the pump’s power and drain all water pressure from the system. Using a tire gauge, check the air charge on the tank’s Schrader valve. It should be 2 psi below the pump’s cut-in pressure. For a common 40/60 switch, that’s 38 psi. If it’s low, use an air compressor to fill it. If air comes out but water never does, the bladder is intact. If water sprays out, the bladder is ruptured and the tank needs replacement.
Listening for Clues: Motor Sounds and System Behavior
Turn the power back on and listen carefully at the wellhead. The sound tells you everything.
A silent pump usually means no power is reaching it. The circuit is broken at the breaker, a loose connection, or a failed pressure switch.
A loud humming pump that never builds pressure is often a mechanical seizure or a failed start capacitor. The motor is getting power but can’t turn. For pumps with a control box, a bulging or leaking capacitor is a common, fixable issue. You can test and replace it for under $50. That stuck-pump scenario is exactly what the well pump stuck troubleshooting steps cover next. The next steps walk you through diagnosing motor seizure, capacitor health, and control box issues before taking action.
A pump that runs but delivers weak or sandy water points to wear inside the pump end, like worn impellers, or a low water level in the well. If it runs constantly but can’t reach cut-off pressure, you likely have a leak in the drop pipe underground.
When the Problem Might Not Be the Pump
Plenty of other components fail first. Before you blame the pump, eliminate these common culprits.
- Failed Pressure Switch: The most common failure point. The contacts burn out or the diaphragm fails. It’s a $25 part and a 15-minute fix.
- Leaking Drop Pipe: A crack or bad joint in the pipe underground means water flows back into the well. The pump runs but you get little to no water in the house.
- Clogged Sediment Filter: If you have a whole-house filter, a completely blocked cartridge can mimic no water pressure. Bypass it to check.
- Low Well Water Level: If your well is shallow or in a drought area, the water level may have dropped below the pump intake. A well service can measure this.
I once spent a whole weekend convinced my pump was dead. It turned out a mouse had chewed through a wire in the control box. Always check the simple, cheap stuff first.
The DIY vs. Pro Verdict and Your Tool Checklist
Difficulty Rating: 9/10. This is a major, physically demanding project with significant risk of damage or injury. You are pulling heavy, wet equipment from a deep, narrow hole. One slip can mean a lost pump or a broken pipe at the bottom of your well.
A skilled homeowner with mechanical aptitude can supervise the pull, lay out the pipe, and handle the disassembly and cleaning of the pump end (the wet end). This is where you replace worn impellers and seals. The electrical motor half is usually sealed; you don’t rewind it yourself.
Call a professional for pulling very deep pumps (over 200 feet), dealing with complex electrical faults in the motor, or if you discover major issues like a collapsed well casing. Their insurance and specialized hoist rig are worth the cost.
Tools & Materials Checklist for Removal and Repair
What tools and materials are needed for the repair? You need more than just wrenches. Here is the specific list for a safe, controlled pull and rebuild.
Tools for Removal:
- Well cap wrench or large channel locks
- Two large pipe wrenches (24-inch minimum)
- Heavy-duty cable ties or duct tape
- A pump hoist (tripod), a sturdy overhead beam, or at least two very strong helpers
- Pipe stands or a clean, long surface to lay the pipe
- Torque arrestor (if yours is damaged)
- Multimeter
- Pump-specific socket or spanner wrench for disassembly
Materials for Repair & Reinstallation:
- Replacement impellers and diffusers kit (match your pump model exactly)
- New shaft seal kit
- Thread sealant (made for plastic, like Blue Monster)
- Stainless steel hose clamps (for the torque arrestor)
- New waterproof wire splicing kits
- Spare length of safety rope (if yours is frayed)
Code & Compliance Check
The wiring that goes down the well is critical. It must be watertight to prevent shorts and contamination. You must use proper submersible pump cable. Standard outdoor wire is not acceptable.
All splices must be made with waterproof, direct-burial splice kits, and the entry point through the well cap must be sealed with a watertight gland. This isn’t just a good idea; it’s typically required by local plumbing and electrical code. A failed splice means pulling the pump all over again.
Pulling, Teardown, and Finding the Failure
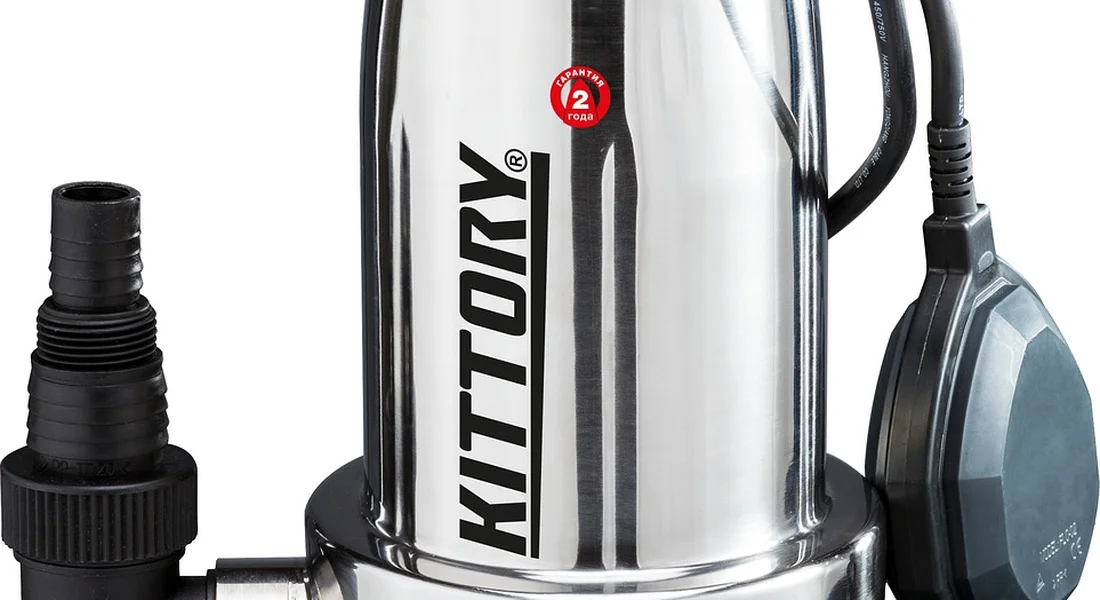
How do you safely remove a submersible pump? This is the most physical part of the job. Your goal is to get the pump to the surface without damaging the pipe, wire, or yourself.
The Safe Step-by-Step Pulling Process
Your first and most important job is to make the system completely safe to work on. A live electrical line or a pipe under pressure can cause serious injury. Follow these steps in order.
- Kill power at the breaker AND disconnect at the control box. Go to your main electrical panel and turn off the breaker for the well pump. Then, locate the pump’s control box (usually near the pressure tank) and disconnect the wires. Use a voltage tester to double check the terminals are dead. This eliminates any chance of shock.
- Relieve system pressure and secure the drop pipe. Open a hose bib or faucet to drain pressure from the plumbing system. The pressure gauge on your tank should read zero. At the wellhead, you’ll find the pitless adapter or well seal. You need to unthread or unbolt this to access the drop pipe. Have a sturdy pipe vise or a set of well caps ready to clamp onto the pipe once you lift it a few feet. This prevents the whole assembly from falling back down the well.
- Method for pulling and coiling pipe/wire without damage. Pull the pipe up in sections. As you pull, have a helper guide the wire and pipe into large, flat coils on clean ground. Avoid sharp bends. Never let the pump’s weight hang by the electrical cable. For my own 250-foot well, I lay out a tarp first to keep everything clean. Use duct tape every 10-15 feet to secure the wire to the pipe as you go; this makes reinstallation much easier.
Can You Replace Impellers? A Step-by-Step Teardown
Can you replace impellers in a submersible pump? Yes, absolutely. That’s often the core of a rebuild. The pump is a stack of alternating impellers and diffusers. Wear here causes a loss of pressure and flow.
Disassembly is a careful process of unthreading the housing and keeping every single part in perfect order. The parts must go back exactly as they came out. Here is how you do it.
- Secure the pump body in a vise with soft jaws. Do not crush it.
- Unthread the discharge head or the first stage housing. You may need a large pipe wrench and some penetrating oil.
- As you lift off the housing, the first impeller and diffuser will be revealed. Carefully lift them out and place them on a clean bench in a line, in order.
- Continue unthreading subsequent housing sections, removing and ordering each impeller and diffuser pair. Take a picture with your phone after each stage.
Now, inspect each part. Look for wear on the impeller vanes-they should be sharp, not rounded. Check diffusers for cracks or where sand has eroded the passages. A small amount of sand can be cleaned with vinegar. Heavy wear means you need a complete rebuild kit.
Common Failure Points and How to Fix Them
Once the pump is apart, you need to play detective. Here are the usual suspects that kill a submersible pump.
Clogged or Worn Impellers/Diffusers: This is the most common mechanical fix. If impellers are just gritty, soak them in a 50/50 water and vinegar solution. Rinse thoroughly. If vanes are worn down, replace the entire stack with a matched rebuild kit for your pump model. Do not mix old and new parts.
Worn Shaft Seal: This seal sits where the motor shaft enters the pump housing. If it leaks, water drips directly into the motor windings. You’ll often see corrosion on the shaft. A leaking shaft seal is a death sentence for the motor; always replace it during any rebuild. The kit usually includes a new one.
Seized Bearings: Try to spin the motor shaft by hand. It should turn smoothly and quietly. If it’s gritty, binds, or won’t turn, the motor bearings are shot. For most homeowners, this means replacing the entire motor. It’s rarely cost-effective to rewind or re-bearing a submersible motor.
Corroded Cable or Splices: Inspect the entire length of the pump cable. Look for green corrosion, nicks, or cracked insulation. Any bad section must be cut out. To make a perfect waterproof splice, use direct-burial, heat-shrink splice kits with adhesive liner. Strip the wires, insert them into the butt connector, crimp it, then apply the heat-shrink tube. The heat melts the inner adhesive, creating a complete seal. Do not use standard wire nuts.
Rebuilding, Testing, and Getting It Back in the Hole
How do you reassemble and test a rebuilt pump? Slowly and cleanly. Rushing here will send you right back to the start.
Reassembly is a Reverse (But Cleaner) Process
Clean your workbench. Wash your hands. A single grain of sand introduced during reassembly will grind away your new parts in just hours. Work methodically.
- Lightly lubricate new shaft seals and O-rings with a silicone grease meant for potable water.
- Apply a thin layer of thread sealant (like Blue Monster or Rectorseal #5) to all male pipe threads. Avoid Teflon tape; shreds can get inside.
- Refer to your photo and line of old parts. Reinstall each new impeller and diffuser in the exact same sequence.
- Thread housings together hand-tight, then use a wrench for a final snug turn. Do not overtighten.
The Critical Bench Test
Never skip this. You must verify your work before the pump goes down 300 feet.
Briefly run the rebuilt pump in a large barrel or stock tank full of clean water. Use a spare piece of pipe on the discharge and secure the pump so it’s submerged. Make temporary electrical connections (follow safety protocols). Turn it on for just 15-30 seconds. You should see a strong, consistent flow from the discharge with no leaks at the housing joints. No flow or strange noises means something is wrong inside. Fix it on the bench, not in the well.
Reinstallation and Priming the System
What are the steps for reinstalling the pump? This is the pulling process in reverse, with more care.
- Secure the new pump to the drop pipe. Use thread sealant and tighten it well.
- As you lower the assembly, slowly feed the pipe and taped wire into the well. Your helper’s job is to prevent any kinks or pinches. Go slow.
- Install the torque arrestor about 20 feet above the pump. This clamp with rubber bumpers stops the pump from twisting and wearing against the well casing.
- When the pump is at the correct depth, secure the pipe in the well seal or pitless adapter. Follow the manufacturer’s instructions for a watertight seal.
Finally, reconnect the wiring at the control box, restore power at the breaker, and open a few faucets in the house. Submersible pumps are self-priming; “priming” here simply means letting the air bleed out of your household pipes until you get steady, solid water pressure. Listen for the pump to cycle off at the correct high pressure. You’re done.
Keeping It Running: Maintenance and Final Advice
Your Well Pump Maintenance Roadmap
Treat your pump like your car. You do not wait for it to break down on the highway. A little routine care prevents big headaches and saves money.
Check the pressure tank and switch once a year, every year. Use a standard tire gauge to check the air charge in the tank’s Schrader valve. It should be 2 PSI below the pump’s cut-in pressure. If your switch is set for 40/60 PSI, the tank air should be 38 PSI. An incorrect air charge makes the pump short-cycle, which wears it out fast.
Your ears are your best diagnostic tool. You need to know what a healthy pump sounds like so you can hear when it changes. A smooth hum is good. New grinding, clicking, or a labored start is a red flag. I caught an impeller issue in my own system because the startup whine got louder over a week.
Watch your power bill. A steady climb in energy use, with no other changes, often points to a pump working harder than it should. It is fighting friction from worn parts or sediment. Plugging a simple energy monitor into the pump’s circuit can show you exactly how many hours it runs each day.
The Water Science Snippet: How Sand and Acidity Kill Pumps
Pumps fail for reasons you can see and reasons you cannot. The water chemistry itself can be the enemy.
Water with a low pH is acidic. Think of it like weak battery acid. Acidic water slowly dissolves metal components, from the pump housing to the wiring connections. It causes pitting and corrosion you cannot stop without treating the water itself. If you have copper pipes with blue-green stains, you likely have acidic water.
Sand and sediment are physical abrasives. Every grain of sand that passes through the pump acts like tiny sandpaper on the impellers and seals. It grinds them down, destroys the tight tolerances, and lets water into the motor. A pump pulling sandy water will have a much shorter life than one in a clean well.
When to Put the Wrench Down and Call a Professional
Knowing your limits keeps you safe and prevents a simple repair from becoming a disaster. Here is when you stop.
- Your well is deeper than 200 feet. Pulling that much pipe and a heavy pump requires a large truck with a winch and a pulling head. This is not a job for a homeowner’s tripod.
- You think the problem is the well, not the pump. If your water yield has dropped suddenly or the water is persistently muddy, the well might be collapsing or silted in. A pro needs to camera it and decide on rehabilitation.
- The motor itself is faulty. If your diagnostics point to a burnt winding or a short in the motor, your job is done. Submersible motor repair is a specialized task that is almost never a DIY job. Replace the entire pump unit instead.
Recommended Products for a Successful Repair
Using the right parts makes your repair last. Do not cheap out on critical connections.
- Stainless Steel Hose Clamps: Always use all-stainless clamps on the drop pipe. The cheap zinc-plated ones rust through and fail underground.
- Waterproof Wire Splice Kits: Get the kind with heat-shrink tubing and sealing adhesive inside. A proper splice is waterproof and will not corrode.
- Pump-Specific Rebuild Kits: If you are replacing seals or bearings, buy the kit made for your pump model. Generic kits often have parts that do not fit right.
- Food-Grade Thread Sealant: Use a paste sealant rated for potable water on all pipe threads. Standard Teflon tape can shred and get into the pump.
Quick Answers
What’s the single most important safety step before pulling the pump?
Kill the power at the breaker and physically disconnect the wires at the control box. Always verify with a multimeter that the terminals are dead. This eliminates any risk of shock or the pump accidentally starting while you’re handling it.
How do I test my rebuilt pump before lowering it back in?
Perform a bench test by running the pump in a large barrel of clean water for 15-30 seconds. This verifies proper flow and checks for leaks at the housing joints. This is non-negotiable; fixing a problem now is infinitely easier than pulling it again later.
What is “priming” for a submersible pump?
Submersible pumps are self-priming, so you don’t prime the pump itself. After reinstallation, “priming” simply means bleeding the air from your household pipes by opening faucets until you get steady, solid water flow with no sputtering. The system will do the rest automatically.
What’s the most common rebuild mistake?
Introducing contamination during reassembly. A single grain of sand on a new seal or impeller will cause rapid wear. Work on a clean surface, use potable-water lubricant on seals, and ensure all parts are spotless before you put them back together.
When have I gone too far and need to call a pro?
Call a professional if your well is over 200 feet deep, if the motor shaft is seized or the electrical windings are faulty, or if you suspect a well issue like a collapsed casing. Their specialized equipment and experience are worth the cost for these complex, high-risk scenarios.
Lock In a Lasting Repair
Never skip locking out the electrical power at the breaker; this is the non-negotiable first step for any pump work. Finish the job by running the pump through a complete cycle and monitoring the pressure gauge to verify steady operation.