Fix Your Running Toilet Tank: Stop Leaks and Constant Water Waste Now
That constant trickle from your toilet is water and money pouring down the drain. You can stop it yourself with a few basic tools.
This article will walk you through finding the exact source of the leak, replacing worn parts like the flapper or fill valve, and making sure your fix holds.
I’ve swapped more flappers and adjusted more fill valves than I can count, both on service calls and in my own bathroom. Turn off the water at the wall valve first-this is non-negotiable.
Is Your Toilet Talking to You? Diagnose the Sound First
A running toilet speaks in two distinct voices. Learn to listen.
You hear a steady hiss. It sounds like a slow leak from a tire or a quiet tea kettle. That is the sound of a constant refill. The fill valve is letting water into the tank non stop because the tank level keeps dropping. It is actively working, and your water meter is actively spinning.
Then there is the ghost flush. It is silent. Suddenly, every 15 or 20 minutes, you hear the toilet refill for just a few seconds, all by itself. No one touched the handle. This means water is slowly leaking from the tank down into the bowl. When the tank water gets low enough, the fill valve kicks on to top it back up.
The Food Coloring Test: Your Silent Leak Detective
You can prove a silent leak in two minutes. It is the simplest test in plumbing.
- Lift the tank lid and set it somewhere safe.
- Drop 5 to 10 drops of dark food coloring (blue or green works best) into the tank water. Do not flush.
- Wait 20 to 30 minutes. Go have a cup of coffee.
- Come back and look in the toilet bowl. If you see any of the colored water in the bowl, you have a confirmed tank to bowl leak.
The food coloring test is foolproof it shows exactly where the water is escaping. This leak is why your toilet seems to flush on its own. It may also signal a leaking home water line, so consider checking the main line for signs of leakage.
Think of it this way. Your house tells you when things are wrong. A hissing toilet is not just an annoyance. It is your home announcing you are throwing money down the drain, literally. Fixing these sounds stops the waste.
Where’s the Water Going? Pinpointing Internal Tank Leaks
An internal leak means water is escaping from the tank into the bowl without you flushing. No water hits your bathroom floor. This leak happens entirely inside the porcelain.
In over 90% of service calls for a running toilet, the problem is a worn out flapper. The flapper is that rubber stopper at the bottom of the tank. When you push the handle, a chain lifts it to let water rush into the bowl. It should seal perfectly shut when the tank is empty. Over time, the rubber gets stiff, warped, or slimy. A bad seal lets water trickle past, constantly draining the tank.
Other Internal Leak Culprits
While the flapper is suspect number one, check these other parts too.
- Misaligned Flapper Chain: The chain connecting the handle lever to the flapper can be too tight or tangled. If it is too tight, it can prevent the flapper from sealing all the way. There should be just a little slack when the flapper is closed.
- Cracked Overflow Tube: The overflow tube is the large plastic pipe in the center of the tank. A crack near its base can let tank water leak directly into the tube and down into the bowl. Run your finger around its base to feel for splits.
- Warped Flush Valve Seat: The flapper seals against a round plastic or brass ring called the valve seat. Mineral deposits can build up on it, or the surface can become pitted. Even a brand new flapper will not seal properly against a rough, warped seat.
Here is a key point many homeowners miss. A toilet tank leak almost always starts internally, wasting hundreds of gallons long before any water shows up on your floor. The water has a direct path to the sewer through the bowl. You only find out through the sound or your higher water bill. The guest bathroom you never use could be leaking right now, and you would not know without checking.
Finding the Drip: How to Spot External Toilet Tank Leaks
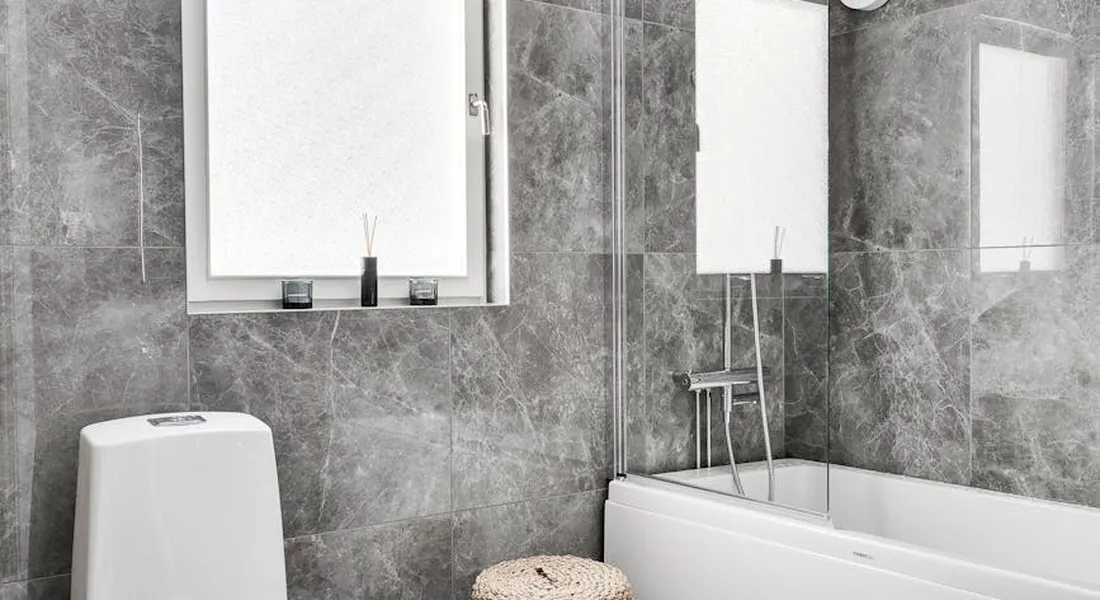
An external leak means water is escaping the tank itself. You will see it on the floor or feel moisture on the tank bolts. This is different from internal leaks that cause running water. An external leak wastes water and can damage your bathroom floor.
Three spots cause almost all external toilet tank leaks.
- The water supply line connection where it meets the tank’s fill valve.
- The tank-to-bowl gasket, also called a spud washer, which seals the tank to the bowl.
- Cracked porcelain on the tank itself, though this is less common.
Finding the exact spot is simple. Use the paper towel test.
- Shut off the water supply valve behind the toilet.
- Flush the toilet to drain most water from the tank.
- Use a sponge or old towel to dry the outside of the tank, the supply line, the bolts, and the floor.
- Layer a few dry paper towels around the tank’s base, over the bolts, and under the supply line connection.
- Wait. Check the towels in 15 minutes. The wet spot will lead you right to the leak’s source.
What causes a toilet tank to lose water externally is usually a failed seal or a loose connection. The paper towel test tells you which one so you don’t waste time and money replacing the wrong part.
Your Toilet Repair Toolbox: What You’ll Need to Fix It
You don’t need a truck full of tools. For 90% of toilet repairs, this basic kit gets the job done. Gather these items before you start.
- Adjustable wrench
- Channel-lock pliers
- Large sponge and a bucket
- Old towels or rags
For parts, I recommend keeping these common replacements on hand. They are cheap and fail often.
- Universal toilet flapper (fits most 2-inch flush valves)
- Complete fill valve kit (like Fluidmaster 400A)
- Tank-to-bowl gasket and bolt kit
- New braided stainless steel supply line
When buying parts that touch your drinking water, look for the NSF certification mark on the packaging. It’s a safe bet the materials are approved for potable water. I always have a roll of Teflon tape and a tub of plumber’s putty in my kit for sealing threaded connections and other small jobs.
The Universal Fix: Step-by-Step Flapper and Seal Replacement
A worn flapper is the number one reason for a toilet that runs constantly. It’s a five-minute, five-dollar fix. Here is how you do it.
- Turn off the water supply valve clockwise until it stops.
- Flush the toilet to drain the tank. Hold the lever down to get as much water out as possible.
- Soak up any remaining water in the tank bottom with your sponge.
- Unhook the chain from the flush lever arm and slide the old flapper off the pegs on the flush valve.
- This is the critical step. Use a green scouring pad to scrub the circular flush valve seat where the flapper sits. Mineral deposits here will ruin the seal of your brand new flapper.
- Slide the new flapper onto the pegs and reconnect the chain.
- Adjust the chain so it has about a half-inch of slack when the flapper is closed. Too tight and it won’t seal. Too loose and it won’t lift all the way.
Turn the water back on. Let the tank fill and flush to test. The running should stop. If it still hisses slightly, jiggle the handle. If the hissing stops, your chain is still too tight.
Stopping the Hiss: How to Adjust or Replace a Faulty Fill Valve
If your toilet makes a constant hissing or trickling sound while refilling, the fill valve is often the culprit. The float might be set too high, letting water spill into the overflow tube. First, try an adjustment.
For a classic ballcock float, gently bend the brass float arm downward slightly. For a modern Fluidmaster-style valve with a cup float, pinch the clip on the adjustment rod and slide the float cup lower. Flush and see if the water stops below the overflow tube rim. Also consider how check valve placement affects deep-well function and backflow prevention. The principle of proper valve placement applies across systems, from wells to household flush valves.
If adjusting doesn’t work, the valve diaphragm is shot. Replacement is straightforward.
- Shut off the water and drain the tank as before.
- Under the tank, unscrew the supply line nut from the old fill valve’s tailpiece.
- Inside the tank, unscrew the plastic locknut securing the valve to the tank.
- Lift out the old valve.
- Drop in the new valve and hand-tighten the locknut underneath.
- Reconnect the supply line. Attach the refill tube from the new valve to the top of the overflow pipe.
The refill tube must be clipped into the overflow pipe. If it’s loose, water will spray into the tank and cause constant filling. Turn the water on. The new valve will stop filling at the correct level, which you can fine-tune.
Sealing the Bottom: Fixing a Leaky Tank-to-Bowl Gasket
If your paper towel test shows water dripping from the tank bolts or the seam between the tank and bowl, the spud washer has failed. This repair is more involved because you must remove the tank.
- Shut off the water and drain the tank completely. Sponge it dry.
- Disconnect the supply line from the fill valve.
- Inside the tank, use a wrench to hold the tank bolts steady while you unscrew the nuts underneath the bowl with channel-lock pliers. These nuts are often rusty.
- Carefully lift the straight tank off the bowl and set it on a towel.
- Scrape off the old tank-to-bowl gasket and any putty from the large central opening.
- Before installing the new gasket, inspect the flush valve’s plastic body for hairline cracks. A crack here means you need a new flush valve, not just a gasket.
- Place the new rubber gasket over the flush valve opening on the bottom of the tank.
- Insert the new tank bolts with their rubber washers through the tank holes.
- Lower the tank back onto the bowl, aligning the bolts.
- Hand-tighten the new nuts underneath, then alternate tightening each side a quarter-turn with a wrench. Stop when they are snug.
Overtightening these bolts is the fastest way to crack your porcelain tank. You just need to compress the new rubber gasket, not crush it. Reconnect everything, turn the water on, and check for leaks. Keep an old towel under the tank for the first few hours to catch any drips from the new seal settling.
The DIY vs. Pro Plumber Verdict
On a difficulty scale from replacing a washer to repiping your house, fixing a running toilet is easy. Replacing a flapper or fill valve gets a 3 out of 10. Swapping the tank-to-bowl gasket is a 5 out of 10 because you have to lift and reset the tank.
About 90% of constant running toilet problems are solved with a single, universal repair kit you can buy for around twenty dollars. If you can use a wrench and follow simple instructions, you can handle this. The kits come with a new flapper, fill valve, and often a new flush valve seal. Replace all three at once. It’s cheap insurance against another leak in six months.
Call a professional plumber in two specific situations. The first is visible cracks in the porcelain of the tank or bowl. A cracked tank will eventually fail catastrophically. The second is if you’ve replaced all the internal parts and water still leaks onto the floor or the toilet still runs. This could point to a hairline crack you can’t see or a problem with the main water line shut-off.
Speaking of shut-offs, the International Plumbing Code (IPC) requires a dedicated shut-off valve for each toilet. If your toilet doesn’t have a valve on the wall or floor behind it, you need one. Installing a new valve often involves soldering, which is a pro job for most homeowners. Don’t start a repair without a way to turn the water off. For setups that include a water tank, a ball valve is a common, reliable shut-off option. A water tank ball valve install guide can help you choose the right valve and walk you through the installation steps.
The Cost of a Drip: Your Toilet’s Water Waste Calculator
A silent leak in your toilet tank isn’t a small issue. That constant trickle of water from the tank into the bowl adds up fast. A slow, barely-audible leak can waste over 5 gallons of clean water every single day. That’s water you’re paying to heat as well, if it’s on the hot water line.
Let’s do the math. Your standard toilet tank holds about 1.6 gallons. Now imagine a small leak that causes it to refill just 10 times a day without being flushed. That’s 16 gallons wasted daily. Over a year, that one leaky toilet wastes 5,840 gallons. If you have a large pressure tank or well system holding 256 gallons, a persistent toilet leak can cycle and waste thousands of gallons annually, which shows up directly on your water bill or strains your well pump.
Think of it like this. A running toilet is the same as leaving your bathroom faucet slightly open all day, every day. You wouldn’t tolerate that. Don’t tolerate a running toilet.
Keep It Quiet: Your Simple Toilet Maintenance Roadmap
Think of your toilet tank like the engine in your car. You don’t wait for it to seize on the highway. You change the oil. A few quick checks each year save you from a huge mess and a bigger bill. Here’s the straightforward schedule I use in my own home.
Inspect the Flapper and Fill Valve Every 6 Months
This takes five minutes. After you flush, listen. Does the water shut off completely, or do you hear a faint hiss or trickle for a minute after the tank fills? That hiss is your flapper not sealing. Lift the tank lid. Look at the rubber flapper. Is it warped, cracked, or slimy with mineral buildup? Pinch it. It should be flexible, not stiff or brittle.
Next, watch the fill valve (the tall assembly on the left). As the tank fills, the float should rise smoothly and shut off the water firmly. If the water shuts off with a loud squeal or vibrates, the valve’s internal seals are wearing out. A simple six-month visual and auditory inspection catches most running water problems before they waste thousands of gallons.
Replace the Flapper Every 2-3 Years (No Exceptions)
This is the cheapest insurance policy in your house. Even if that flapper looks and feels fine, microscopic cracks and material degradation are happening. Chlorine in city water and minerals in well water break down rubber. I replace every flapper in my house on a 3-year cycle, like clockwork. It costs about $10 and takes three minutes.
Buy a universal flapper that matches your flush valve size. Turn off the water, flush to drain the tank, unhook the old one, and hook on the new one. If you can’t shut off the water, a no-water toilet tank fix may be needed. The no-water fix is covered in the next step. Proactive flapper replacement prevents the slow, silent leak that ruins a flush valve seat, which is a much harder fix.
Clean the Valve Seats Annually
Mineral scale and sediment collect on the flush valve seat (the ring the flapper seals against) and inside the fill valve. This grit prevents a tight seal. Once a year, do this:
- Turn off the toilet’s water supply valve and flush to empty the tank.
- Use a soft sponge or an old toothbrush and some white vinegar to gently scrub the flush valve seat.
- For fill valves, many models have a top cap you can twist off to rinse out any debris under running water.
A clean seal surface is critical. This annual cleaning removes the gunk that causes a flapper to leak, even when the flapper itself is brand new.
Check Tank Bolts and Supply Line Tightness Once a Year
Grab a small adjustable wrench. Feel the nuts on the tank bolts inside the tank (where the tank meets the bowl). They should be snug, not gorilla-tight. Overtightening cracks porcelain. Then, check the water supply line connection where it meets the fill valve at the bottom of the tank. Give that nut a gentle quarter-turn snug. If the water level seems off after this, you may need to adjust the toilet tank water level float ball to set the proper level. This helps prevent overfilling and ensures efficient operation.
Look for any moisture or mineral stains around these connections. A slow drip here can rot your floor. Annual verification of these mechanical connections stops minor seeps from becoming major floor repairs.
Stick to this roadmap. The few minutes you spend prevent the 2 a.m. panic of a leaking tank and a soaring water bill. Preventative maintenance stops a water tank from springing a leak at the worst time. It’s that simple.
Common Questions
My toilet only runs for a few seconds every so often. Is that still a problem?
Yes, that “ghost flush” is a confirmed leak. Water is slowly draining from your tank into the bowl, triggering a brief refill. This wastes a surprising amount of water and means your flapper or flush valve seal is failing.
Can a running toilet really affect my water bill that much?
Absolutely. A constant running toilet is one of the biggest sources of unnoticed water waste in a home. It can waste hundreds of gallons per day, which will show as a sudden, unexplained increase on your utility bill or strain your well system.
Are toilet repair parts universal, or do I need a specific model?
Most modern parts are universal. Kits like the Fluidmaster 400A fill valve and standard 2-inch flappers fit the vast majority of toilets. Always look for the NSF mark on packaging to ensure materials are safe for your drinking water.
What’s the one safety step I should never skip?
Always turn off the water supply at the wall valve behind the toilet before doing any work. This is non-negotiable. It prevents a potential flood and lets you work safely and dry.
When should I stop DIY and definitely call a professional plumber?
Call a pro if you find a crack in the porcelain tank or bowl, or if you’ve replaced all the internal parts (flapper, fill valve, gasket) and the leak persists, including issues with the water supply line. These issues indicate a more serious failure that often requires toilet replacement.
Fix It Right the First Time
Shut off the water and lift the tank lid to check the flapper for a clean, tight seal. If the flapper looks good, test the fill valve by listening for the water to stop at the marked line inside the tank. If you’re unsure about the water levels, check and adjust the water levels for your toilet and septic system.