Water Heater Thermocouple Replacement: DIY Steps to Fix Your Pilot Light
Is your water heater’s pilot light constantly going out? You’re looking at a bad thermocouple.
This article shows you exactly how to fix it. We will cover diagnosing the problem, the safe shutdown procedure, removing the old thermocouple, installing the new one, and testing for a steady flame.
I’ve changed these on more heaters than I can count. Do it right and you’ll have hot water in twenty minutes.
The DIY vs. Pro Verdict: Should You Replace It Yourself?
I give replacing a water heater thermocouple a difficulty rating of 4 out of 10. The physical task is simple, but working around an open gas flame demands your full attention and respect. If you can change a faucet washer, you have the basic skill for this job.
A homeowner comfortable with a wrench and able to follow safety steps can handle this repair. You are essentially removing one small tube and installing another. I’ve done this on my own heater and helped neighbors with theirs. The process is logical and doesn’t require special training.
There are clear times when you should not try this yourself. If you smell a strong, persistent odor of gas near the water heater, shut off the gas supply at the main valve, leave the area, and call your utility company or a pro immediately. Do not investigate. If the thermocouple’s connection nut is fused with rust and won’t budge with reasonable force, stop. You risk cracking the gas valve, which is a much bigger repair. Finally, if you are not confident in your ability to safely relight the pilot light after the repair, hire a technician.
Always check your local building codes. In some cities and towns, any work that involves disconnecting a gas appliance, even for a minor part swap, legally requires a permit or must be done by a licensed professional. I found this out after a simple fix at my last house, and it’s not a rule you want to learn with a fine.
Tools & Parts Checklist: What You Need to Get the Job Done
Get your tools together first. Having everything on hand means you won’t be scrambling halfway through.
- Adjustable Wrenches: You’ll need two, usually a 7-inch and a 10-inch. One wrench holds the gas valve steady while the other turns the thermocouple nut. This prevents damage to the valve.
- Needle-Nose Pliers: These are for gripping the small copper tube of the thermocouple and for any tricky clip or bracket.
- Flashlight: The burner compartment is dark. A good light lets you see exactly what you’re doing. I use a headlamp from my toolbox to keep both hands free.
The only part you need is a new thermocouple. You must get the correct one for your water heater model. Find the manufacturer’s label on your heater and write down the model number. Take this to the hardware store or use it to search online.
For most replacements, a universal 24-inch or 30-inch copper tube thermocouple will work. They are inexpensive and get the job done. Original Equipment Manufacturer (OEM) parts are made specifically for your heater model. They often fit a little better and can be more reliable, but they cost more. In my experience, a universal thermocouple has fixed 9 out of 10 pilot light problems I’ve seen.
A multimeter is a useful extra tool. If you want to be absolutely sure the old thermocouple is the problem before you buy a new one, you can test it. With the pilot lit, the thermocouple should generate between 25 and 35 millivolts. A reading below 20 millivolts means it’s bad. I keep a multimeter in my van for service calls to confirm diagnoses quickly.
How to Change a Thermocouple in a Gas Water Heater: The Step-by-Step
Let’s get to work. Replacing a thermocouple is a straightforward job, but gas demands respect. These are among the most common water heater repair options homeowners face. Understanding them can guide your next steps and help you stay safe. Follow these steps in order and you’ll be back to hot water in under an hour.
Step 1: Making the Area Safe – Turn Everything Off
Safety is not a suggestion. Do this first. Go to the gas line leading into your water heater. Find the shutoff valve. Turn the handle so it is perpendicular to the gas pipe. This is the off position. Next, locate the gas control knob on the front of the unit. Turn it to the “PILOT” setting, then firmly press it down all the way to “OFF”. Now, walk away. Wait at least five to ten minutes. This lets any gas lingering in the line completely dissipate before you start removing parts. Safe handling isn’t only about avoiding danger; it also helps ensure efficient gas water heater operation, reducing energy waste and extending the unit’s life.
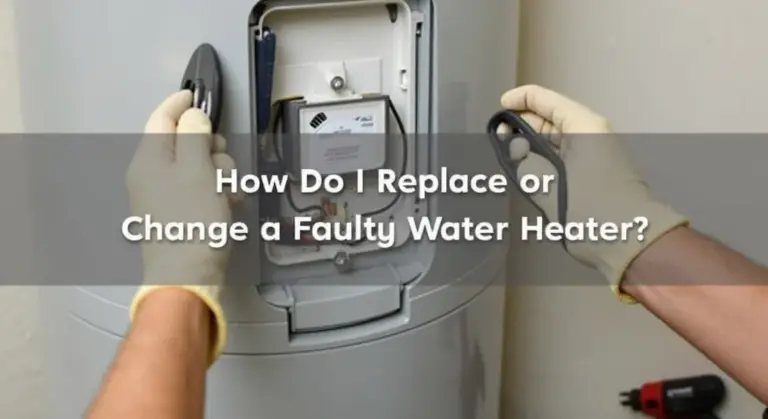
Step 2: Getting Access and Finding the Old Part
Now you can open things up. Remove the outer access panel or door, usually held by a few screws. Look near the bottom where the burner is. You’ll see the pilot assembly-a small tube with a place for a flame. The thermocouple is the thin copper tube or wire that runs from the pilot assembly bracket straight up to the gas control valve. It will have two connection points: a small nut where it threads into the gas valve, and it will be held in place by a bracket or a second small nut right at the pilot assembly.
Step 3: Removing the Old Thermocouple
You’ll need two small wrenches, usually 7/16″ or 1/2″. Place one wrench on the fitting of the gas control valve where the thermocouple connects. Hold that fitting perfectly still. Use your second wrench to loosen the compression nut that holds the thermocouple in place. Turn it counterclockwise. Once it’s loose, unscrew it the rest of the way by hand. Go to the pilot bracket and remove the small screw or nut holding the thermocouple tip in place. Gently pull the entire old thermocouple out, being careful not to kink or sharply bend the copper tube as you remove it.
Step 4: Installing the New Thermocouple
Take your new, matching thermocouple. Start at the gas valve. Thread the new thermocouple’s connector into the valve by hand until it’s snug. Then, use your wrench to give it another quarter to half turn. Do not crank it down hard or you can damage the threads. Next, route the copper tube along the exact same path as the old one. The most critical part is positioning the tip so it sits directly in the path of the pilot flame. Slide the tip into the bracket at the pilot assembly. Tighten the bracket’s screw or nut just enough to hold it firmly in position.
Step 5: Testing Your Work and Relighting
Time to see if you fixed it. Turn the gas supply valve on the pipe back to the open position (handle parallel to pipe). Turn the water heater’s gas control knob to “PILOT”. Depress the knob fully. While holding it down, use a long match or grill lighter to light the pilot at the assembly. Keep the knob depressed for a full 60 seconds after the pilot lights. Slowly release the knob. The pilot must stay lit on its own after you release the control knob-this is your success test. If it stays lit, turn the gas control knob to “ON”. You should hear the main burner ignite when the thermostat calls for heat. If the pilot won’t stay lit, consult our water heater pilot light troubleshooting guide for common causes and fixes. It can help you identify if components like the thermocouple or gas valve need attention.
Troubleshooting: What If the Pilot Still Won’t Stay Lit?
You replaced the part and it still doesn’t work. Don’t get frustrated. The thermocouple is just one link in the chain. Here are the next things to check, in order.
- Red Flag 1: Weak or flickering yellow pilot flame. A healthy pilot flame is steady, blue, and strong enough to engulf the thermocouple tip. A weak, yellow flame means the pilot orifice is clogged or gas pressure is low. Clean the tiny pilot orifice with a piece of wire from a twist tie.
- Red Flag 2: The new thermocouple tip isn’t fully in the flame. Even a slight misalignment means it won’t get hot enough. Turn off the gas, reposition the bracket, and try again.
- Red Flag 3: A faulty gas control valve. This is the next most common culprit. The valve’s internal thermocouple sensor can fail. If everything else looks perfect, the valve itself is likely bad and needs replacement.
- Red Flag 4: A draft blowing out the pilot light. Check the vent pipe above the heater. Feel for a strong draft that could be extinguishing the flame, especially on windy days.
People sometimes ask if you can just bypass a thermocouple. The answer is simple: never. It is the main safety device that shuts off gas if the pilot light goes out. As a dangerous temporary test, you can sometimes hold the control knob in manually to prove the main burner and valve work, which confirms the valve is faulty. But you must never leave it rigged that way. If you bypass it, you are inviting a gas leak and a potential explosion. Just replace the bad part.
How to Know for Sure Your Thermocouple Is the Problem
First, understand what you’re dealing with. A thermocouple is a simple safety device. It sits in the pilot flame. The heat creates a tiny amount of electricity, measured in millivolts. This small current tells the gas valve it’s safe to stay open. When a thermocouple wears out, it fails to generate enough millivolts, and the gas valve’s safety solenoid shuts, cutting off the gas.
Watch for these three clear signs. If you see one, your thermocouple is likely the culprit.
Symptom 1: Pilot Lights, Then Dies
You hold down the pilot control knob. You push the igniter. The pilot lights. Everything seems fine until you release the knob after 30-60 seconds. The pilot flame immediately goes out. This is the most common and definitive symptom. The thermocouple isn’t producing enough “hold-in” current, so the gas valve slams shut the moment you let go.
Symptom 2: No Pilot Flame, Even With Spark
You follow the lighting procedure correctly. You hear the igniter sparking near the pilot assembly, but the flame never catches. This often means the gas valve is completely closed because it’s not getting any signal from a dead thermocouple. The valve needs the thermocouple’s “all clear” before it will even allow gas to the pilot orifice.
Symptom 3: A Bad-Looking Tip
Shine a flashlight in there. Unhook the thermocouple and pull it out for a closer look. You’re looking for damage right at the copper tip that sits in the flame.
- Sooty/Crusted: A layer of buildup insulates the tip, preventing it from getting hot enough.
- Pitted or Eroded: The metal is physically degraded from years of heat.
- Bent or Damaged: It’s not sitting properly in the pilot flame’s hottest point.
If the tip looks compromised, replace the unit. They are cheap and not worth cleaning.
Safety, Location, and Codes: The Must-Know Details
Working with gas requires respect. Do not skip these steps.
The Cardinal Safety Rule
Gas Off. Wait. No Sparks. Turn the gas control knob to “OFF”. Turn off the manual gas shut-off valve on the supply line. Wait at least five full minutes for any residual gas in the line to dissipate. Do not create sparks or use electrical tools in the area during this work.
Where to Find It
The thermocouple is a thin, copper-colored tube. One end is mounted in a bracket right next to the pilot tube at the burner assembly. The other end connects to the gas control valve with a threaded nut (called a union nut). You’ll see it running from the pilot flame area straight up to a connection point on the gas valve. In a water heater parts guide, this component is one you’ll learn to identify when tracing the gas train. It’s a common reference point for understanding how the pilot, thermocouple, and gas control valve work together.
Code & Compliance Check
Replacement thermocouples and gas control valves sold for water heaters in the US should be ANSI certified. This is your assurance they meet safety standards. For a practical, step-by-step approach to common issues, consult our gas water heater troubleshooting guide. It helps you identify symptoms and choose appropriate maintenance steps. If your repair involves any permanent modification to the gas line itself (like cutting and threading new pipe), that work will likely require inspection to comply with the International Fuel Gas Code (IFGC). Simply unscrewing the old thermocouple and screwing in a new, compatible one is typically considered maintenance.
A Smart Maintenance Habit
Thermocouples don’t have a set replacement schedule. They last until they fail. You can extend their life with good pilot health. Once a year, when you flush your water heater, take a second to look at the pilot flame; it should be a steady blue with a small yellow tip engulfing the thermocouple. A lazy, yellow, sooting flame cooks the thermocouple poorly and coats it in carbon, so make sure to clean and maintain the thermocouple.
Common Questions
How do I know for sure the thermocouple is the problem before I buy one?
The most definitive test is the pilot light behavior. If the pilot lights but goes out the *second* you release the control knob after holding it for 60 seconds, the thermocouple is almost always the culprit. You can also inspect the tip for heavy soot, pitting, or damage. A multimeter reading below 20 millivolts with the pilot lit confirms it.
What are the absolute non-negotiable safety steps?
First, turn the gas supply valve off so the handle is perpendicular to the pipe. Then, turn the water heater’s control knob to “OFF”. Wait at least 5 full minutes for any residual gas to clear the line before you touch any parts. Never force a connection or create sparks in the area during disassembly.
Where exactly is the thermocouple located?
Look inside the burner compartment at the bottom of the water heater. Find the small pilot tube where the flame is. The thermocouple is a thin copper tube running from a bracket right next to that pilot tube straight up to a threaded connection on the gas control valve. Knowing the thermocouple’s function and location—sensing the flame and shutting off gas if the pilot goes out, and its placement from the pilot tube to the gas valve—helps explain why this part matters for a gas water heater.
Can I use any thermocouple from the hardware store?
You need a compatible model. A universal 24″ or 30″ copper thermocouple works for most heaters, but matching your water heater’s model number is best for guaranteed fit. The critical part is ensuring the new one is long enough to reach and the threaded end matches your gas valve, especially when you’re doing a replacement on a gas water heater.
I replaced it, but the pilot still won’t stay on. Now what?
First, re-check your work. Is the new thermocouple tip sitting directly in the blue part of the pilot flame? If it is, your issue is likely a weak/clogged pilot orifice or a failing gas control valve. Clean the pilot orifice with a stiff piece of wire and ensure the flame is strong and blue.
Final Thoughts on Thermocouple Maintenance
When your pilot light won’t stay lit, the thermocouple is the first part you should check. Keep a spare thermocouple and the right wrenches on hand, and you can often fix this common problem yourself in under thirty minutes. If you’re considering easier ignition options, light relight pilot water heater models can simplify relighting. In the next steps, we’ll link to more details about these models.
Bob is a an HVAC and plumbing industry veteran. He has professionally helped homeowners resolve issues around water softeners, heaters and all things related to water systems and plumbing around their homes. His trusted advice has helped countless of his clients save time, money and effort in home water systems maintenance and he now here to help you and give you first hand actionable advice. In his spare time, Bob also reviews home water systems such as tankless heaters, water softeners etc and helps home owners make the best choice for their dwelling. He lives around the Detroit area and occasionally consults on residential and commercial projects. Feel free to reach out to him via the contact us form.