Fix Your Water Heater: Replace a Faulty Thermostat Yourself
Is your water running cold one minute and scalding the next? Your water heater’s thermostat is likely shot.
This guide covers safety steps, finding the bad thermostat, swapping it out, and checking your work.
I’ve changed these in my own house and on hundreds of service calls. The trick is to kill the power first.
Is Your Water Heater Thermostat Actually Bad?
Before you start taking things apart, make sure you are fixing the right part. A faulty thermostat sends clear signals.
The Simple Symptoms
Your water is misbehaving in one of three ways. It is either too hot, too cold, or it swings between the two. If you get a blast of scalding water followed by a cold shower, the thermostat is likely failing to regulate properly.
Temperature swings are a classic sign the thermostat cannot maintain a steady setting.
Red Flag Troubleshooting Guide
Some symptoms mean you should stop using the heater immediately. Look for these urgent signs.
- No hot water with a humming element: If you have no hot water but hear a low hum from the heater, the element is getting power but the thermostat is not telling it to heat.
- A tripped high limit switch: This safety switch, often a red button behind a panel, will pop if the thermostat fails and lets the water get dangerously hot. If it trips again after you reset it, the thermostat is the culprit.
- Visible scorch marks or melting: Pull the access panel off. If you see blackened, burnt, or melted plastic on the thermostat body, it has failed and is a fire hazard.
- The thermostat feels loose or wobbly: The mounting plate or the unit itself should be secure. A loose connection can cause arcing and failure.
The Confirmation Test: Using a Multimeter
You need to know if the thermostat is dead or if the heating element is the problem. A basic multimeter test tells you.
- Turn off the power to the water heater at your home’s main circuit breaker panel. Do not just turn the thermostat to “off.”
- Remove the access panel and insulation to expose the thermostat and the element terminals.
- Set your multimeter to measure resistance (Ohms, Ω).
- Touch one probe to each of the two screw terminals on the thermostat. A good thermostat will show a reading very close to zero Ohms. An infinite reading (OL or “1”) means it has failed and is open, blocking power.
A reading of zero Ohms means the thermostat’s contacts are closed, so the problem is likely the heating element, which you test next.
Fixing the Right Thing: Thermostat vs. Other Problems
Do not blame the thermostat for every hot water issue. Here is a quick comparison.
- Failed Heating Element: This causes a complete loss of hot water. The thermostat may click, but the element will not heat. Test it with your multimeter for continuity.
- Failed Dip Tube: This plastic tube sends cold water to the bottom of the tank. If it breaks, cold water mixes at the top, giving you lukewarm water fast. Your thermostat is fine, but you need a new dip tube.
- Sediment Buildup: A tank full of sand like sediment acts as a barrier between the element and the water. It causes slow heating, strange noises, and can make the thermostat cycle oddly. Draining the tank is the fix.
Gearing Up: Tools, Safety, and Know-When-to-Quit
Once you know the thermostat is bad, get your gear and mindset ready. This is not a guesswork job.
Tools & Material Checklist
Gather these items before you touch the heater.
- Multimeter (for final verification of the new part)
- Non contact voltage tester (to double check power is off)
- Flat head and Phillips screwdrivers
- Work gloves
- A garden hose (for draining the tank if needed)
- The exact replacement thermostat (single or double element, same voltage and wattage)
Critical Safety Steps
Skip a step here and you risk severe shock or injury.
- Turn off the power at the circuit breaker. Find the correct breaker in your main panel and flip it to OFF. Tag it so no one turns it back on.
- Use your non contact voltage tester on the wires at the heater’s junction box and thermostat terminals to confirm power is dead.
- Shut off the cold water supply valve to the heater.
- Attach a hose to the drain valve and open it to relieve pressure in the tank. You do not need to drain it completely, but you must release the pressure.
Testing with a non contact voltage tester is the only way to be sure the wires are safe to handle.
DIY vs. Pro Verdict
This repair gets a difficulty rating of 6 out of 10. You need basic comfort with electrical wiring and following a diagram.
You can do this if you can match wires one for one, take clear photos before disconnecting anything, and buy the correct OEM replacement part. The line where you should stop is clear. Call a pro if you see complex dual element wiring that confuses you, if the access panel is severely rusted shut, or if the wiring compartment shows extensive corrosion.
When NOT to Try This
Be honest with yourself. Do not start this repair under these conditions.
- Your water heater is very old (15+ years). A new thermostat might fail soon due to other aging parts.
- You see extensive rust on the tank or the mounting plate for the thermostat.
- The idea of handling 240 volt electrical wires makes you uncomfortable.
- Your unit has a “smart” or digital control system instead of simple mechanical thermostats.
On an old, corroded unit, your time and money are better spent replacing the entire heater.
The Step-by-Step Thermostat Swap
Getting Ready: Power Down and Drain
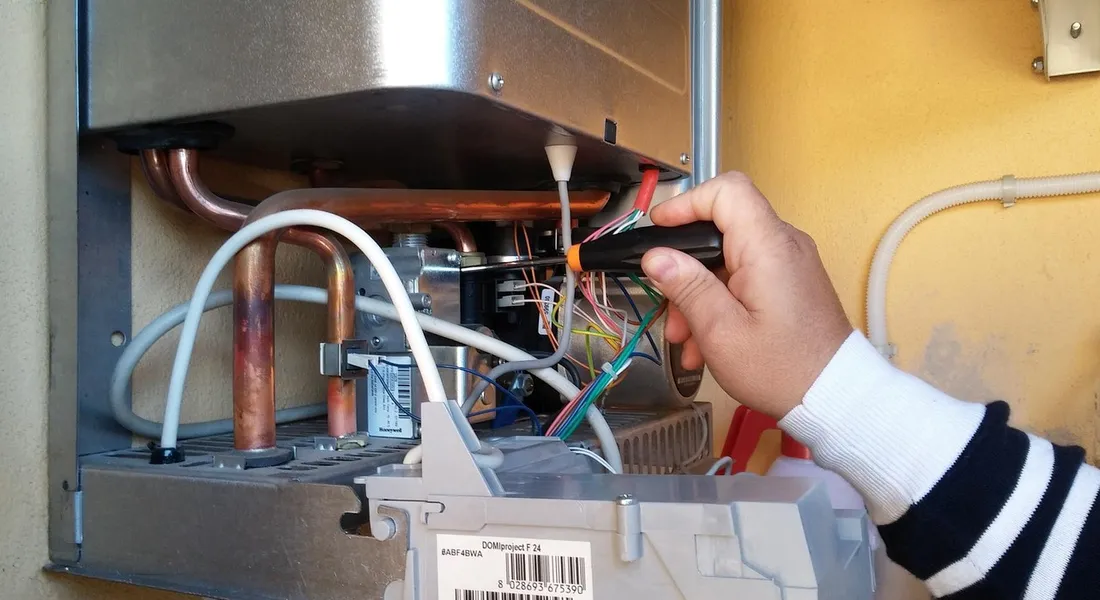
First, kill all power. Go to your main electrical panel and find the breaker labeled for the water heater. Flip it to OFF. Do not trust the label alone; sometimes breakers can be mislabeled or unclear, so it’s important to verify the correct breaker before proceeding.
Grab a non-contact voltage tester. Remove the outer access panel cover on the water heater to expose the wiring. Carefully hold the tester near the wire terminals. If it beeps or lights up, the wrong breaker is off or you have a faulty disconnect. You must verify there is zero voltage at the terminals before you touch any wires.
Next, you need to drop the water level. You don’t need to drain the whole tank. Locate the drain valve at the bottom of the tank. Attach a standard garden hose and run it to a floor drain or a large bucket. Open the valve and let water flow for about 30 seconds to a minute, just until it stops coming out. This lowers the water line below the thermostat mounting area. Close the valve tightly.
Access, Removal, and the Crucial Match
With the power confirmed off, remove the inner access panel. It’s usually held by screws. Carefully pull back the insulation blanket behind it. Try not to tear it.
Now, look at the old thermostat. Before you touch a single wire, use your phone to take a crisp, clear photo of the entire wiring setup. This is your map. It prevents a guessing game later. Note which colored wire goes to which screw terminal.
Using a screwdriver, loosen the terminal screws and disconnect each wire. Set them aside. Unscrew the mounting brackets or clips that hold the thermostat to the tank and remove the old unit.
Choosing the right replacement is non-negotiable. Take your old thermostat to the hardware store. You must match four things:
- Voltage: Is it 120V or 240V? Most standard home electric water heaters use a 240-volt system.
- Amperage: The new thermostat’s amp rating must meet or exceed the old one’s. It’s printed on the label.
- Single vs. Double Pole: A double-pole thermostat has two switches and controls both heating elements in a two-element system. A single-pole only controls one. Match what you have.
- Brand & Model: While universal thermostats exist, getting the exact OEM (Original Equipment Manufacturer) part for your water heater brand (like Rheem, AO Smith, Bradford White) is the safest bet for a perfect fit.
Installation and Re-wiring
Position the new thermostat exactly as the old one was mounted. The sensing plate on the back must sit flat against the tank wall. Secure it with the brackets or screws.
Time to re-wire. Pull up the photo on your phone. Reconnect each wire to the identical terminal on the new thermostat, one at a time, ensuring each connection is tight. A loose connection will overheat and fail. Give each wire a gentle tug to confirm it’s secure.
Check that no bare copper wire is visible outside of the terminal screw. If there is, disconnect it, trim the wire back slightly, strip just enough insulation, and reconnect. Tuck the wires neatly back into the compartment.
Bringing Your Water Heater Back to Life
Do not turn the power on yet. First, you must refill the tank. Go to a hot water faucet in your house, like in a bathroom sink, and turn it on. Leave it on. Now, go back to the water heater and slowly open the cold water supply valve all the way. You will hear air and water rushing into the tank.
Let the water run at the open faucet until a steady, non-sputtering stream comes out. This purges the air from the lines and ensures the tank is full. Turn the faucet off.
Now, replace the insulation and screw the access panel cover back on. Go to your electrical panel and flip the water heater breaker back to ON. Be sure to follow the correct reset steps for your water heater.
Set the thermostat dial. I recommend setting it to 120°F (49°C) for a balance of safety, efficiency, and sufficient hot water. You’ll usually find this dial under a small screw-on cover on the thermostat. Setting the right temperature helps maximize energy efficiency.
To test it, put your hand on the tank near the thermostat. Within an hour, you should feel a distinct area of warmth as the element activates. Listen closely; you might hear a soft click from the thermostat engaging. The final test is at the tap. Run the hot water and use a cooking thermometer. It should read close to your set temperature (around 120°F). If it does, you’re back in business.
Keeping It Running Smoothly
Fixing a thermostat gets your hot water back. Keeping your water heater healthy prevents the next call. Think of this as a simple roadmap. First, locate your water heater thermostat.
Your Electric Water Heater Maintenance Roadmap
Follow these three tasks. They protect your tank, your elements, and your new thermostat.
- Annual Temperature & Pressure (T&P) Relief Valve Check: Lift the valve’s test lever for a few seconds. You should hear a gush of water into the drain tube, then it should stop when you release it. If it doesn’t run or won’t stop, replace the valve immediately. This is a critical safety device.
- Periodic Anode Rod Inspection: Check the sacrificial anode rod every 3-5 years. This rod attracts corrosive elements, sacrificing itself to protect your tank’s steel lining. If it’s more than 50% corroded, replace it. A spent rod means your tank is rusting.
- Annual Sediment Flushing: Connect a garden hose to the drain valve at the bottom of the tank. Run it to a floor drain or outside. Turn off the power, shut the cold water inlet, open a hot faucet in the house, then open the drain valve. Let it flush until the water runs clear. This removes sediment that insulates the heating elements.
Water Science Snippet: The Scale Problem
Hard water is full of minerals like calcium and magnesium. When you heat hard water, those minerals solidify and stick to everything inside your tank. This crust is called scale, which sometimes isn’t effectively removed by softeners.
Scale acts like a blanket wrapped around your heating elements and thermostats. The element has to work much harder and get much hotter to push heat through that insulating layer to warm the water. This extra heat and strain cooks the element and overheats the thermostat, causing early failure. A water softener prevents this cycle. Hard water buildup reduces heat transfer efficiency. The heater then works harder and uses more energy.
What Helped Me: A Tale of Two Thermostats
On my own heater, I always do two things. First, before I disconnect a single wire, I put a small piece of masking tape on each one and label it with its terminal name (like “Upper Element” or “L1”). A quick phone photo works as a backup. This saves so much frustration during reassembly.
Second, I usually buy a two-pack of universal thermostats. They’re cheap. I use one for the repair and keep the other in my basement toolbox. When the next one fails in a few years, I’m ready in ten minutes.
Recommended Products and Final Advice
Gear That Gets the Job Done
You don’t need the most expensive tools, just the right ones.
- Universal Replacement Thermostats: Brands like Camco or Reliance make single and double-element thermostats that fit most standard 240V heaters. Make sure it matches your voltage and wattage (usually 4500W or 5500W).
- Thermostat and Element Combo Kits: If you’re replacing a thermostat because an element failed, it’s smart to replace both the upper and lower thermostats and both elements as a set. They’ve all endured the same wear. A kit ensures everything is compatible.
- Good Quality Multimeter: A non-contact voltage tester is great for safety. But a digital multimeter that can measure voltage and resistance (ohms) is essential for diagnosing which component has actually failed.
When to Put the Screwdriver Down and Call a Pro
Electrical work demands respect. If you see any of these, stop and call a licensed plumber or electrician.
- Any signs of melted wire insulation, black scorch marks on the terminals, or a burning smell.
- If the high-limit switch (usually a red button on the upper thermostat) trips repeatedly after you reset it. This indicates a deeper safety issue.
- Any doubt about turning off the correct circuit, identifying the wires, or your ability to make safe, tight connections.
Replacing a water heater thermostat is a standard repair. With the power off, the wires labeled, and a matching part, you can handle it. It’s one of the most common water heater repair options homeowners consider. Good preparation makes all the difference.
Quick Answers
What’s the absolute first thing I should do before touching the thermostat?
Turn off the power at your home’s main circuit breaker panel-not just at the unit. This is non-negotiable. Then, use a non-contact voltage tester on the thermostat wires to confirm the power is truly off before you proceed.
Do I really need to drain the water heater to change the thermostat?
Yes, but only partially. You must lower the water level below the thermostat mounting area. Attach a hose, open the drain valve briefly until water stops flowing, then close it. This prevents water from spilling into the electrical compartment when you open it.
How do I make 100% sure I buy the correct replacement thermostat?
Take the old thermostat with you to the store. You must match the voltage (usually 240V), amperage, and whether it’s a single or double-pole design. For the easiest swap, get the OEM (Original Equipment Manufacturer) part for your specific water heater brand. Electric water heater thermostats guide can help you identify the right replacement.
What’s the single most important tip for reconnecting the wires?
Take a clear photo of the wiring before you disconnect anything. Reconnect each wire to the identical terminal on the new thermostat one-for-one, and ensure every screw connection is tight. A loose wire will overheat and fail quickly.
How do I know my new thermostat is working after I turn the power back on?
Set the thermostat to 120°F. Within an hour, feel the tank near the thermostat for a warm spot, indicating the element is heating. Finally, run a hot water tap and use a thermometer to verify the output temperature matches your setting.
Verifying Your Thermostat Replacement
Test the hot water as soon as you restore power to confirm the new thermostat works correctly. If the temperature is off, recheck all wiring and settings before relying on the heater. If issues persist, consult the water heater not heating troubleshooting guide for detailed steps.
Written by Bob McArthur. Bob is a an HVAC and plumbing industry veteran. He has professionally helped homeowners resolve issues around water softeners, heaters and all things related to water systems and plumbing around their homes. His trusted advice has helped countless of his clients save time, money and effort in home water systems maintenance and he now here to help you and give you first hand actionable advice. In his spare time, Bob also reviews home water systems such as tankless heaters, water softeners etc and helps home owners make the best choice for their dwelling. He lives around the Detroit area and occasionally consults on residential and commercial projects. Feel free to reach out to him via the contact us form.