Install a Hand Pump on Your Well: A DIY Guide for Emergencies
When the power fails, your electric well pump is just a paperweight. A hand pump gets you water no matter what.
This article walks you through the job. We will cover picking the right pump, prepping your wellhead, bolting it down, and connecting the pipes.
I’ve installed these on service calls and at my own place. My rule: always pressure test your work before you call it done.
Will a Hand Pump Even Fit on My Well?
Before you buy anything, you need to know what you’re working with. Your well’s type and dimensions are everything.
Drilled Well vs. Bored Well: The Big Difference
A drilled well is what most modern homes have. It’s a narrow hole, typically 4 to 6 inches in diameter, cased with steel or plastic pipe deep into the earth. A bored well is wider, often 24 inches or more, and usually much shallower. Hand pumps install very differently on each.
You can add a hand pump to a drilled well, but it usually means your existing submersible electric pump has to stay in the hole. The hand pump pipe and cylinder get installed right alongside it. This is the most common setup for an emergency backup.
Three Critical Measurements You Must Take
Grab a tape measure and a flashlight.
- Casing Size: Measure the inner diameter of the well casing. Most hand pump kits are designed for standard 4-inch or 6-inch casings. If yours is smaller, your options shrink fast.
- Depth to Water: This is not your well’s total depth. It’s the distance from the top of the well down to the water’s surface. You can often find this on your well log. A simple pitcher pump works to about 25 feet. Deep well hand pumps use a cylinder down the hole and can lift from 100 to 300 feet, depending on the model.
- Vertical Clearance: This is the deal-breaker everyone forgets. Measure from the well cap straight up to any obstruction. The pump handle needs a full arc to operate. No room means no pump, or you’ll be rebuilding your well house.
When You’re Not Sure: The Safe Path
Your well log is the cheat sheet. It should list casing type, diameter, depth, and static water level. Can’t find it? Check with your local health department or the original drilling company.
If you can’t confirm your well’s specs, call a licensed well professional for an inspection. The cost is worth avoiding the nightmare of buying a pump that will never fit or, worse, dropping parts down your only water source. Once you have your well specs, you can compare well water pump types to find the right fit. It helps weigh options like submersible versus jet pumps for your setup.
The DIY vs. Pro Verdict for This Job
I rate this a solid 6 out of 10 on the DIY difficulty scale. The assembly is straightforward, but the stakes are high if you mess up.
What a Confident Homeowner Can Do
If you’re handy and your well is straightforward, you can handle these tasks:
- Accurately measuring your well’s casing and clearance.
- Unbolting the well cap (with the power to the submersible pump turned OFF at the breaker).
- Assembling the pump head, pipe sections, and drop pipe according to the manufacturer’s instructions.
- Securing the pump to a stable, reinforced well seal or mounting plate.
When You Must Call a Licensed Well Specialist
This isn’t about skill, it’s about safety and legality. Bring in a pro if:
- Your well is deeper than 150 feet. Threading and lowering hundreds of feet of pipe alone is dangerous.
- You need to pull the existing submersible pump to make room. This requires specialized tools and risks damaging your primary water system.
- Your well uses a pressurized, sanitary cap that you’re not comfortable breaking the seal on.
- Local code requires a licensed contractor for any well modification (many areas do).
The Non-Negotiable Safety Rule
Never leave the well opening uncovered and unattended. An open well is a severe fall hazard for people and pets, and it’s an open door for contamination. Have your new pump seal or cap ready to install immediately. Work with a partner, keep the area cordoned off, and replace the cover the second you stop working.
Picking the Right Pump for Your Water and Wallet
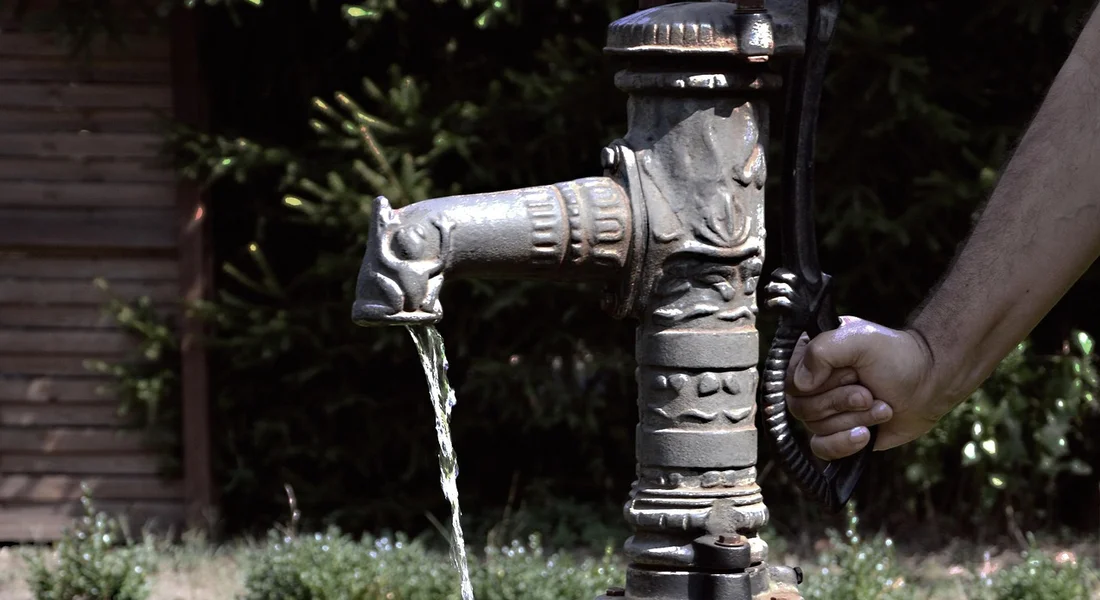
Think of your well and a hand pump like a straw in a glass. A shallow well pump is like a short straw. It uses a simple suction mechanism and can only pull water up from about 25 feet down. If your water level is deeper than 25 feet, you must use a deep well pump.
A deep well pump is your long straw. It has a cylinder that goes down into the water. When you work the handle, a rod moves a piston inside that cylinder to push water up the pipe. It can lift water from several hundred feet.
Three Numbers You Must Know Before Buying
Get these wrong and you’ll waste money on a pump that doesn’t work.
- Static Water Level: This is the distance from the top of your well down to the water. Your well driller’s report has this. No report? Tie a weight to a string, lower it until you hear a splash, and measure the wet string. This number dictates shallow vs. deep well.
- Daily Water Needs: Be realistic. A family of four needs about 40 gallons per day just for drinking, cooking, and minimal cleaning. A simple pitcher pump might give you 3-5 gallons per minute of pumping. A deep well pump is slower but can handle bigger daily volumes.
- Frost-Proof Requirements: If you live where it freezes, you need a pump designed for it. A frost-proof pump has a long discharge spout that drains the water column back below the frost line after each use, preventing freeze-ups. It’s not an optional feature in cold climates.
Pump Head and Mounting Styles
How the pump connects to your well casing matters.
A side-mount pump bolts to a well seal or adapter on the side of your well casing. The handle sticks out to the side. This is common when you want to keep your existing electric submersible pump in the well and mount the hand pump beside it.
A top-mount pump sits directly over the well casing, replacing the well cap entirely. The handle is centered. This gives a cleaner look and is often stronger. Top-mount pumps require removing your existing well equipment, so they’re best for dedicated off-grid setups.
Look for pumps made of cast iron or bronze for durability. Avoid cheap aluminum housings for a primary emergency pump. Simple pitcher pumps are great for shallow, seasonal use. Heavy-duty deep well pumps with sealed bearings will last for decades. For homes with wells, submersible pump types are a common choice for reliable water delivery. These submersible units are installed down in the well and push water to the surface.
Gather Your Gear First: The Tool & Material Checklist
Nothing kills a project faster than missing one fitting. Lay everything out before you touch the well.
Tools You Will Need
- Well cap wrench or large adjustable wrench (for that weird hexagonal well cap nut)
- Two pipe wrenches (one to hold, one to turn)
- Hacksaw with a metal blade or a PVC cutter (depending on your drop pipe material)
- Teflon tape (for NPT threads)
- Pipe thread sealant (the paste kind, for a positive seal)
- Tape measure
- Adjustable wrench set
- Safety glasses and work gloves
Materials You Must Have
- The complete hand pump kit
- Drop pipe (enough to reach from the pump head to about 10-20 feet below the static water level)
- All necessary couplings, elbows, and adapters (check the pump kit’s thread type)
- A new well seal or sanitary well cap if your old one is damaged or doesn’t fit the new pump
- Pipe thread sealant
Choosing Your Drop Pipe
This pipe runs from the pump down into the water. Your choice affects weight, cost, and corrosion.
| Material | Pros | Cons |
| Galvanized Steel | Very strong, traditional, works with most pumps. | Heavy, can corrode over time, hard to cut/thread without tools. |
| Schedule 80 PVC | Lightweight, corrosion-proof, easy to cut and glue. | Can become brittle in extreme cold, requires special threaded adapters. |
| Polyethylene (PE) | Flexible, extremely corrosion-proof, easy to work with. | Requires special stainless steel clamp-on fittings, not as rigid. |
I used galvanized on my own backup pump because it was already threaded and I had the wrenches. If I were doing it again today, I’d likely use polyethylene for its simplicity and total resistance to rust. Never mix galvanized and copper fittings in the same string without a dielectric union, or you’ll accelerate corrosion.
Code & Compliance Check Before You Start
You cannot skip this part. Installing a hand pump isn’t just about mechanics, it’s about protecting your water supply. The rules exist to stop surface water, bugs, and vermin from contaminating your well.
Your first call should be to your local health department or building inspection office. They will tell you the specific codes for your area. Common requirements include using an approved, sealed well cap or adapter plate that provides an airtight, vermin-proof seal around the drop pipe. Many codes also state you must maintain a minimum height for the well casing above ground.
This work often requires a permit, especially if you are drilling a new hole in the existing well seal or replacing the entire seal. Getting a permit might seem like a hassle, but it’s your proof the job was done right. On my own property, I had to pull a permit to add a simple Bison pump setup, and the inspector just wanted to verify the sanitary seal. It was worth the peace of mind.
The Step-by-Step Installation Walkthrough

Safely Removing the Old Well Cap or Seal
Safety first, always. Your existing well has a powered submersible pump. You must disconnect it completely.
Go to your main electrical panel and shut off the circuit breaker for the well pump. Do not just rely on a switch. Use a voltage tester at the well head’s pressure switch or control box to confirm the power is off. Once confirmed, you can disconnect the wiring. Keep the wires capped and taped up safely.
Now for the cap. Common types include:
- Bolted Caps: These have multiple bolts around the perimeter. Loosen them evenly. The cap may be siliconed or sealed. Use a putty knife to carefully break the seal.
- Threaded Caps: These screw directly onto the well casing. You might need a large pipe wrench or strap wrench to break it loose.
- Sealed Well Caps: These often have a central bolt and a gasket. Remove the bolt and gently pry it up.
As you lift the old cap, be meticulous. Do not let any bolts, tools, or debris fall into the well. Cover the hole immediately with a clean piece of plywood or a bucket if you need to step away. Treat that open hole like a surgery site.
Measuring, Cutting, and Assembling the Drop Pipe
Accuracy here prevents a huge headache. You need to know two distances: from your mounting point down to the static water level, and how far below that level you want the pump cylinder to sit.
Lower a weighted fishing line or tape measure into the well until you hear it hit water. Mark that length. For a reliable hand pump, the cylinder should be submerged at least 10-15 feet below the static water level to ensure it stays primed and away from sediment. Add these two lengths together.
This total length is your drop pipe. Galvanized steel or schedule 80 PVC are common choices. Cut your pipe sections to manageable lengths, usually 5 or 10 feet, that you can handle while lowering. Use a pipe cutter for a clean, square cut. Connect sections with threaded couplings, using a good pipe thread sealant rated for potable water. Do not use standard Teflon tape for the drop pipe, as pieces can shred and foul the pump. Use a paste-style sealant.
Thread the first length of pipe directly into the top of the pump cylinder. Hand-tighten, then use a pipe wrench to snug it up another turn or two. Do not overtighten.
Lowering the Pump and Securing the Pump Head
This is a two-person job. Have one person guide the pump cylinder into the well casing while the other feeds the pipe. Go slowly. The cylinder must not bang against the side of the casing. These steps are part of the replace well pump process. When you replace the well pump, this careful handling helps ensure the new unit seats properly and the system remains protected.
Lower the entire assembly until only the last few feet of pipe is above the well casing. Now, thread the drop pipe into the bottom of the pump head. You will need to support the full weight of the drop pipe and cylinder while doing this. A pipe vise or a second set of wrenches is essential.
The final and most critical step is creating a permanent, weather-tight seal at the well head. Your hand pump kit should include a mounting flange or adapter. This part bolts or clamps directly to the top of your well casing. Set the pump head onto this flange, aligning the pipe connection. The drop pipe now hangs from the pump head, suspending the cylinder in the well. A complete, step-by-step walkthrough is available in the install shallow well pump guide, which will be linked in the next steps.
Bolt everything down firmly according to the manufacturer’s instructions. The goal is a rigid setup where the only movement is the pump handle. On my red Bison pump, I used a stainless steel adapter plate that bolted to the old well casing, and then the pump bolted to that. It hasn’t budged in five years.
Priming, Testing, and The First Pump
Some deep well hand pumps are self-priming. Many shallow well or convertible models need to be primed. Check your manual. If priming is needed, start and prime your well pump by removing the plug from the priming port on the pump head. Pour clean water in until it’s full. Replace the plug tightly.
Now for the moment of truth. Operate the pump handle through its full stroke. The first several strokes will likely move air. Keep a steady, full-stroke rhythm. You should feel resistance build as water begins to move up the column, then see a sputter at the spout, followed by a solid stream. This can take a dozen strokes or more for a deep well. If you don’t get any water after an extended period, consider troubleshooting the pump.
If no water comes, check the basics:
- Is the pump primed (if required)?
- Did you measure the water level correctly? The cylinder might be above the water.
- Is the check valve in the pump cylinder working? Sometimes a piece of debris can hold it open.
Once you get a solid flow, pump for several minutes to flush the system. The water should run clear. You now have a reliable, mechanical backup water source.
Keeping Your Hand Pump Ready: The Maintenance Roadmap
Your hand pump isn’t a set-it-and-forget-it tool. Think of it like a classic car in your garage. Regular, simple care keeps it ready to roar to life when your main power fails.
The Seasonal Check-In
You don’t need to baby it, but a quick inspection a few times a year saves a huge headache during a storm.
- Every 3-6 Months (Spring & Fall are good reminders):
- Operate the pump. Run a few gallons through it to keep the leathers supple and the valves moving.
- Check all visible bolts and connections on the pump head for tightness.
- Apply a tiny amount of food-grade silicone grease to the pump rod where it enters the packing gland. This keeps the seal pliable and prevents leaks.
- Annually:
- Inspect the above-ground pipe and fittings for corrosion or leaks.
- Listen for any change in the sound or effort of pumping.
How to Winterize Your Pump
If you live where it freezes and this is a backup pump, you must winterize it. A burst pipe or cracked pump housing defeats the whole purpose.
The safest method is to install a drain port below the frost line. I have a simple brass tee with a boiler drain on my setup. When winter comes, I shut the isolation valve, open the drain, and leave the pump handle slightly up to let all water drain out of the column.
If you can’t install a drain, you’ll need to use a hand pump antifreeze made for potable water systems. You pour it down the spout and work the handle to draw it into the cylinder. Follow the product’s instructions exactly.
Spare Parts to Keep in Your Kit
When you need it, you won’t be able to run to the store. Keep these items in a sealed bag with your pump manual.
- Leathers or Cup Seals: These are the heart of the pump. They wear out. Know your pump model and have a replacement set.
- Packing Gland Kit: This is the seal around the pump rod. If it starts dripping, you can tighten or replace it.
- Foot Valve Screen: A simple, cheap spare screen can save you from pulling sand later.
- PTFE Tape & Pipe Dope: For resealing any threaded connections you might need to open.
Red Flags: Troubleshooting Your Hand Pump
Hand pumps are simple, which makes diagnosing problems straightforward. Here are the common signs something is wrong.
Pump Handle Moves Too Easily (No Resistance)
You’re pumping air. This usually means one of two things.
- You’ve Lost Prime: The water column in the drop pipe has fallen back into the well. Try pouring 2-3 gallons of water down the pump spout to re-fill the pipe and cylinder, then pump vigorously to re-establish suction.
- Worn Leathers or Seals: If priming doesn’t work, the seals in the cylinder are no longer creating suction. They need replacement.
Water is Sandy or Gritty
This points directly to the foot valve at the bottom of your well pipe. The screen might be damaged or degraded, allowing sediment into the system. You can try pumping heavily for a minute to see if it clears, but often the foot valve needs to be pulled and inspected.
Strange Noises (Squeaking, Grinding, Clunking)
- Squeaking: Almost always a dry pump rod or packing gland. Lubricate with food-grade grease.
- Grinding or Metallic Scraping: Stop. This could mean a broken connecting rod or a serious internal issue. Do not force it.
- Loud Clunk at Top or Bottom of Stroke: A loose internal nut or a worn bushing. The pump head likely needs disassembly.
Leaking at the Pump Head
A drip from where the pump rod goes into the head is a failing packing gland. You can often tighten the packing nut a quarter-turn to stop it. If that doesn’t work, replace the packing material with the spare kit you have on hand.
When to Put the Wrenches Down and Call a Pro
If the problem is deeper than the pump head, you’re likely pulling the entire drop pipe. This is a two-person job that requires a pipe tripod or winch. If you suspect a broken pipe, a collapsed well screen, or a failed foot valve deep in the well, call a well systems technician. The risk of dropping the pipe or tools down your well is real and turns a simple fix into a very expensive one.
Quick Answers
How much water can I realistically get from a hand pump?
It depends entirely on the model and your effort. A simple pitcher pump may yield 3-5 gallons per minute but only from shallow depths. A deep well pump is slower, often 1-2 gallons per minute, but can provide 40+ gallons daily for a family. Choose your pump based on your true daily needs, not just depth.
Do I really need a permit for this?
In most areas, yes. Modifying your wellhead often requires a permit to ensure the sanitary seal is maintained, preventing contamination. Your first call should always be to the local health or building department. It’s not just red tape; it’s protecting your water supply.
What’s the most critical test after installation?
After priming, you must pressure test the seal. Pump vigorously for several minutes and then inspect the well seal and all connections for any moisture or leaks. A proper seal is bone dry. This verifies your work and keeps surface contaminants out.
What’s the difference between a “frost-proof” pump and “winterizing”?
A frost-proof pump has a built-in drain-back design that automatically empties the above-ground column after each use. Winterizing is the process you must perform on a non-frost-proof pump, which involves manually draining the system or adding antifreeze. In freezing climates, a frost-proof model is far more convenient for emergency use.
What is the absolute minimum maintenance to keep it functional?
Pump it for a minute every season to keep seals supple. Annually, check bolt tightness and lubricate the pump rod with food-grade grease. Most importantly, keep a spare set of leather cup seals and a packing gland kit stored with the pump’s manual.
Keeping Your Hand Pump Ready for Anything
Always secure a perfect seal where the pump meets the well casing to keep debris and contaminants out. Run the pump for several minutes after installation to verify a strong, consistent flow and to spot any leaks before you need it.
Written by Bob McArthur. Bob is a an HVAC and plumbing industry veteran. He has professionally helped homeowners resolve issues around water softeners, heaters and all things related to water systems and plumbing around their homes. His trusted advice has helped countless of his clients save time, money and effort in home water systems maintenance and he now here to help you and give you first hand actionable advice. In his spare time, Bob also reviews home water systems such as tankless heaters, water softeners etc and helps home owners make the best choice for their dwelling. He lives around the Detroit area and occasionally consults on residential and commercial projects. Feel free to reach out to him via the contact us form.